Creative Woodworks & crafts 1997-12, страница 16
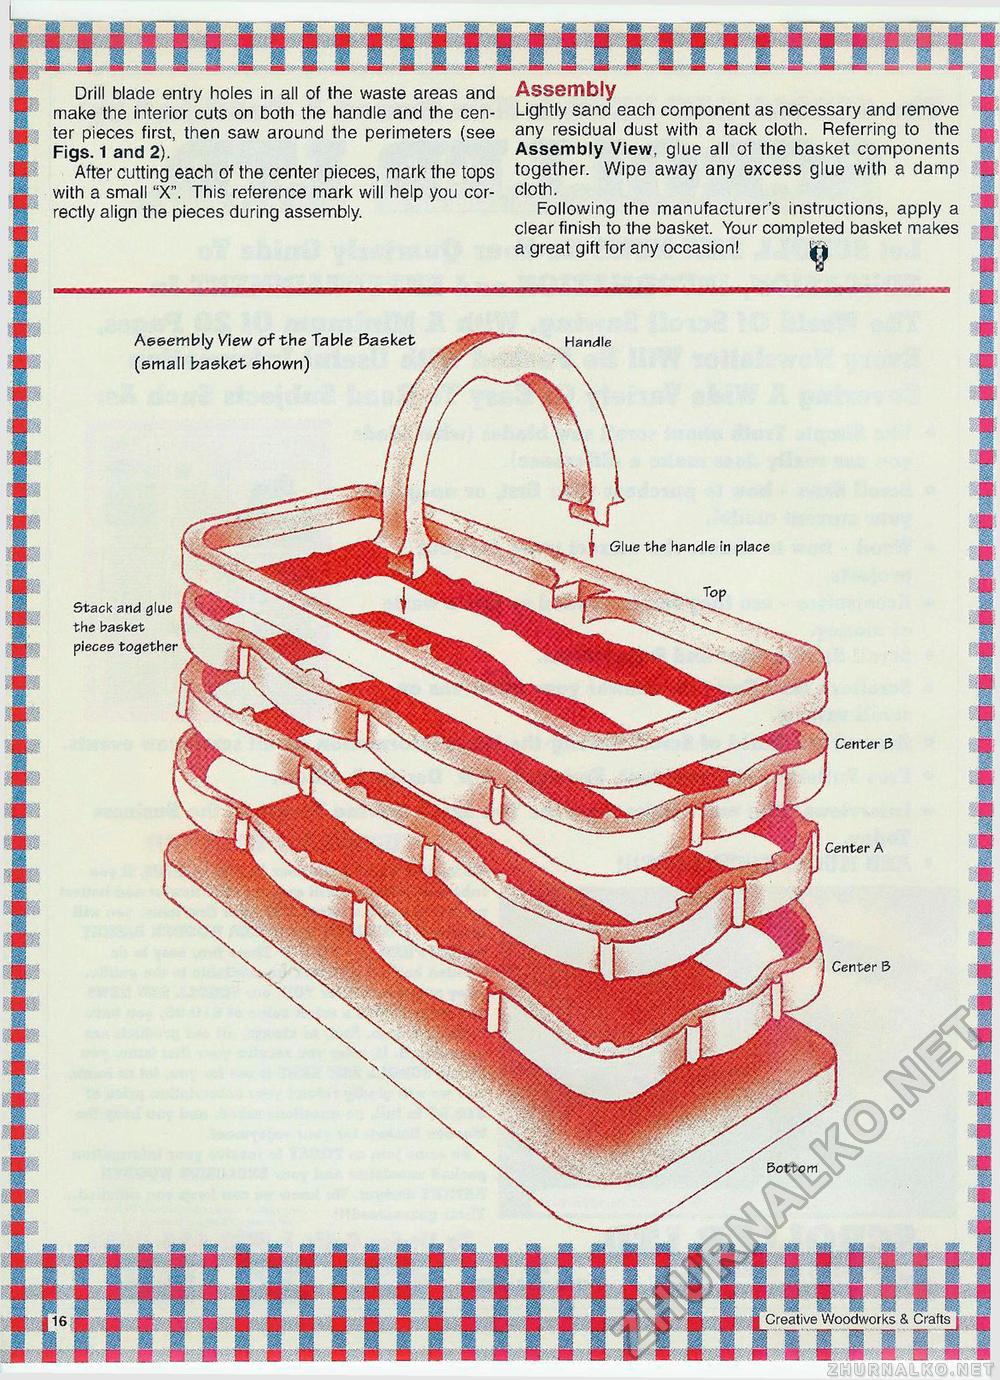
Assembly Lightly sand each component as necessary and remove any residual dust with a tack cloth. Referring to the Assembly View, glue all of the basket components together. Wipe away any excess glue with a damp cloth. Following the manufacturer's instructions, apply a clear finish to the basket. Your completed basket makes a great gift for any occasion! Drill blade entry holes in all of the waste areas and make the interior cuts on both the handle and the center pieces first, then saw around the perimeters (see Figs. 1 and 2). After cutting each of the center pieces, mark the tops with a small "X". This reference mark will help you correctly align the pieces during assembly. Assembly View of the Table Basket (small basket shown) Handle Glue the handle in place Stack and glue the basket pieces together Center B Center A Center B Bottom Creative Woodworks & Crafts |


