Creative Woodworks & crafts 1997-12, страница 22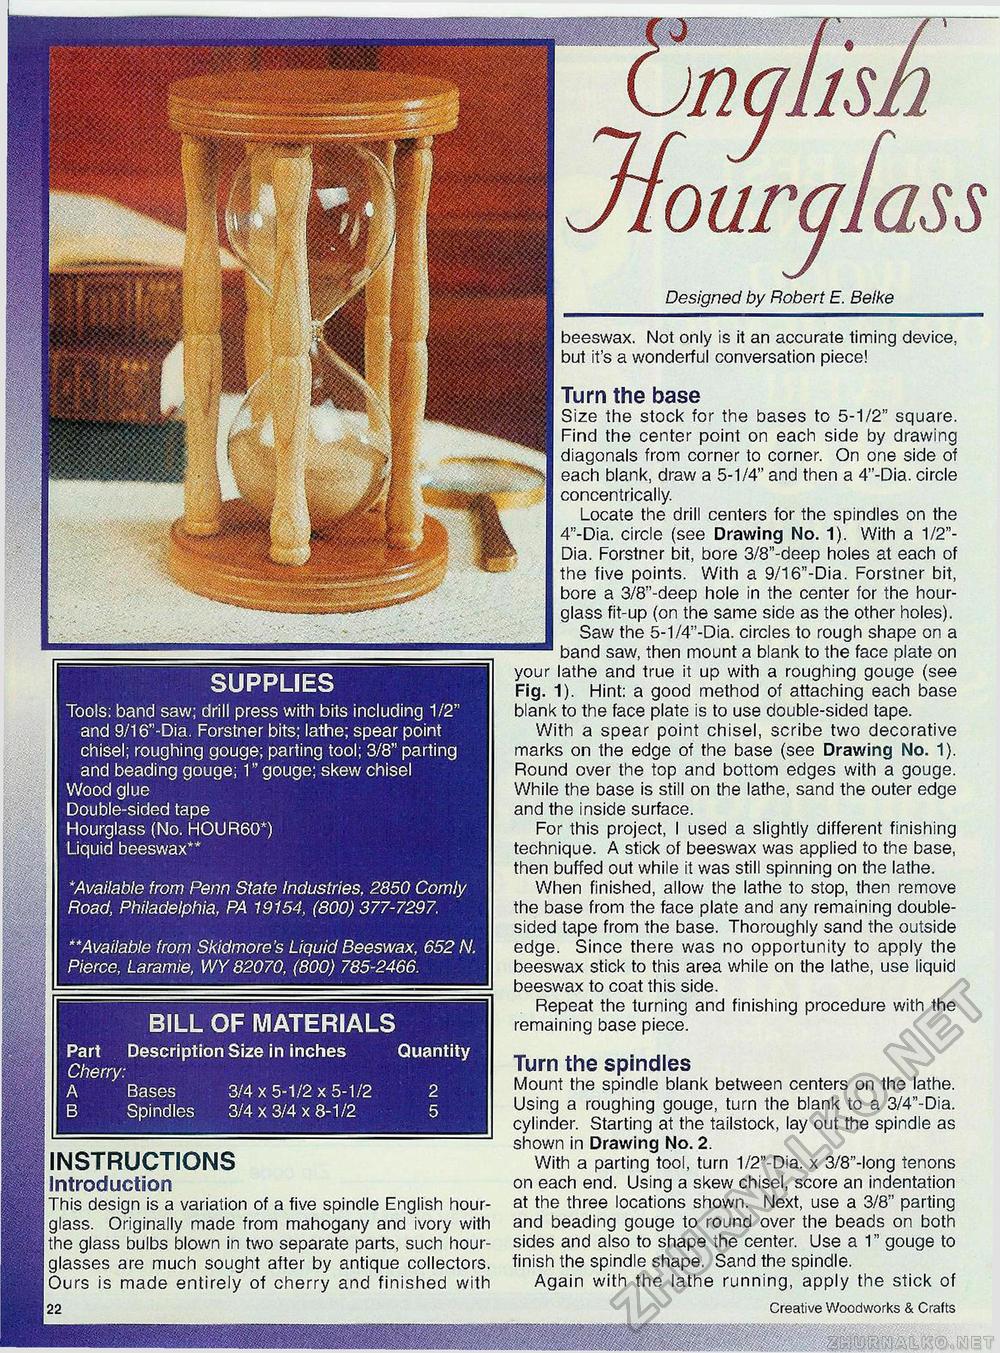
SUPPLIES Tools: band saw; drill press with bits including 1/2" and 9/16"-Dia. Forstner bits; lathe; spear point chisel; roughing gouge; parting tool; 3/8" parting and beading gouge; 1" gouge; skew chisel Wood glue Double-sided tape Hourglass (No. HOUR6O*) Liquid beeswax** *Available from Penn State Industries, 2850 Comly Road, Philadelphia, PA 19154, (800) 377-7297. **Available from Skldmore's Liquid Beeswax, 652 N. Pierce, Laramie, WY 82070, (800) 785-2466. BILL OF MATERIALS Part Description Size in inches Quantity Cherry: A Bases 3/4x5-1/2x5-1/2 2 B Spindles 3/4x3/4x8-1/2 5 INSTRUCTIONS Introduction This design is a variation of a five spindle English hour-j glass. Originally made from mahogany and ivory with the glass bulbs blown in two separate parts, such hourglasses are much sought after by antique collectors. Ours is made entirely of cherry and finished with Turn the base Size the stock for the bases to 5-1/2" square. Find the center point on each side by drawing diagonals from corner to corner. On one side of each blank, draw a 5-1/4" and then a 4"-Dia. circle concentrically. Locate the drill centers for the spindles on the 4"-Dia. circle (see Drawing No. 1). With a 1/2"-Dia. Forstner bit, bore 3/8"-deep holes at each of the five points. With a 9/16"-Dia. Forstner bit, bore a 3/8"-deep hole in the center for the hourglass fit-up (on the same side as the other holes). Saw the 5-1/4"-Dia. circles to rough shape on a band saw, then mount a blank to the face plate on your lathe and true it up with a roughing gouge (see Fig. 1). Hint: a good method of attaching each base blank to the face plate is to use double-sided tape. With a spear point chisel, scribe two decorative marks on the edge of the base (see Drawing No. 1). Round over the top and bottom edges with a gouge. While the base is still on the lathe, sand the outer edge and the inside surface. For this project, I used a slightly different finishing technique. A stick of beeswax was applied to the base, then buffed out while it was still spinning on the lathe. When finished, allow the lathe to stop, then remove the base from the face plate and any remaining double-sided tape from the base. Thoroughly sand the outside edge. Since there was no opportunity to apply the beeswax stick to this area while on the lathe, use liquid beeswax to coat this side. Repeat the turning and finishing procedure with the remaining base piece. Turn the spindles Mount the spindle blank between centers on the lathe. Using a roughing gouge, turn the blank to a 3/4"-Dia. cylinder. Starting at the tailstock, lay out the spindle as shown in Drawing No. 2. With a parting tool, turn 1/2"-Dia. x 3/8"-long tenons on each end. Using a skew chisel, score an indentation at the three locations shown. Next, use a 3/8" parting and beading gouge to round over the beads on both sides and also to shape the center. Use a 1" gouge to finish the spindle shape. Sand the spindle. Again with the lathe running, apply the stick of Creative Woodworks & Crafts our a Designed by Robert E. Beike beeswax. Not only is it an accurate timing device, but it's a wonderful conversation piece! |


