Creative Woodworks & crafts 1998-07, страница 36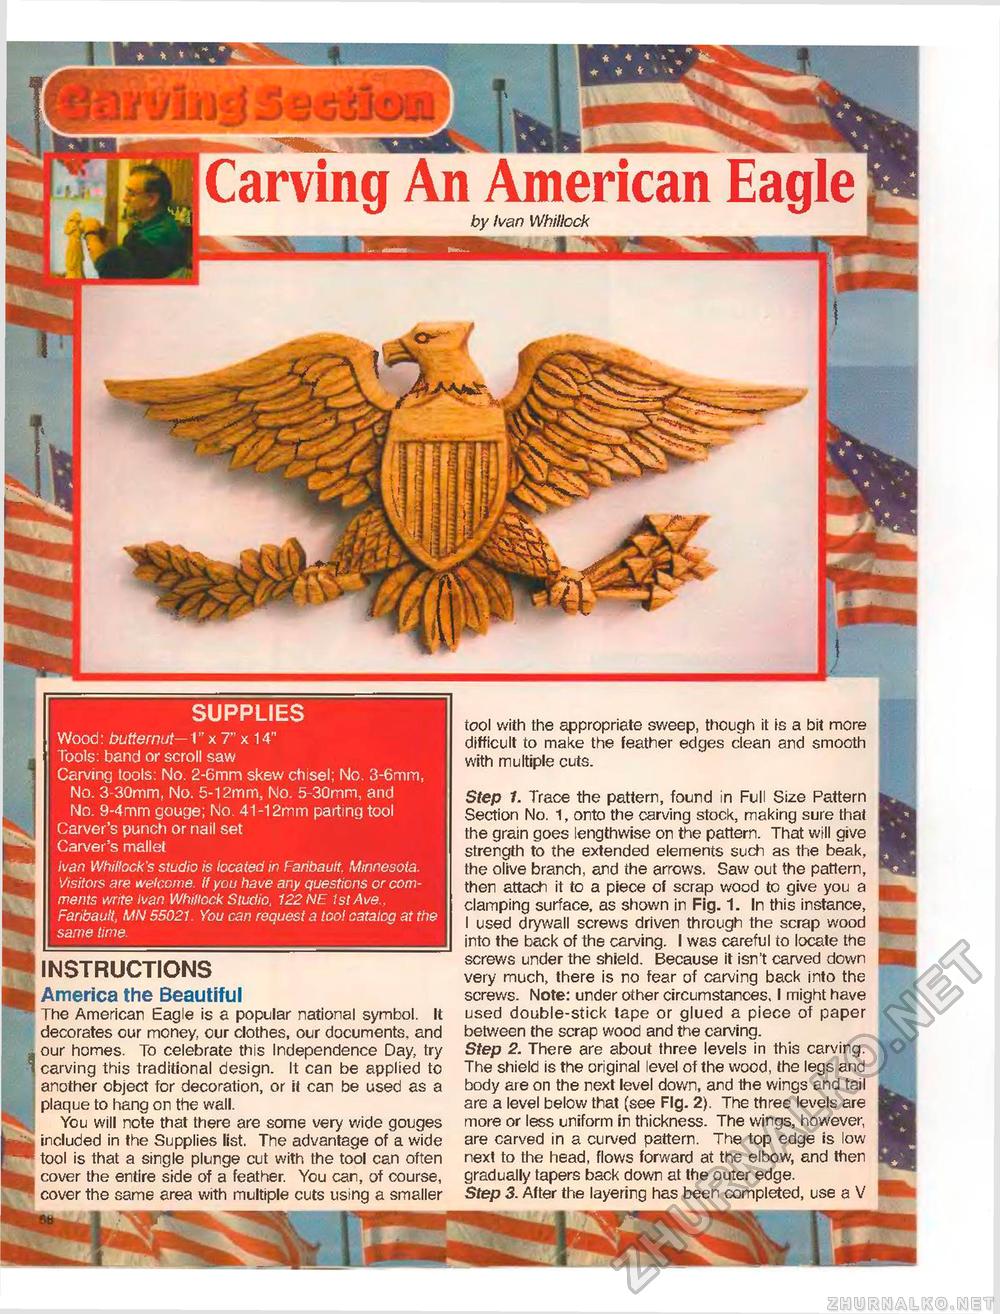
Carving Ail American Eagle by Ivan Whillock SUPPLIES Wood: butternut-V x 7" x 14" Tools: band or scroll saw Carving tools: No. 2-6mm skew chisel; No. 3-6mm, No. 3-30mm, No. 5-12mm, No. 5-30mm, and No. 9-4mm gouge; No. 41-12mm parting tool Carver's punch or nail set Carver's mallet Ivan Whillock's studio is located in Faribault. Minnesota. Visitors are welcome. If you have any questions or comments write Ivan Whillock Studio, 122 NE 1st Ave.. Faribault, MN 55021. You can request a tool catalog at the same time. INSTRUCTIONS America the Beautiful The American Eagle is a popular national symbol. It decorates our money, our clothes, our documents, and our homes. To celebrate this Independence Day, try carving this traditional design. It can be applied to another object for decoration, or it can be used as a plaque to hang on the wall. You will note that there are some very wide gouges included in the Supplies list. The advantage of a wide tool is that a single plunge cut with the tool can often cover the entire side of a feather. You can, of course, cover the same area with multiple cuts using a smaller tool with the appropriate sweep, though it is a bit more difficult to make the feather edges clean and smooth with multiple cuts. Step 1. Trace the pattern, found in Full Size Pattern Section No. 1, onto the carving stock, making sure that the grain goes lengthwise on the pattern. That will give strength to the extended elements such as the beak, the olive branch, and the arrows. Saw out the pattern, then attach it to a piece of scrap wood to give you a clamping surface, as shown in Fig. 1. In this instance, I used drywall screws driven through the scrap wood into the back of the carving. I was careful to locate the screws under the shield. Because it isn't carved down very much, there is no fear of carving back into the screws- Note: under other circumstances, I might have used double-stick tape or glued a piece of paper between the scrap wood and the carving. Step 2. There are about three levels in this carving. The shield is the original level of the wood, the legs and body are on the next level down, and the wings and tail are a level below that (see Fig. 2). The three levels are more or less uniform in thickness. The wings, however, are carved in a curved pattern. The top edge is low next to the head, flows forward at the elbow, and then gradually tapers back down at the outer edge. Step 3. After the layering has been completed, use a V |


