Creative Woodworks & crafts 1999-10, страница 16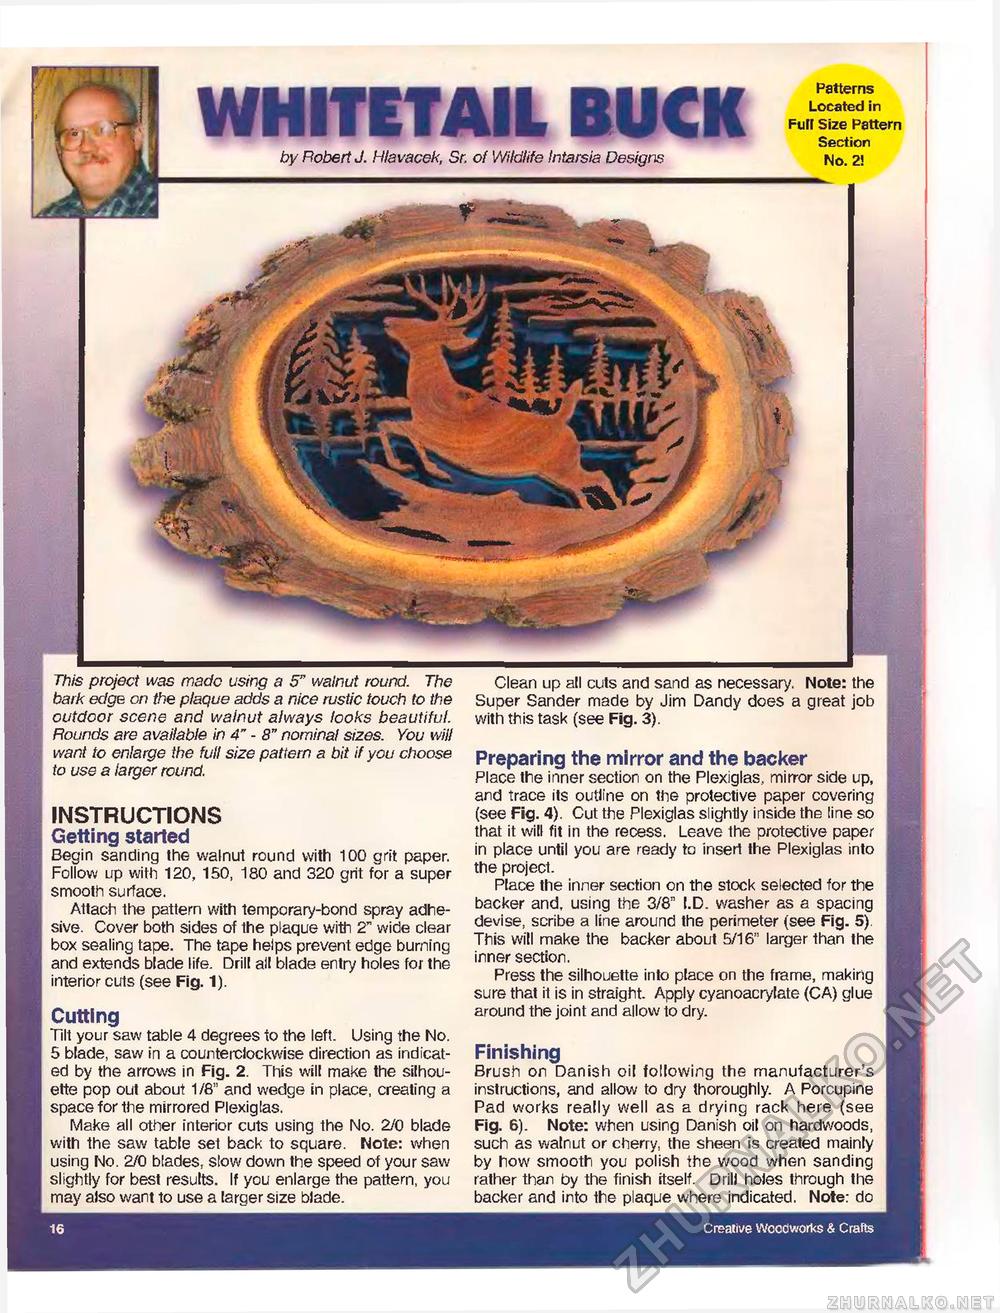
WHITETAIL BUCK Patterns Located in Full Size Pattern Section by Robert J. Hlavacek, Sr. of Wildlife Intarsia Designs No. 2! This project was made using a 5" walnut round. The bark edge on the plaque adds a nice rustic touch to the outdoor scene and walnut always looks beautiful. Rounds are available in 4" - 8" nominal sizes. You will want to enlarge the full size pattern a bit if you choose to use a larger round. INSTRUCTIONS Getting started Begin sanding the walnut round with 100 grit paper. Follow up with 120, 150, 180 and 320 grit for a super smooth surface. Attach the pattern with temporary-bond spray adhesive. Cover both sides of the plaque with 2" wide clear M box sealing tape. The tape helps prevent edge burning I and extends blade life. Drill ail blade entry holes for the [j interior culs (see Fig. 1). Cutting Tilt your saw table 4 degrees to the left. Using the No. 5 blade, saw in a counterclockwise direction as indicated by the arrows in Fig. 2. This will make the silhouette pop out about 1 /8" and wedge in place, creating a space for the mirrored Plexiglas. Make all other interior cuts using the No. 2/0 blade with the saw table set back to square. Note: when using No. 2/0 blades, slow down the speed of your saw slightly for best results. If you enlarge the pattern, you may also want to use a larger size blade. Clean up all cuts and sand as necessary. Note: the Super Sander made by Jim Dandy does a great job with this task (see Fig. 3). Preparing the mirror and the backer Place the inner section on the Plexiglas. mirror side up, and trace its outline on the protective paper covering (see Fig. 4). Cut the Plexiglas slightly inside the line so that it will fit in the recess. Leave the protective paper in place until you are ready to insert the Plexiglas into the project. Place the inner section on the stock selected for the backer and, using the 3/8" I.D. washer as a spacing devise, scribe a line around the perimeter (see Fig. 5) This will make the backer about 5/16" larger than the inner section. Press the silhouette into place on the frame, making sure that it is in straight. Apply cyanoacrylate (CA) glue around the joint and allow to dry. Finishing Brush on Danish oil following the manufacturer's instructions, and allow to dry thoroughly. A porcupine Pad works really well as a drying rack here (see Fig. 6). Note: when using Danish oil on hardwoods, such as walnut or cherry, the sheen is created mainly by how smooth you polish the wood when sanding rather than by the finish itself. Drill holes through the backer and into the plaque where indicated. Note: do 16 Creative Woodworks & Crafts |


