Creative Woodworks & crafts 1999-10, страница 28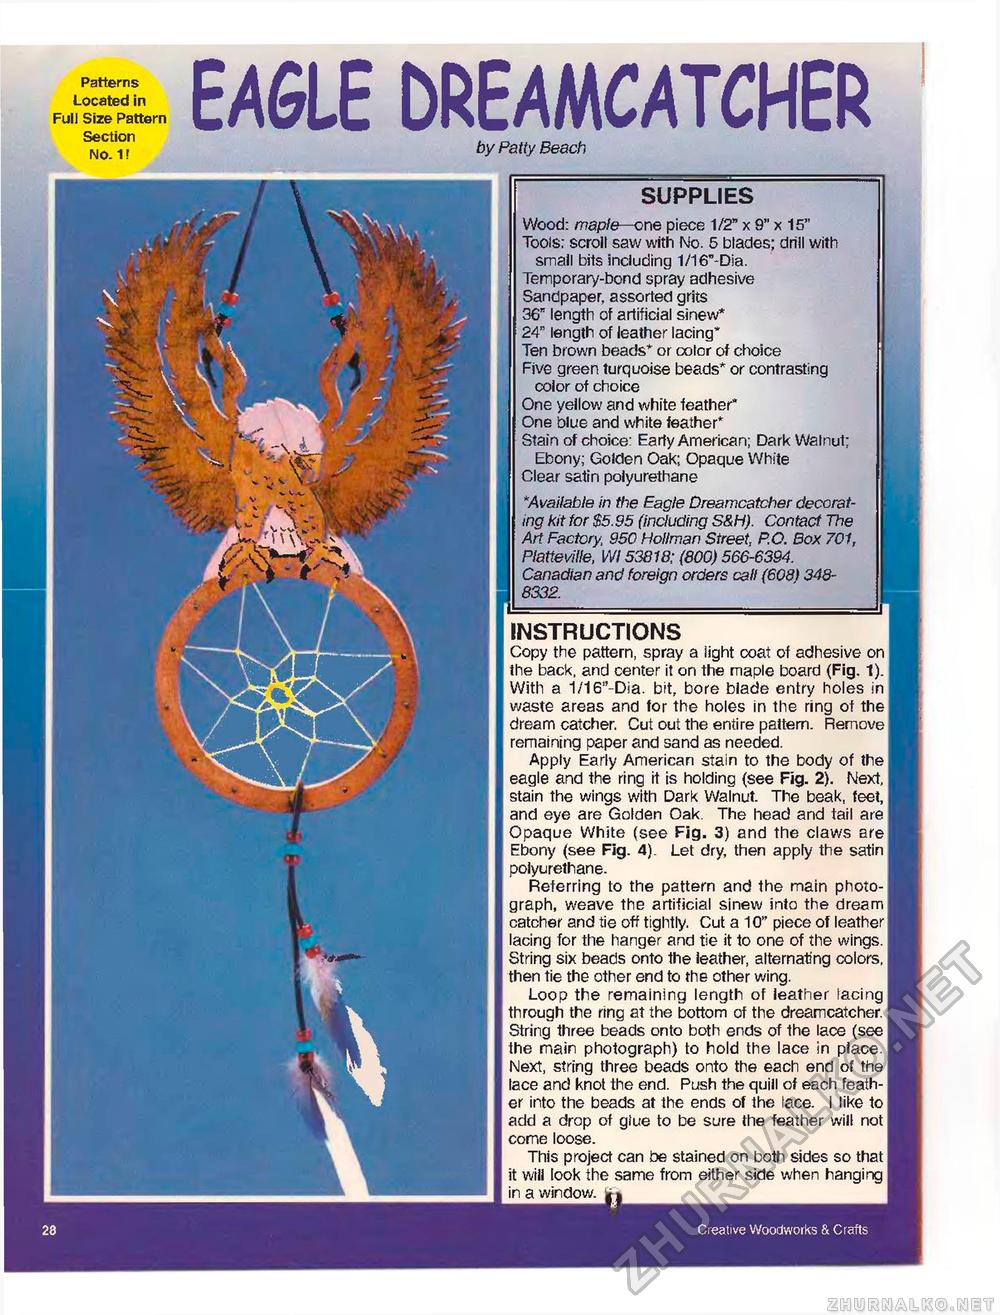
Patterns Located in Full Size Pattern Section No. 1! EAGLE DREAMCATCHERby Patty Beach SUPPLIES Wood: maple—one piece 1/2" x 9" x 15" Tools; scroll saw with No. 5 blades; drill with small bits including 1/16"-Dia. Temporary-bond spray adhesive Sandpaper, assorted grits 36" length of artificial sinew* 24" length of leather lacing* Ten brown beads* or color of choice Five green turquoise beads* or contrasting color of choice One yellow and white feather* One blue and white feather* Stain of choice: Early American; Dark Walnut; Ebony; Golden Oak; Opaque White Clear satin polyurethane *Available in the Eagle Dreamcatcher decorating kit for $5.95 (including S&H). Contact The Art Factory 950 Hollman Street, P.O. Box 701, Platteville, Wl 53818; (800) 566-6394. Canadian and foreign orders call (608) 348-8332. INSTRUCTIONS Copy the pattern, spray a light coat of adhesive on I the back, and center it on the maple board (Fig. 1). With a 1/16"-Dia. bit, bore blade entry holes in waste areas and for the holes in the ring of the dream catcher. Cut out the entire pattern. Remove | remaining paper and sand as needed. Apply Early American stain to the body of the I eagle and the ring it is holding (see Fig. 2). Next, stain the wings with Dark Walnut. The beak, feet, and eye are Golden Oak. The head and tail are Opaque White (see Fig. 3) and the claws are Ebony (see Fig. 4). Let dry, then apply the satin | polyurethane. Referring to the pattern and the main photo-1 graph, weave the artificial sinew into the dream catcher and tie off tightly, Cut a 10" piece of leather I lacing for the hanger and tie it to one of the wings, f String six beads onto the leather, alternating colors, | then tie the other end to the other wing. Loop the remaining length of leather lacing I through the ring at the bottom of the dreamcatcher. String three beads onto both ends of the lace (see the main photograph) to hold the lace in place. Next, string three beads onto the each end of the | lace and knot the end. Push the quill of each feather into the beads at the ends of the lace. I like to I add a drop of glue to be sure the feather will not | come loose. This project can be stained on both sides so that I it will look the same from either side when hanging | ir^i o LI _ ■ —■ ——i ■ iiii'iii irriifM i ^^m^mmmmm^m^^mmmmi 28 Creative Woodworks & Crafts |


