Creative Woodworks & crafts 1999-10, страница 36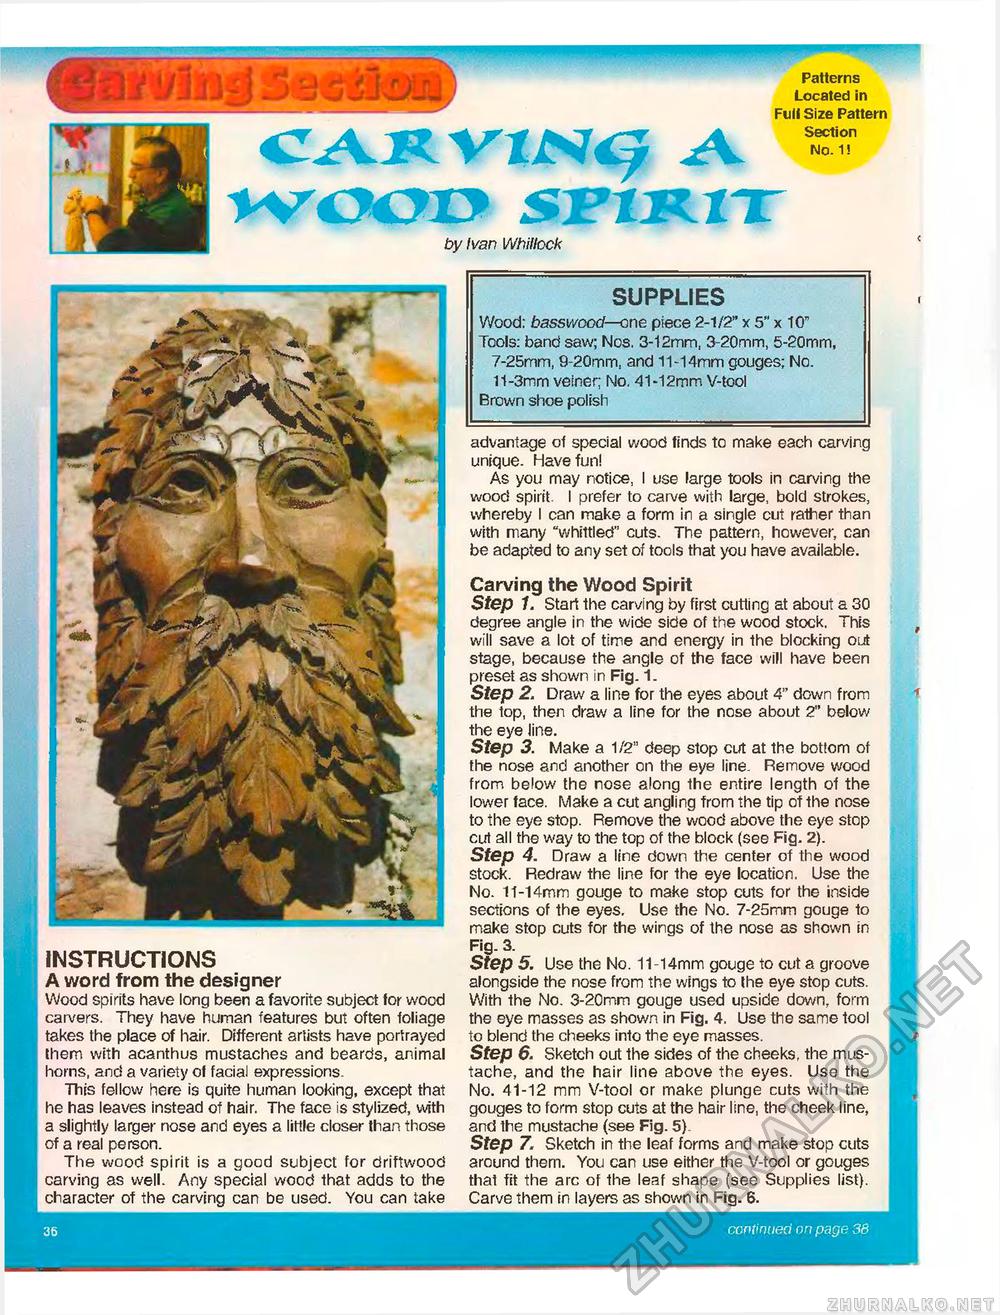
Patterns Located in Full Size Pattern Section No. 1! by Ivan Whillock SUPPLIES Wood: basswood—one piece 2-1/2" x 5" x 10° Tools: band saw; Nos. 3-12mm, 3-20mm, 5-20mm, 7-25mm, 9-20mm, and 11-14mm gouges; No. 11-3mm veiner; No. 41-12mm V-tool Brown shoe polish INSTRUCTIONS A word from the designer Wood spirits have long been a favorite subject for wood carvers. They have human features but often foliage takes the place of hair. Different artists have portrayed them with acanthus mustaches and beards, animal horns, and a variety of facial expressions. This fellow here is quite human looking, except that he has leaves instead of hair. The face is stylized, with a slightly larger nose and eyes a little closer than those of a real person. The wood spirit is a good subject for driftwood carving as well. Any special wood that adds to the character of the carving can be used. You can take advantage of special wood finds to make each carving unique. Have fun! As you may notice, I use large tools in carving the wood spirit. I prefer to carve with large, bold strokes, whereby I can make a form in a single cut rather than with many "whittled" cuts. The pattern, however, can be adapted to any set of tools that you have available. Carving the Wood Spirit Step 1. Start the carving by first cutting at about a 30 degree angle in the wide side of the wood stock. This will save a lot of time and energy in the blocking out stage, because the angle of the face will have been preset as shown in Fig. 1. Step 2. Draw a line for the eyes about 4" down from the top, then draw a line for the nose about 2" below the eye line. Step 3. Make a 1/2" deep stop curt at the bottom of the nose and another on the eye line. Remove wood from below the rose along the entire length of the lower face. Make a cut angling from the tip of the nose to the eye stop. Remove the wood above the eye stop cut all the way to the top of the block (see Fig. 2). Step 4. Draw a line down the center of the wood stock. Redraw the line for the eye location. Use the No. 11-14mm gouge to make stop cuts for the inside sections of the eyes. Use the No. 7-25mm gouge to make stop cuts for the wings of the nose as shown in Fig. 3. Step 5. Use the No. 11-14mm gouge to cut a groove alongside the nose from the wings to (he eye stop cuts. With the No. 3-20mm gouge used upside down, form the eye masses as shown in Fig. 4. Use the same tool to blend the cheeks into the eye masses. Step 6. Sketch out the sides of the cheeks, the mustache, and the hair line above the eyes. Use the No. 41-12 mm V-tool or make plunge cuts with the gouges to form stop cuts at the hair line, the cheek line, and the mustache (see Fig. 5). Step 7. Sketch in the leaf forms and make stop cuts around them. You can use either the V-tool or gouges that fit the arc of the leaf shape (see Supplies list). Carve them in layers as shown in Fig. 6. |


