Creative Woodworks & crafts 1999-11, страница 52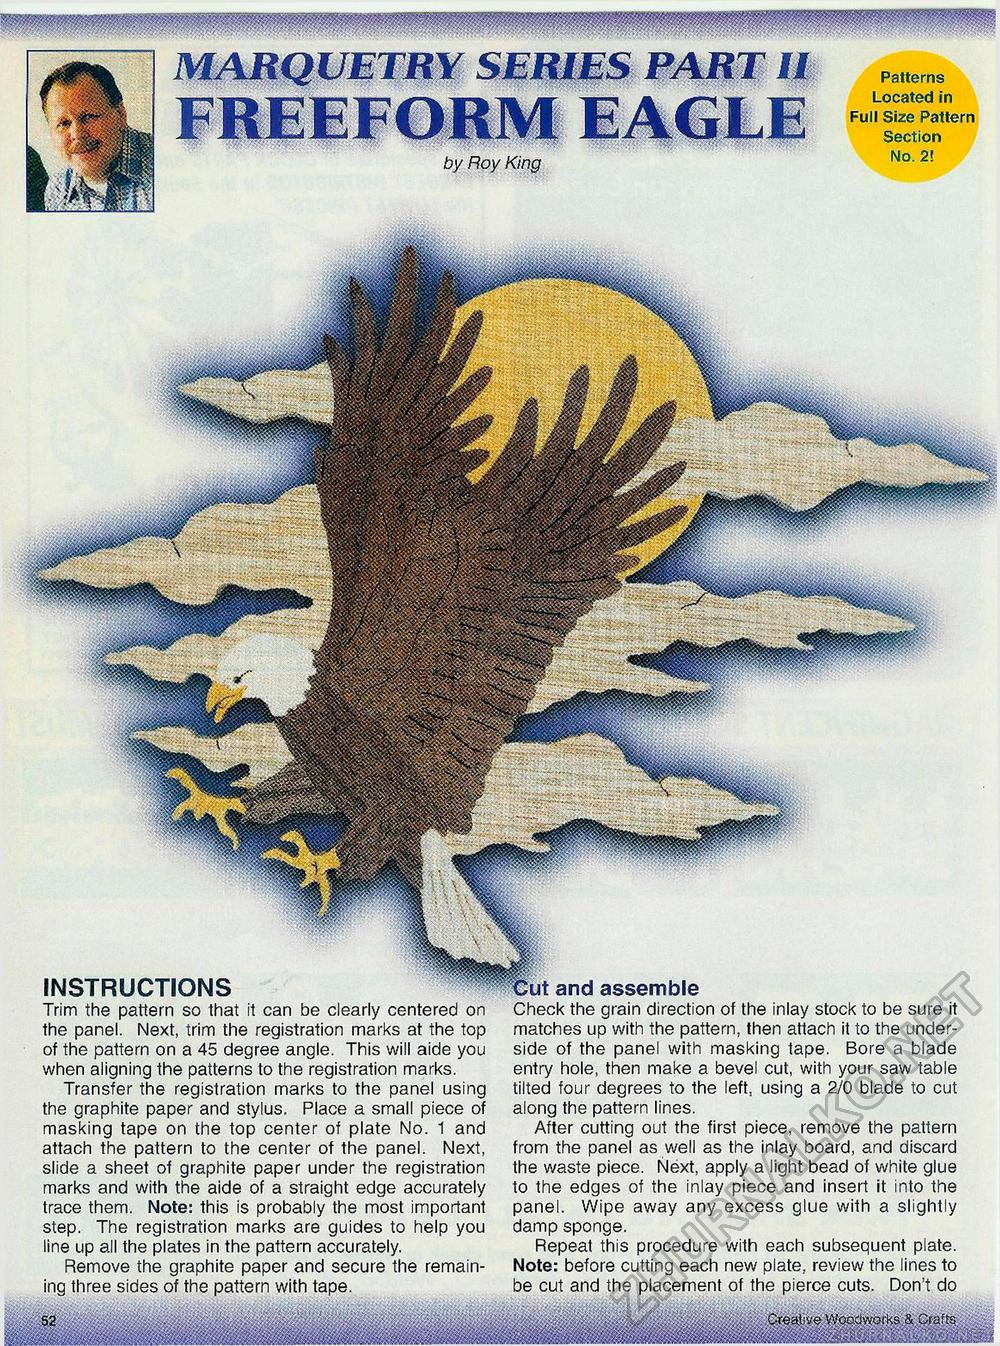
Creative Woodworks & Crafts MARQUETRY SERIES PART II by Roy King Patterns Located in Full Size Pattern Section No. 2! instructions Trim the pattern so that it can be clearly centered on the panel. Next, trim the registration marks at the top of the pattern on a 45 degree angle. This will aide you when aligning the patterns to the registration marks. Transfer the registration marks to the panel using the graphite paper and stylus. Place a small piece of masking tape on the top center of plate No. 1 and attach the pattern to the center of the panel. Next, slide a sheet of graphite paper under the registration marks and with the aide of a straight edge accurately trace them. Note: this is probably the most important step. The registration marks are guides to help you line up all the plates in the pattern accurately. Remove the graphite paper and secure the remaining three sides of the pattern with tape. and assemble unecK the grain direction of the inlay stock to be sure it matches up with the pattern, then attach it to the underside of the panel with masking tape. Bore a blade entry hole, then make a bevel cut, with your saw table tilted four degrees to the left, using a 2/0 blade to cut along the pattern lines. After cutting out the first piece, remove the pattern from the panel as well as the inlay board, and discard the waste piece. Next, apply a light bead of white glue to the edges of the inlay piece and insert it into the panel. Wipe away any excess glue with a slightly damp sponge. Repeat this procedure with each subsequent plate. Note: before cutting each new plate, review the lines to be cut and the placement of the pierce cuts. Don't do |


