Creative Woodworks & crafts 1999-11, страница 70
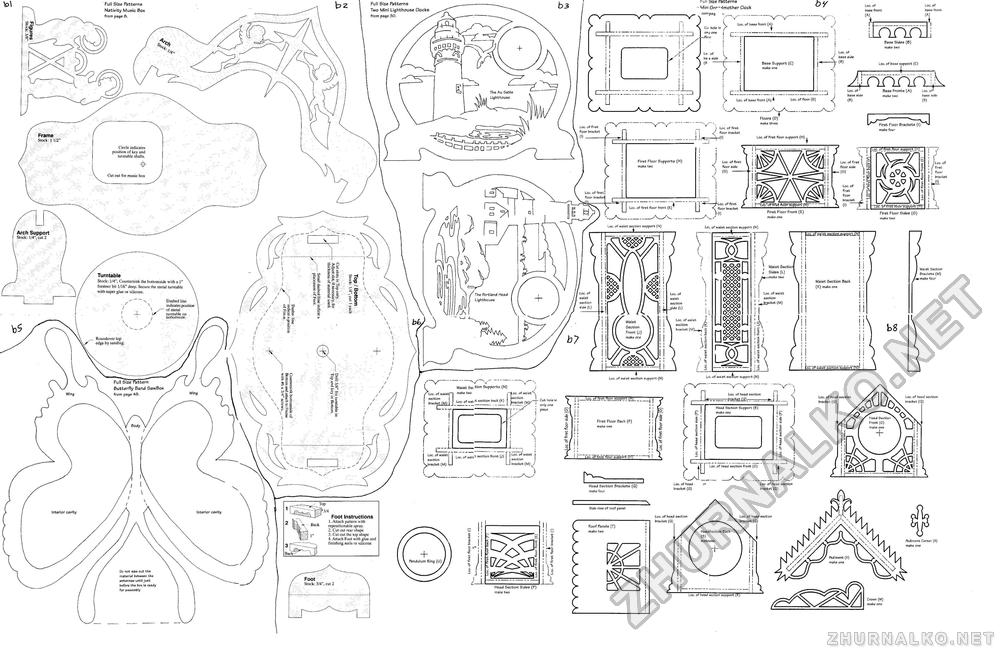
ruii ^ize Patterns Mini Gr?mother Clock rompaa r. Full Size Patterns Two Mini Lighthouse Clocks from page 30. . Full Size Patterns Nativity Music Pox from page Loc, of base front Loc. of base front Loc. of base support (C) 8a se Fronts (A) Loc. of make two base si The Au Sable lighthouse Loc. of floor (D) Loc. of base front (A) Floors (D) make three First Floor brackets (I) make four Loc. of first floor bracket Loc. of first floor bracket Frame Stock: 1 1/2 Loc. of first floor support (H) Circle indicates position of key and turntable shafts. Loc. of first floor First Floor Supports (H) make two Loc. of first floor side Loc. of first floor side j Loc. of / first j floor * bracket Cut out for music box Loc. of first floor bracket looToTW&t floor supporiT(HX~" " ' First Floor Front (H) make one Loc. of first floor bracket First Floor make two Loc. of waist section support (N) Lo;, of waist section support (N) Arch Support Stock: 1/4", cut 2 oc. of waist section 1 Waist Sectio j Sides (L) L*—make two Waist Section brackets (M) make four Turntable \ Stock: 1/4", Countersink the bortomside with a T \ forstncr bit 1/16" deep. Secure the metal turntable \ with super glue or silicone. /"" \ Dashed line / \ indicates position / \ of metal •' f jA— ' if turntable on . \ > ; bottomside.. Waist Section Pack (K) make one Loc. of waist section side (L) Loc. of waist section bracket (M) Loc. of waist section side (L) The Portland Head Lighthouse Loc. of waist section bracket (M)_ Waist Section Front (J) make one _ Roundover top X edge by sanding, oc.'of waist section su L(C. of waist section support (N) Loc. of waist section support (N) Full Size Pattern Butterfly Band Saw&ox from page 43. > Waist Seizor] Supports (N) make two Loc. of wai?pt back (K) "Loc. of waist \ section j bracket Loc. of waist section bracket (M) Loc. of head section bracket (Q)- Loc. of head section bracket (Q) Loc. of head section bracket (Q) Support (h]"" Cut hole in only one piece Head Section Support (R) make one Head Section ?rox\t (0) make one First Floor Back (F) make one Loc. of waist j section ! bracket (M) J Loc. of waist section .bracket (M) Loc. of wa(£t section front (J) Loc. of first"floor support Loc. of head section front (0) Loc. of head bracket (G) Loc. of head section bracket (Q) Head Section brackets (G) make four Side view of roof panel Interior cavity Interior cavity Foot Instructions 1. Attach pattern with repositionabie spray. 2. Cut out rear shape 3. Cut out the top shape 4. Attach Foot with glue and finishing nails or silicone Loc. of head section bracket (Q) Loc, of head section bracket (Q) Roof Panels (T) make two HeadSection Dack makeone Pediment Center (X) make one Pediment (\0 make one Pendulum Ring (U) Do not saw out the material between the antennae until just before the box is reac for assembly Head Section Sides (P) make two Loc. of head section su Crown (W) make one |


