Creative Woodworks & crafts 2000-01, страница 32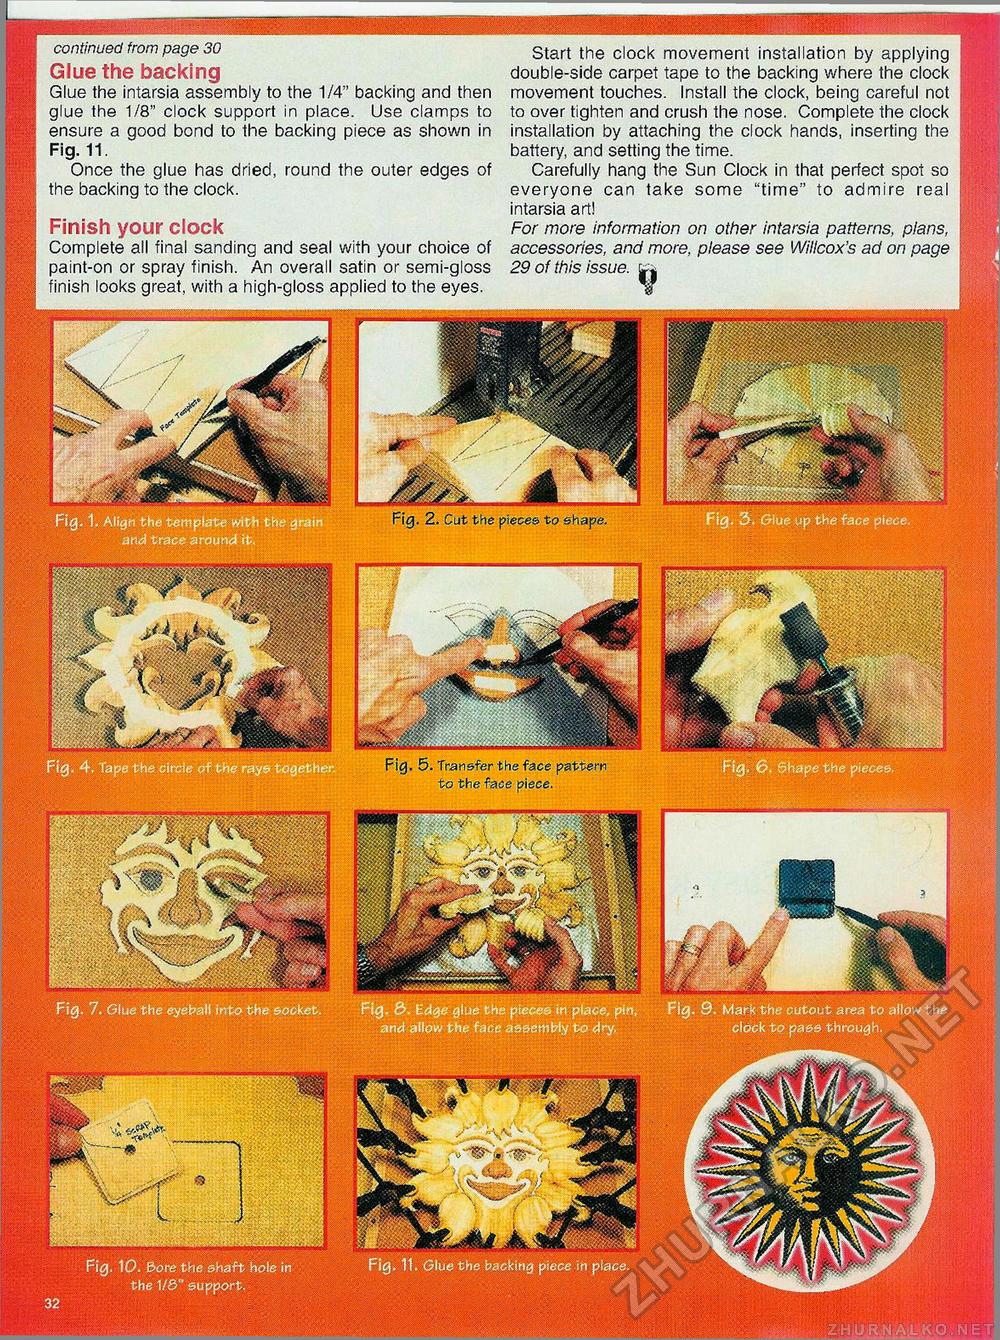
Fig. 11. Glue the backing piece in place. continued from page 30 Glue the backing Glue the intarsia assembly to the 1/4" backing and then glue the 1/8" clock support in place. Use clamps to ensure a good bond to the backing piece as shown in Fig. 11. Once the glue has dried, round the outer edges of the backing to the clock. Finish your clock Complete all final sanding and seal with your choice of paint-on or spray finish. An overall satin or semi-gloss finish looks great, with a high-gloss applied to the eyes. Start the clock movement installation by applying double-side carpet tape to the backing where the clock movement touches. Install the clock, being careful not to over tighten and crush the nose. Complete the clock installation by attaching the clock hands, inserting the battery, and setting the time. Carefully hang the Sun Clock in that perfect spot so everyone can take some "time" to admire real intarsia art! For more information on other intarsia patterns, plans, accessories, and more, please see Wiilcox's ad on page 29 of this issue. Fig. 4. Fig. 10. Bore the shaft hole in the V&" support. Fig. 5. Transfer the face pattern to the face piece. |


