Creative Woodworks & crafts 2000-01, страница 36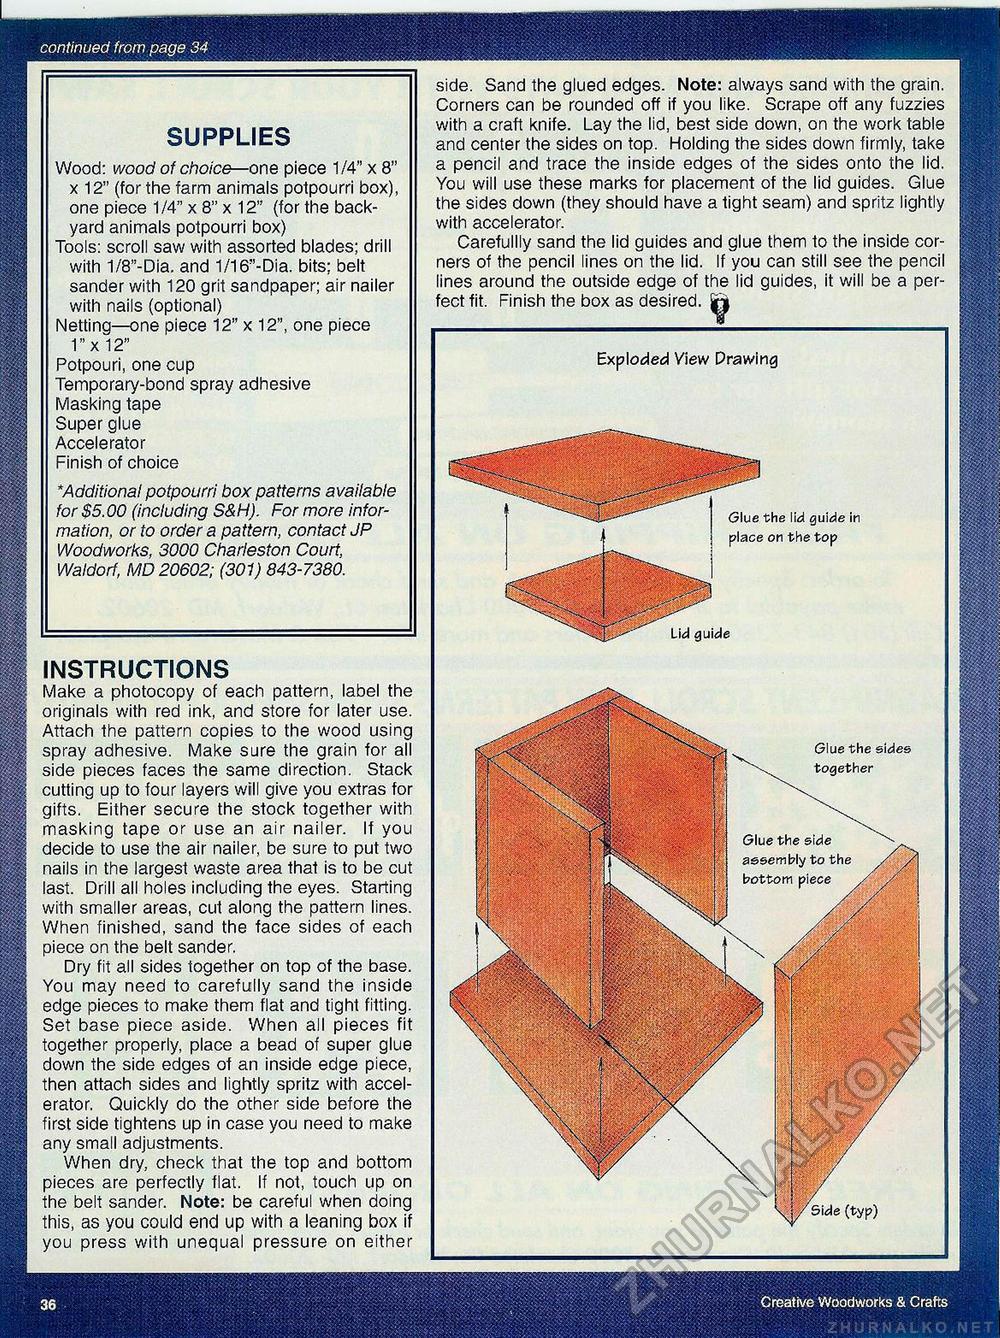
side. Sand the glued edges. Note: always sand with the grain. Corners can be rounded off if you like. Scrape off any fuzzies with a craft knife. Lay the lid, best side down, on the work table and center the sides on top. Holding the sides down firmly, take a pencil and trace the inside edges of the sides onto the lid. You will use these marks for placement of the lid guides. Glue the sides down (they should have a tight seam) and spritz lightly with accelerator. Carefullly sand the iid guides and glue them to the inside corners of the pencil lines on the lid. If you can still see the pencil lines around the outside edge of the lid guides, it will be a perfect fit. Finish the box as desired. *Additional potpourri box patterns available for $5.00 (including S&H). For more information, or to order a pattern, contact JP Woodworks, 3000 Charleston Court, Waldorf, MD 20602; (301) 843-7380. INSTRUCTIONS Make a photocopy of each pattern, label the originals with red ink, and store for later use. Attach the pattern copies to the wood using spray adhesive. Make sure the grain for all side pieces faces the same direction. Stack cutting up to four layers will give you extras for gifts. Either secure the stock together with masking tape or use an air nailer. If you decide to use the air nailer, be sure to put two nails in the largest waste area that is to be cut last. Drill all holes including the eyes. Starting with smaller areas, cut along the pattern lines. When finished, sand the face sides of each piece on the belt sander. Dry fit all sides together on top of the base. You may need to carefully sand the inside edge pieces to make them flat and tight fitting. Set base piece aside. When all pieces fit together properly, place a bead of super glue down the side edges of an inside edge piece, then attach sides and lightly spritz with accelerator. Quickly do the other side before the first side tightens up in case you need to make any small adjustments. When dry, check that the top and bottom pieces are perfectly flat. If not, touch up on the belt sander. Note: be careful when doing this, as you could end up with a leaning box if you press with unequal pressure on either SUPPLIES Wood: wood of choice—one piece 1/4" x 8" x 12" (for the farm animals potpourri box), one piece 1/4" x 8" x 12" (for the backyard animals potpourri box) Tools: scroll saw with assorted blades; drill with 1/8"-Dia. and 1/16"-Dia. bits; belt sander with 120 grit sandpaper; air nailer with nails (optional) Netting—one piece 12" x 12", one piece 1" x 12" Potpouri, one cup Temporary-bond spray adhesive Masking tape Super glue Accelerator Finish of choice Exploded View Drawing Glue the sides together Glue the side assembly to the bottom piece |


