Creative Woodworks & crafts 2000-03, страница 18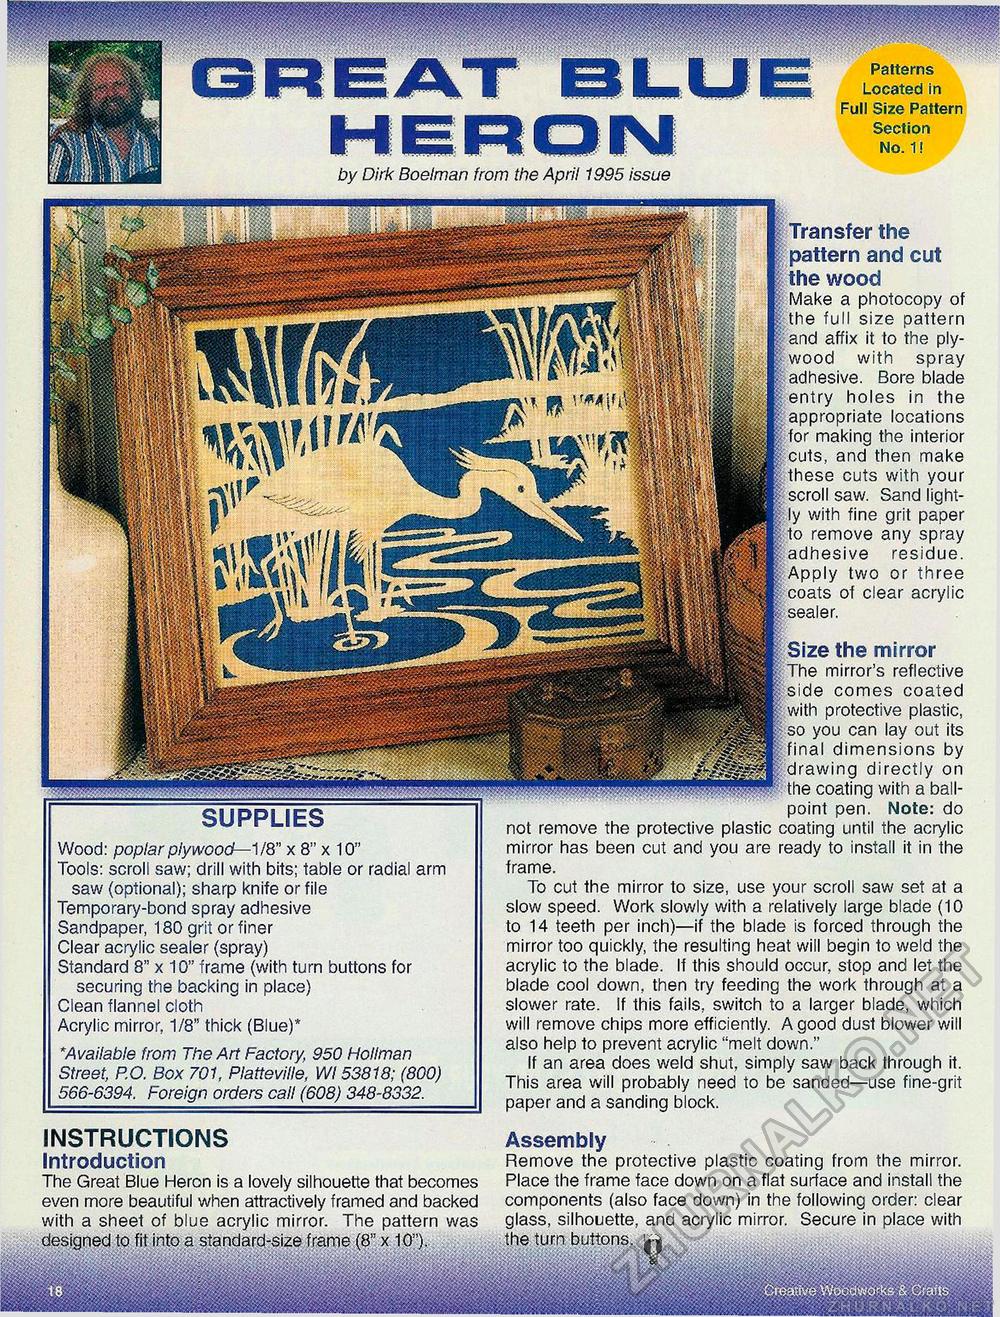
Located in Full Size Pattern Section No. 1! (SreatiVfe Woca^'o"ks & Crafts INSTRUCTIONS Introduction The Great Blue Heron is a lovely silhouette that becomes even more beautiful when attractively framed and backed with a sheet of blue acrylic mirror. The pattern was designed to fit into a standard-size frame (8" x 10"). Assembly Remove the protective plastic coating from the mirror. Place the frame face down on a flat surface and install the components (also face down) in the following order: clear glass, silhouette, and acrylic mirror. Secure in place with the turn buttons. SUPPLIES Wood: poplar plywood—1/8" x 8" x 10" Tools: scroll saw; drill with bits; table or radial arm saw (optional); sharp knife or file Temporary-bond spray adhesive Sandpaper, 180 grit or finer Clear acrylic sealer (spray) Standard 8" x 10" frame (with turn buttons for securing the backing in place) Clean flannel cloth Acrylic mirror, 1/8" thick (Blue)* *Available from The Art Factory, 950 Hollman Street, P.O. Box 701, Platteville, Wl 53818; (800) 566-6394. Foreign orders call (608) 348-8332. Transfer the pattern and cut the wood Make a photocopy of the full size pattern and affix it to the plywood with spray adhesive. Bore blade entry holes in the appropriate locations for making the interior ; cuts, and then make , these cuts with your scroll saw. Sand lightly with fine grit paper to remove any spray adhesive residue. Apply two or three coats of clear acrylic sealer. Size the mirror The mirror's reflective ; side comes coated with protective plastic, so you can lay out its final dimensions by drawing directly on the coating with a ballpoint pen. Note: do not remove the protective plastic coating until the acrylic mirror has been cut and you are ready to install it in the frame. To cut the mirror to size, use your scroll saw set at a slow speed. Work slowly with a relatively large blade (10 to 14 teeth per inch)—if the blade is forced through the mirror too quickly, the resulting heat will begin to weld the acrylic to the blade. If this should occur, stop and let the blade cool down, then try feeding the work through at a slower rate. If this fails, switch to a larger blade, which will remove chips more efficiently. A good dust blower will also help to prevent acrylic "melt down." If an area does weld shut, simply saw back through it. This area will probably need to be sanded—use fine-grit paper and a sanding block. |


