Creative Woodworks & crafts 2000-10, страница 48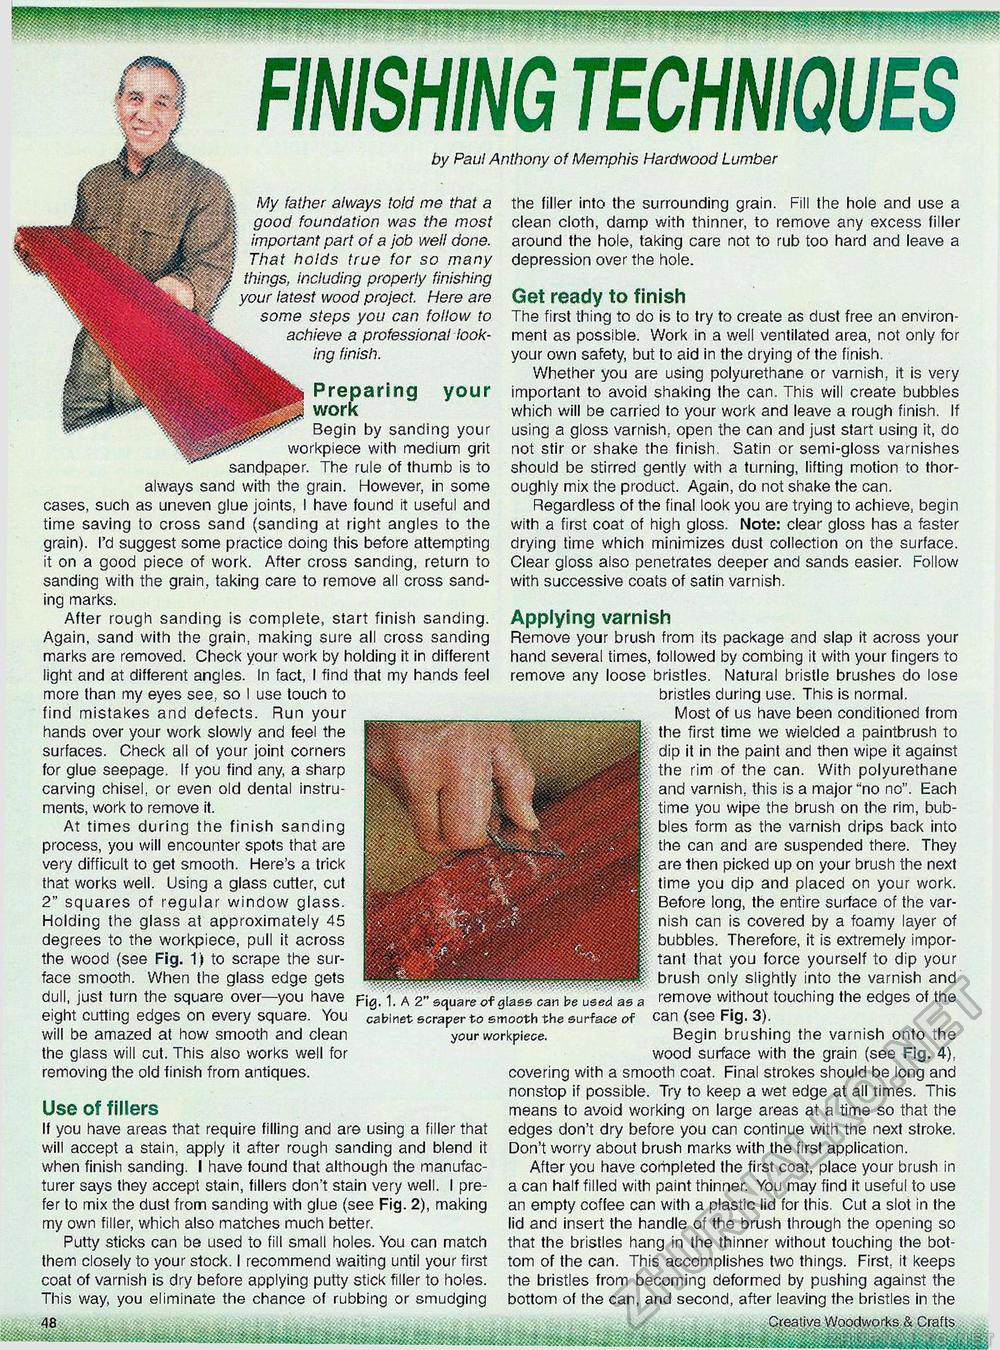
hhh FINISHING TECHNIQUES by Paul Anthony of Memphis Hardwood Lumber My father always told me that a good foundation was the most important part of a job well done. That holds true for so many things, including properly finishing your latest wood project. Here are some steps you can follow to achieve a professional looking finish. Preparing work your Begin by sanding your workpiece with medium grit sandpaper. The rule of thumb is to always sand with the grain. However, in some cases, such as uneven glue joints, I have found it useful and time saving to cross sand (sanding at right angles to the grain). I'd suggest some practice doing this before attempting it on a good piece of work. After cross sanding, return to sanding with the grain, taking care to remove all cross sanding marks. After rough sanding is complete, start finish sanding. Again, sand with the grain, making sure all cross sanding marks are removed. Check your work by holding it in different light and at different angles. In fact, I find that my hands feel more than my eyes see., so I use touch to find mistakes and defects. Run your hands over your work slowly and feel the surfaces. Check all of your joint corners for glue seepage. If you find any, a sharp carving chisel, or even old dentai instruments, work to remove it. At times during the finish sanding process, you will encounter spots that are very difficult to get smooth. Here's a trick that works well. Using a glass cutter, cut 2" squares of regular window glass. Holding the glass at approximately 45 degrees to the workpiece, pull it across the wood (see Fig. 1) to scrape the surface smooth. When the glass edge gets dull, just turn the square over—you have eight cutting edges on every square. You will be amazed at how smooth and clean the glass will cut. This also works well for removing the old finish from antiques. Fig. 1. A 2" square of glass can be used as a cabinet scraper to smooth the surface of your workpiece. Use of fillers If you have areas that require filling and are using a filler that will accept a stain, apply it after rough sanding and blend it when finish sanding. I have found that although the manufacturer says they accept stain, fillers don't stain very well. I prefer to mix the dust from sanding with glue (see Fig. 2), making my own filler, which also matches much better. Putty sticks can be used to fill small holes. You can match them closely to your stock. I recommend waiting until your first coat of varnish is dry before applying putty stick filler to holes. This way, you eliminate the chance of rubbing or smudging 48 the filler into the surrounding grain. Fill the hole and use a clean cloth, damp with thinner, to remove any excess filler around the hole, taking care not to rub too hard and leave a depression over the hole. Get ready to finish The first thing to do is to try to create as dust free an environment as possible. Work in a well ventilated area, not only for your own safety, but to aid in the drying of the finish. Whether you are using polyurethane or varnish, it is very important to avoid shaking the can. This will create bubbles which will be carried to your work and leave a rough finish. If using a gloss varnish, open the can and just start using it, do not stir or shake the finish Satin or semi-gloss varnishes should be stirred gently with a turning, lifting motion to thoroughly mix the product. Again, do not shake the can. Regardless of the final look you are trying to achieve, begin with a first coat of high gloss. Note: clear gloss has a faster drying time which minimizes dust collection on the surface. Clear gloss also penetrates deeper and sands easier. Follow with successive coats of satin varnish. Applying varnish Remove your brush from its package and slap it across your hand several times, followed by combing it with your fingers to remove any loose bristles. Natural bristle brushes do lose bristles during use. This is normal. Most of us have been conditioned from the first time we wielded a paintbrush to dip it in the paint and then wipe it against the rim of the can. With polyurethane and varnish, this is a major "no no". Each time you wipe the brush on the rim, bubbles form as the varnish drips back into the can and are suspended there. They are then picked up on your brush the next time you dip and placed on your work. Before long, the entire surface of the varnish can is covered by a foamy layer of bubbles. Therefore, it is extremely important that you force yourself to dip your brush only slightly into the varnish and remove without touching the edges of the can {see Fig. 3). Begin brushing the varnish onto the wood surface with the grain (see Fig. 4), covering with a smooth coat. Final strokes should be long and nonstop if possible. Try to keep a wet edge at all times. This means to avoid working on large areas at a time so that the edges don't dry before you can continue with the next stroke. Don't worry about brush marks with the first application. After you have completed the first coat, place your brush in a can half filled with paint thinner. You may find it useful to use an empty coffee can with a plastic lid for this. Cut a slot in the lid and insert the handle of the brush through the opening so that the bristles hang in the thinner without touching the bottom of the can. This accomplishes two things. First, it keeps the bristles from becoming deformed by pushing against the bottom of the can, and second, after leaving the bristles in the Creative Woodworks & Crafts |


