Creative Woodworks & crafts 2001-03, страница 18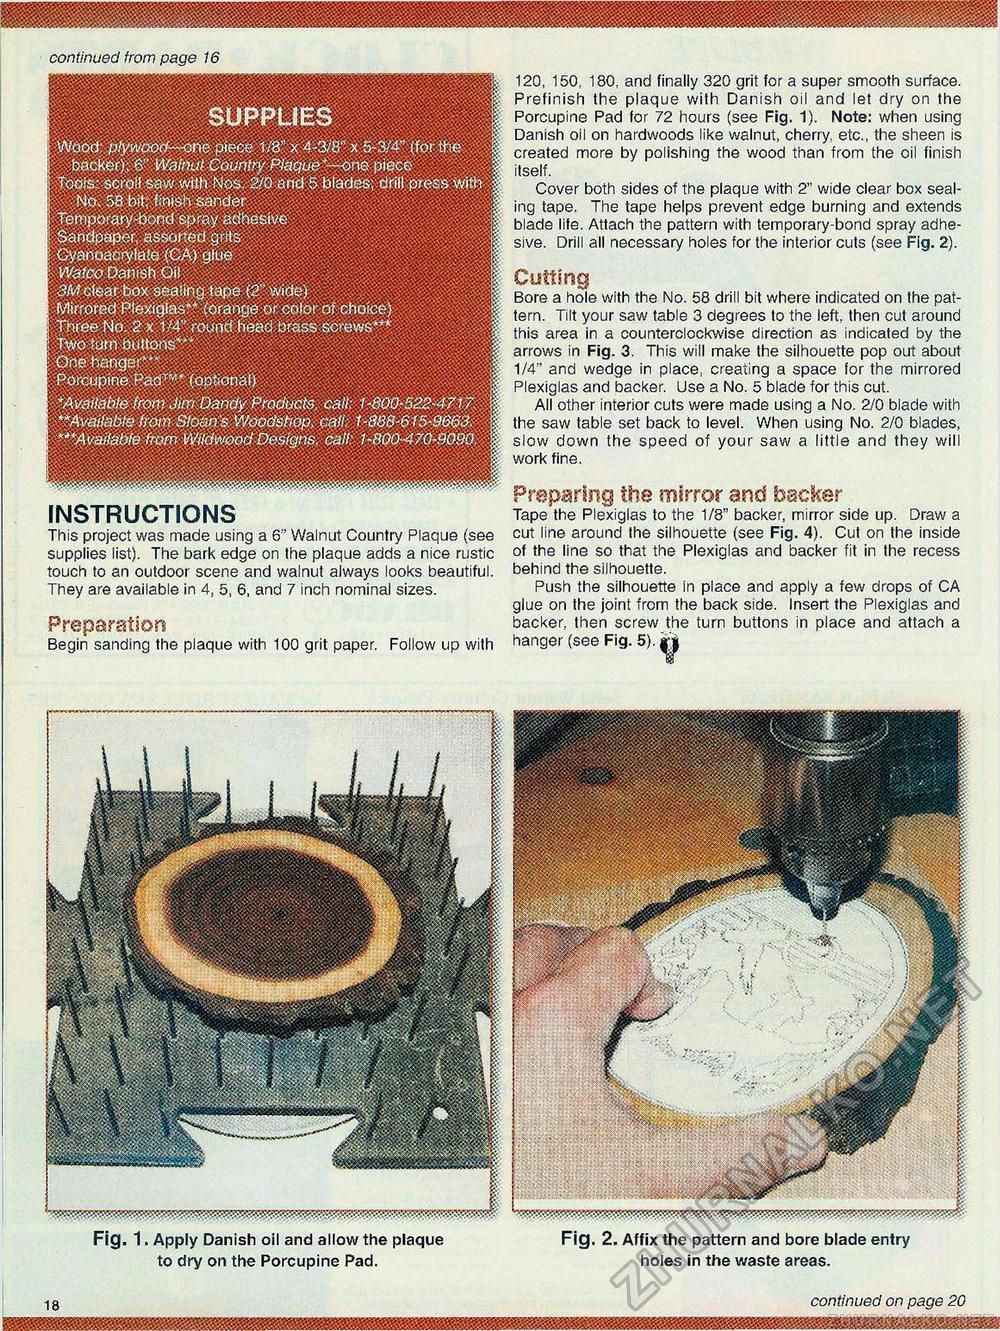
continued from page 16 SUPPLIES Wood: plywood—one piece 1/8" x 4-3/8" x 5-3M" (for the backer); r6" Walnut Country Plague*-—on© piece Tools: sera!) saw with Nos 2/0 arid 5 glades, drill press with No. 58 bit, finish Sander Temporary-bond spray adhesive Sandpaper, assorted grrts Gyanoaeryfete (CA) glue m M Wet0oDw ishO.! 3M clear box sealing tape iT wide) - Mirrored Plexiglas** (orange or color of choice} J i Three Wo- 2-x t/4" round head brass sc'rews*+* Three Wo. 2 x t/4" round head brass screws*** Two turn buttons*** Mi ' i I ' I Porcupine Pad™* (optional) | | | "Available from Juri Dandy Products, call: 1-800-522-4717.' "Available from 310a.ns Woodshop, can 1-888-615-9663■. "'Available from Wtldwood Designs, call' 1-800-470-9090 mm 11111/ INSTRUCTIONS This project was made using a 6" Walnut Country Plaque (see supplies list). The bark edge on the plaque adds a nice rustic touch to an outdoor scene and walnut always looks beautiful. They are available in 4, 5, 6, and 7 inch nominal sizes. Preparation Begin sanding the plaque with 100 grit paper. Follow up with 120, 150, 180, and finally 320 grit for a super smooth surface. Prefinish the plaque with Danish oil and let dry on the Porcupine Pad for 72 hours (see Fig. 1). Note: when using Danish oil on hardwoods like walnut, cherry, etc., the sheen is created more by polishing the wood than from the oil finish itself. Cover both sides of the plaque with 2" wide clear box sealing tape. The tape helps prevent edge burning and extends blade life. Attach the pattern with temporary-bond spray adhesive. Drill all necessary holes for the interior cuts (see Fig. 2). Bore a hole with the No. 58 drill bit where indicated on the pattern. Tilt your saw table 3 degrees to the left, then cut around this area in a counterclockwise direction as indicated by the arrows in Fig. 3. This will make the silhouette pop out about 1/4" and wedge in place, creating a space for the mirrored Plexiglas and backer. Use a No. 5 blade for this cut. All other interior cuts were made using a No. 2/0 blade with the saw table set back to level. When using No. 2/0 blades, slow down the speed of your saw a little and they will work fine. Preparing the mirror and backer- Tape the Plexiglas to the 1/8" backer, mirror side up. Draw a cut line around the silhouette (see Fig. 4). Cut on the inside of the line so that the Plexiglas and backer fit in the recess behind the silhouette. Push the silhouette in place and apply a few drops of CA glue on the joint from the back side. Insert the Plexiglas and backer, then screw the turn buttons in place and attach a hanger (see Fig. 5). j"~ Fig. 1. Apply Danish oil and allow the plaque Fig. 2. Affix the pattern and bore blade entry to dry on the Porcupine Pad. holes in the waste areas. 18 continued on page 20 |


