Creative Woodworks & crafts 2001-03, страница 6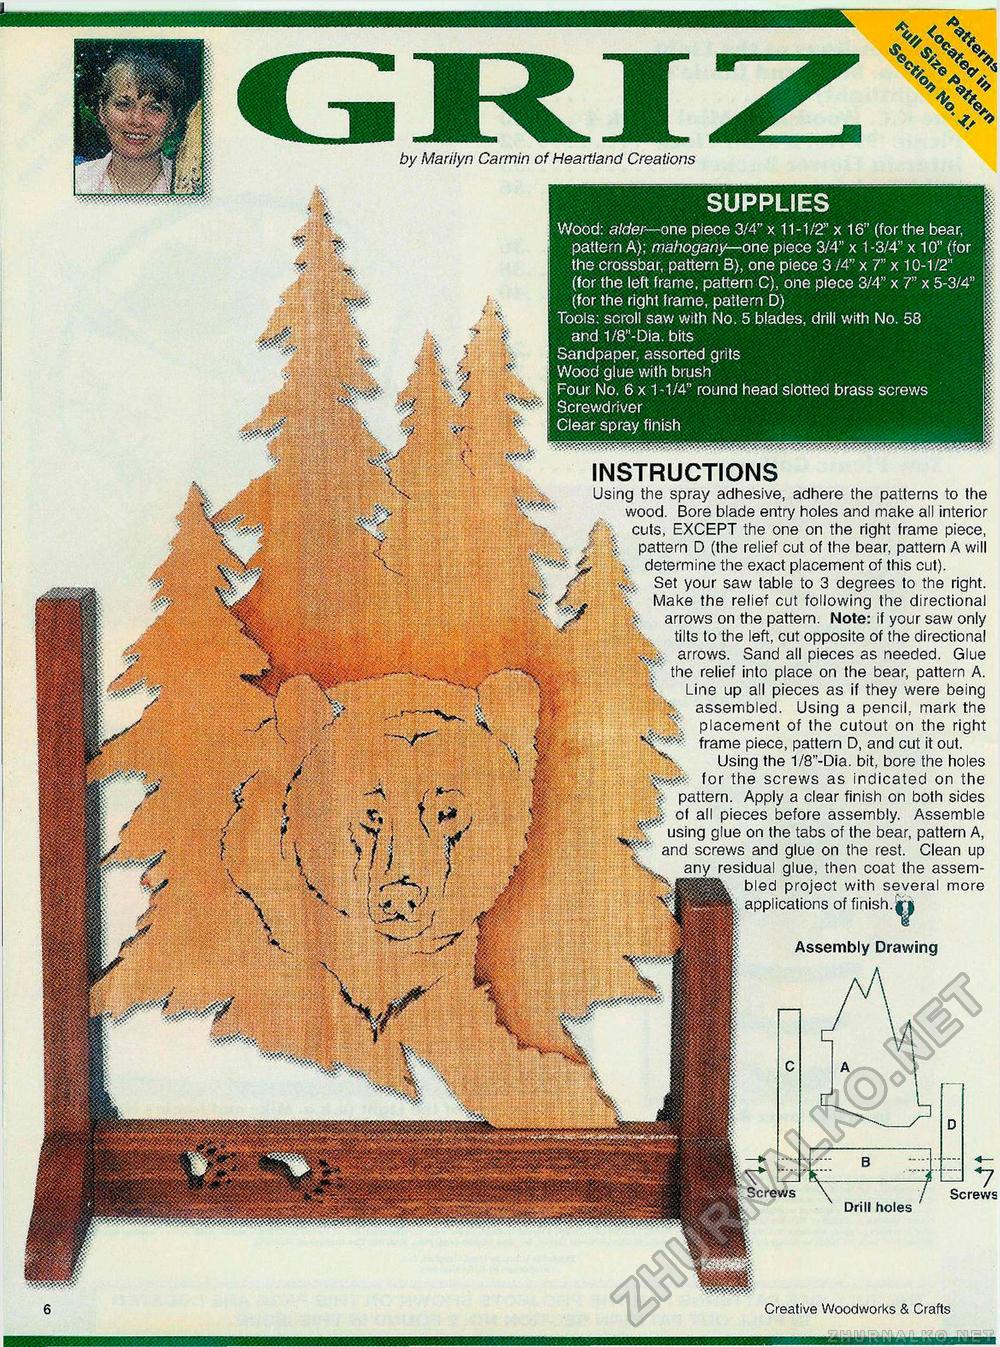
Wood: alder—one piece 3/4" x 11-1/2" x 16" (for the bear, pattern A); mahogany—one piece 3/4" x 1 -3/4" x 10" (for the crossbar, pattern B), one piece 3 /4" x 7" x 10-1/2" (for the left frame, pattern C), one piece 3/4" x 7" x 5-3/4" (for the right frame, pattern D) Tools: scroll saw with No. 5 blades, drill with No. 58 and 1/8"-Dia. bits Sandpaper, assorted grits Wood glue with brush Four No. 6 x 1-1/4" round head slotted brass screws Screwdriver Clear spray finish INSTRUCTIONS Using the spray adhesive, adhere the patterns to the wood. Bore blade entry holes and make all interior # ; . cuts, EXCEPT the one on the right frame piece, pattern D (the relief cut of the bear, pattern A will determine the exact placement of this cut). Set your saw table to 3 degrees to the right. Make the relief cut following the directional arrows on the pattern. Note: if your saw only . tilts to the left, cut opposite of the directional arrows. Sand all pieces as needed. Glue tlie relief into place on the bear, pattern A. Line up all pieces as if they were being '>.. assembled. Using a pencil, mark the .. ' placement of the cutout on the right frame piece, pattern D, and cut it out. Using the 1/8"-Dia. bit, bore the holes for the screws as indicated on the pattern. Apply a clear finish on both sides of all pieces before assembly. Assemble using glue on the tabs of the bear, pattern A, and screws and glue on the rest. Clean up any residual glue, then coat the assembled project with several more applications of finish.* Assembly Drawing ir t \ Screws \t-T7 7 Drill holes Screws by Marilyn Carmin of Heartland Creations 6 Creative Woodworks & Crafts |


