Creative Woodworks & crafts 2001-06, страница 16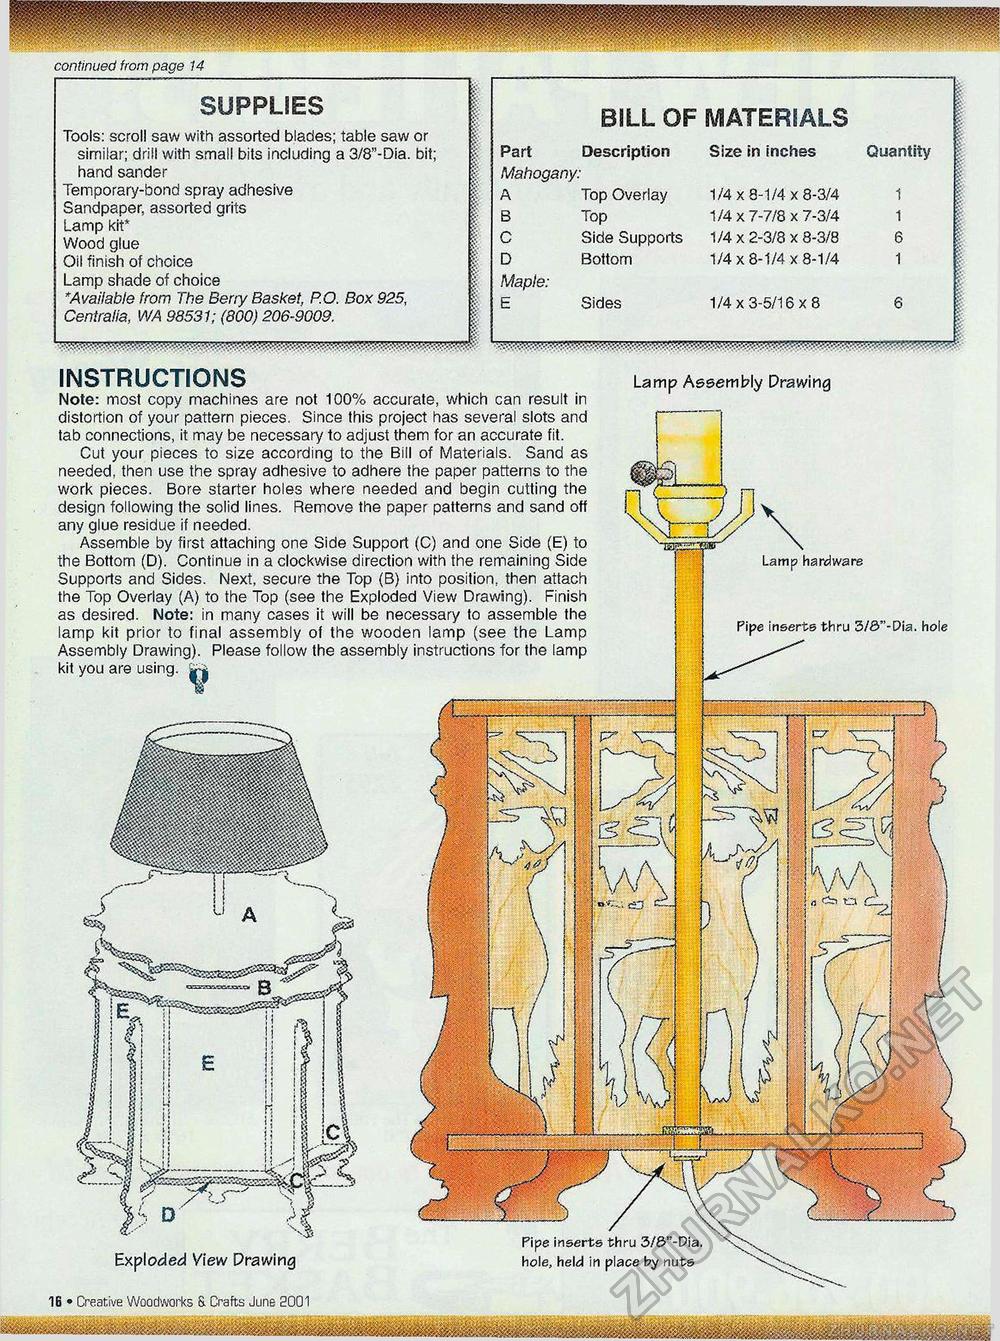
continued from page 14 SUPPLIES Tools: scroll saw with assorted blades; tabie saw or similar; drill with small bits including a 3/8"-Dia. bit; hand sander Temporary-bond spray adhesive Sandpaper, assorted grits Lamp kit* Wood glue Oil finish of choice Lamp shade of choice 'Available from The Beriy Basket, P.O. Box 925, Centralia, WA 98531; (800) 206-9009.
Lamp Assembly Drawing Exploded View Drawing INSTRUCTIONS Note: most copy machines are not 100% accurate, which can result in distortion of your pattern pieces. Since this project has several slots and tab connections, it may be necessary to adjust them for an accurate fit. Cut your pieces to size according to the Bill of Materials. Sand as needed, then use the spray adhesive to adhere the paper patterns to the work pieces. Bore starter holes where needed and begin cutting the design following the solid lines. Remove the paper patterns and sand off any glue residue if needed. Assemble by first attaching one Side Support (C) and one Side (E) to the Bottom (D). Continue in a clockwise direction with the remaining Side Supports and Sides. Next, secure the Top (B) into position, then attach the Top Overlay (A) to the Top (see the Exploded View Drawing). Finish as desired. Note: in many cases it will be necessary to assemble the lamp kit prior to final assembly of the wooden lamp (see the Lamp Assembly Drawing). Please follow the assembly instructions for the lamp kit you are using. Pipe inserts thru 3/8"-Dia. hole, held in place by nuts Lamp Assembly Drawing IB * Creative Woodworks S. drafts June 2001 |
||||||||||||||||||||||||||||||||||||


