Creative Woodworks & crafts 2001-08, страница 37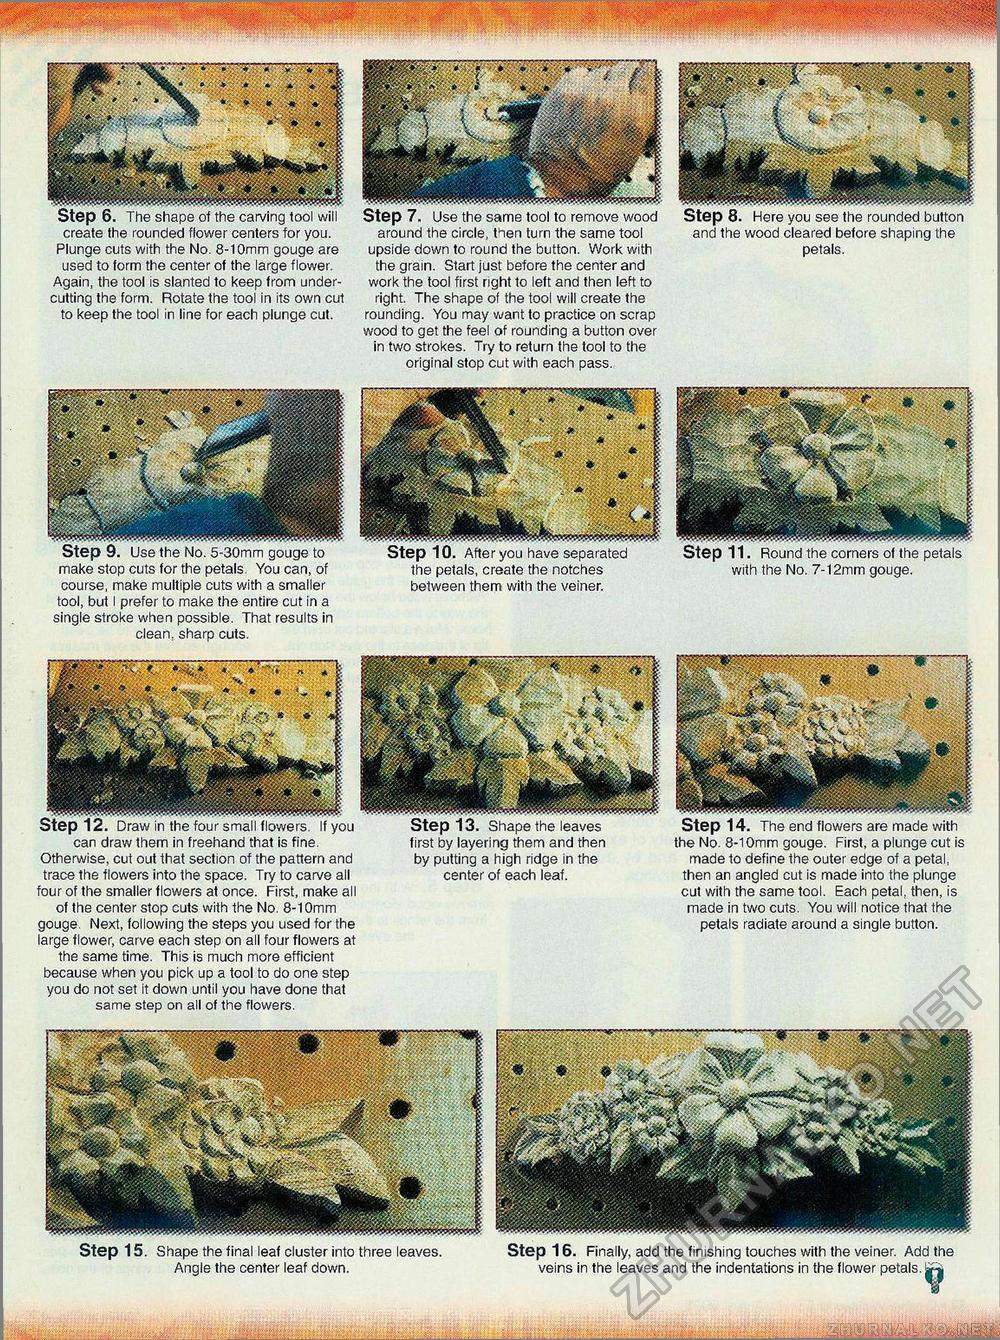
create the rounded flower centers for you. Plunge cuts with the No. 8-1 Omm gouge are used to form the center of the large flower. Again, the tool is slanted to keep from undercutting the form. Rotate the tool in its own cut to keep the tool in line for each plunge cut. Step 7. Use the same tool to remove wood around the circle, then turn the same tool upside down to round the button. Work with the grain. Start just before the center and work the tool first right to left and then left to right. The shape of the tool will create the rounding. You may want to practice on scrap wood to get the feel of rounding a button over in two strokes. Try to return the tool to the original stop cut with each pass. . you see the rounded button and the wood cleared before shaping the petals. Step 9. Use the No. 5-30mm gouge to make stop cuts for the petals. You can, of course, make multiple cuts with a smaller tool, but I prefer to make the entire cut in a single stroke when possible. That results in clean, sharp cuts. the petals, create the notches between them with the veiner. ■■■ Round the corners of the petals with the No. 7-12mm gouge. htep Id. Draw in the four small flowers. Ifyou can draw them in freehand that is fine. Otherwise, cut out that section of the pattern and trace the flowers into the space. Try to carve all four of the smaller flowers at once. First, make all of the center stop cuts with the No. 8-1 Omm gouge. Next, following the steps you used for the large flower, carve each step on all four flowers at the same time. This is much more efficient because when you pick up a tool to do one step you do not set it down until you have done that same step on all of the flowers. W l^-r U | Wi >_JI lapu II II? iGclVQS first by layering them and then by putting a high ridge in the center of each leaf. Step 14. The end flowers are made with the No. 8-1 Omm gouge. First, a plunge cut is made to define the outer edge of a petal, then an angled cut is made into the plunge cut with the same tool. Each petal, then, is made in two cuts. You will notice that the petals radiate around a single button. Step 15. Shape the final leaf cluster into three leaves. Angle the center leaf down. Step 16. Finally, add the finishing touches with the veiner. Add the veins in the leaves and the indentations in the flower petals. |


