Creative Woodworks & crafts 2001-11, страница 14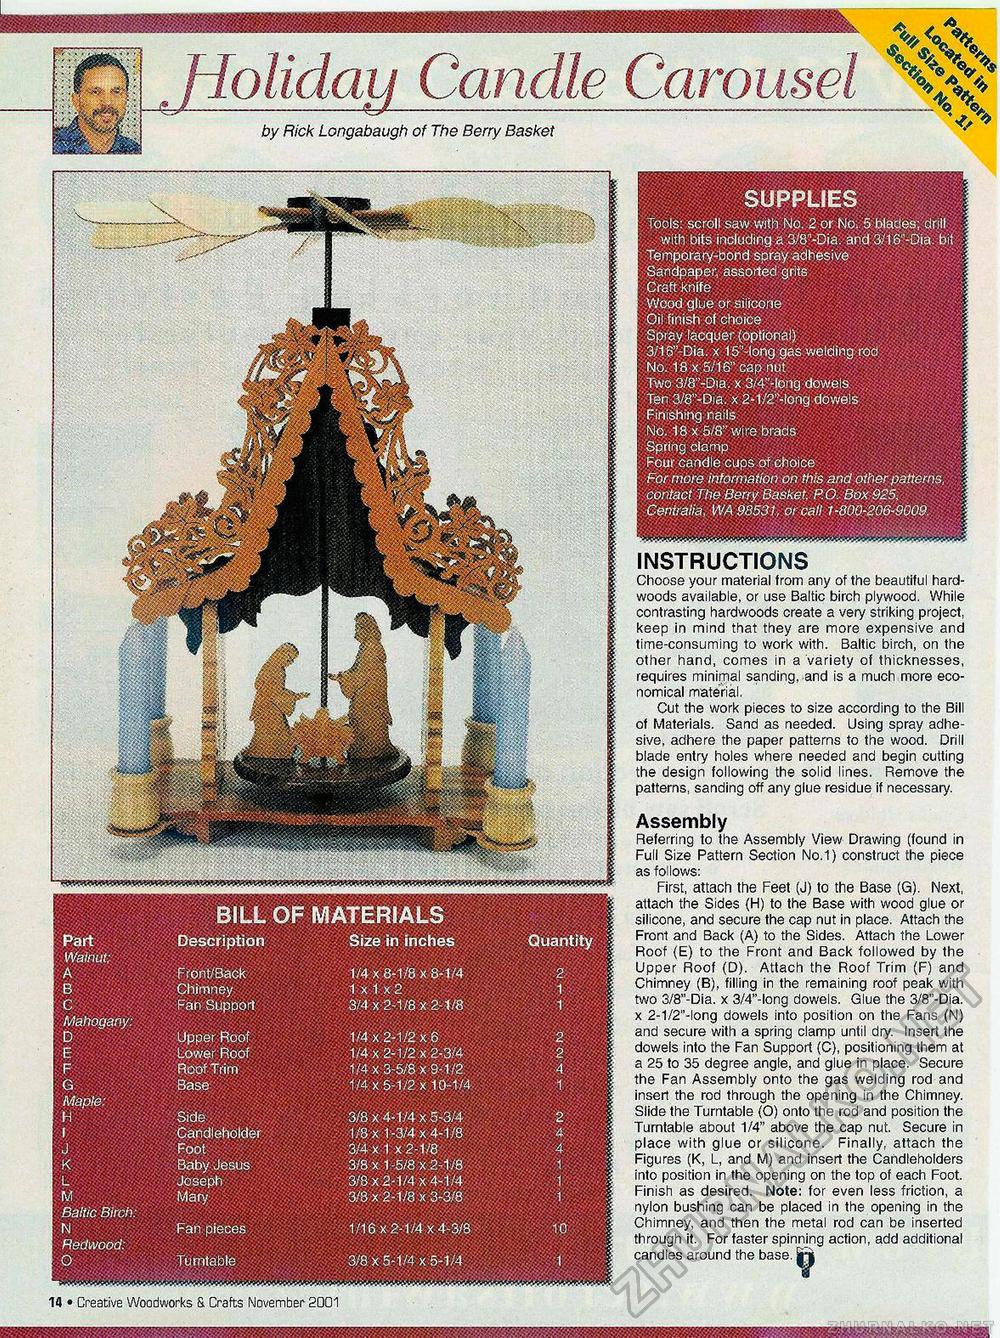
BILL OF MATERIALS Size in inches Part Walnut; Description Quantity Front/Back Chimney Fan Support Mahogany: Upper Roof Lower Roof Roof Trim Base Side Candleholder Foot Baby Jesus Joseph Mary Baltic Birch. Fan pieces Redwood: Turntable SUPPLIES Tools: scroll saw with No. 2 or No. 5 blades; drill with bits including a 3/8"-Dia. and 3/16"-Dia. bit Temporary-bond spray adhesive Sandpaper, assorted grits Craft knife Wood glue or silicone Oil finish of choice Spray.lacquer- (optional) 3/16"-Dia. x 15"-longgas welding rod No. 18 x 5/16" cap nut Two 3/8"-J3ia x 3/4"-long dowels Ten 3/8"-Dia. x 2-1/2'Mong dowels Flashing nails No. 18 x 5/8" wire brads Spring clamp Four candle cups of choice For more information on this and other patterns, contact The Berry Basket, P. O. Box 925, Centralia, WA 98531, or call 1-800-206-9009. Vo ** >Vv% w* INSTRUCTIONS Choose your material from any of the beautiful hardwoods available, or use Baltic birch plywood. While contrasting hardwoods create a very striking project, keep in mind that they are more expensive and time-consuming to work with. Baltic birch, on the other hand, comes in a variety of thicknesses, requires minimal sanding, and is a much more economical material. Cut the work pieces to size according to the Bill of Materials. Sand as needed. Using spray adhesive, adhere the paper patterns to the wood. Drill blade entry holes where needed and begin cutting the design following the solid lines. Remove the patterns, sanding off any glue residue if necessary. Assembly Referring to the Assembly View Drawing (found in Full Size Pattern Section No.1) construct the piece as follows: First, attach the Feet (J) to the Base (G). Next, attach the Sides (H) to the Base with wood glue or silicone, and secure the cap nut in place. Attach the Front and Back (A) to the Sides. Attach the Lower Roof (E) to the Front and Back followed by the Upper Roof (D). Attach the Roof Trim (F) and Chimney (B), filling in the remaining roof peak with two 3/8"-Dia. x 3/4"-long dowels. Glue the 3/8"-Dia. x 2-1/2"-long dowels into position on the Fans (N) and secure with a spring clamp until dry. Insert the dowels into the Fan Support (C), positioning them at a 25 to 35 degree angle, and glue in place. Secure the Fan Assembly onto the gas welding rod and insert the rod through the opening in the Chimney. Slide the Turntable (O) onto the rod and position the Turntable about 1/4" above the cap nut. Secure in place with glue or silicone. Finally, attach the Figures (K, L, and M) and insert the Candleholders into position in the opening on the top of each Foot. Finish as desired. Note: for even less friction, a nylon bushing can be placed in the opening in the Chimney, and then the metal rod can be inserted through it. For faster spinning action, add additional candles around the base. by Rick Longabaugh of The Berry Basket 14 • Creative Woodworks & Crafts November 2001 continued on page 18 |


