Creative Woodworks & crafts 2001-11, страница 20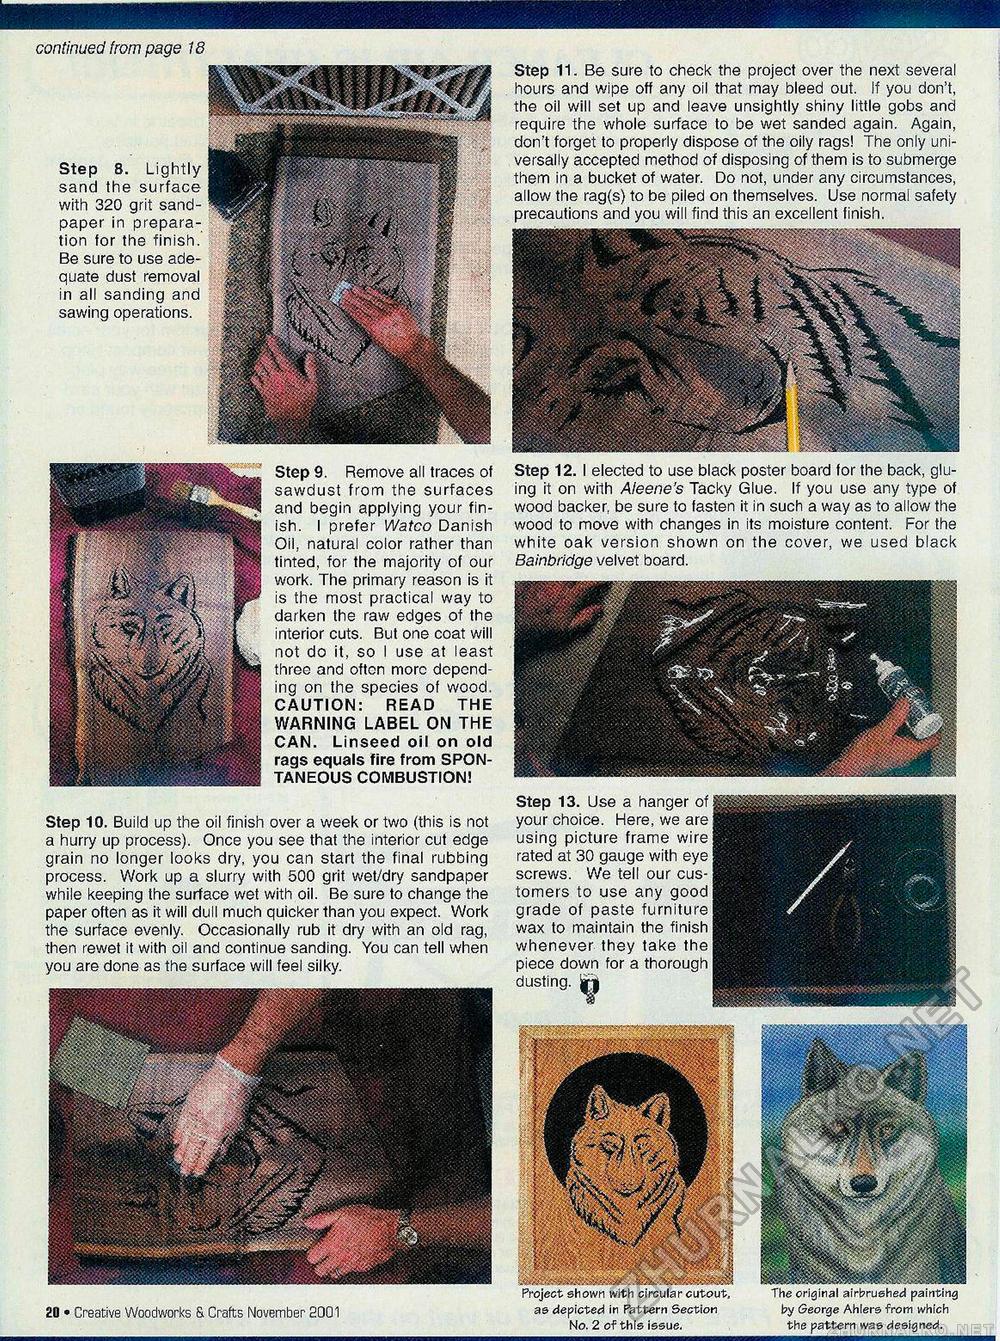
20 • Creative Woodworks & Crafts November 2001 continued on page 18 Step 11. Be sure to check the project over the next several hours and wipe off any oil that may bleed out. If you don't, the oil will set up and leave unsightly shiny little gobs and require the whole surface to be wet sanded again. Again, don't forget to properly dispose of the oily rags! The only universally accepted method of disposing of them is to submerge them in a bucket of water. Do not, under any circumstances, allow the rag(s) to be piled on themselves. Use normal safety precautions and you will find this an excellent finish. Step 12. I elected to use black poster board for the back, gluing it on with Aieene's Tacky Glue. If you use any type of wood backer be sure to fasten it in such a way as to allow the wood to move with changes in its moisture content. For the white oak version shown on the cover, we used black Bainbridge velvet board. Step 13. Use a hanger of your choice. Here, we are using picture frame wire rated at 30 gauge with eye screws. We tell our customers to use any good grade of paste furniture wax to maintain the finish whenever they take the piece down for a thorough dusting, jjgj continued from page 18 Step 8. Lightly sand the surface with 320 grit sandpaper in preparation for the finish. Be sure to use adequate dust removal in all sanding and sawing operations. as depicted in Pattern Section No. 2 of this issue. by George Ahlers from which the pattern was designed. Step 10. Build up the oil finish over a week or two (this is not a hurry up process). Once you see that the interior cut edge grain no longer looks dry, you can start the final rubbing process. Work up a slurry with 500 grit wet/dry sandpaper while keeping the surface wet with oil. Be sure to change the paper often as it will dull much quicker than you expect. Work the surface evenly. Occasionally rub it dry with an old rag, then rewet it with oil and continue sanding. You can tell when you are done as the surface will feel silky. Step 9. Remove all traces of sawdust from the surfaces and begin applying your finish. I prefer Watco Danish Oil, natural color rather than tinted, for the majority of our work. The primary reason is it is the most practical way to darken the raw edges of the interior cuts. But one coat will not do it, so I use at least three and often more depending on the species of wood. CAUTION: READ THE WARNING LABEL ON THE CAN. Linseed oil on old rags equals fire from SPONTANEOUS COMBUSTION! |


