Creative Woodworks & crafts 2003-01, страница 36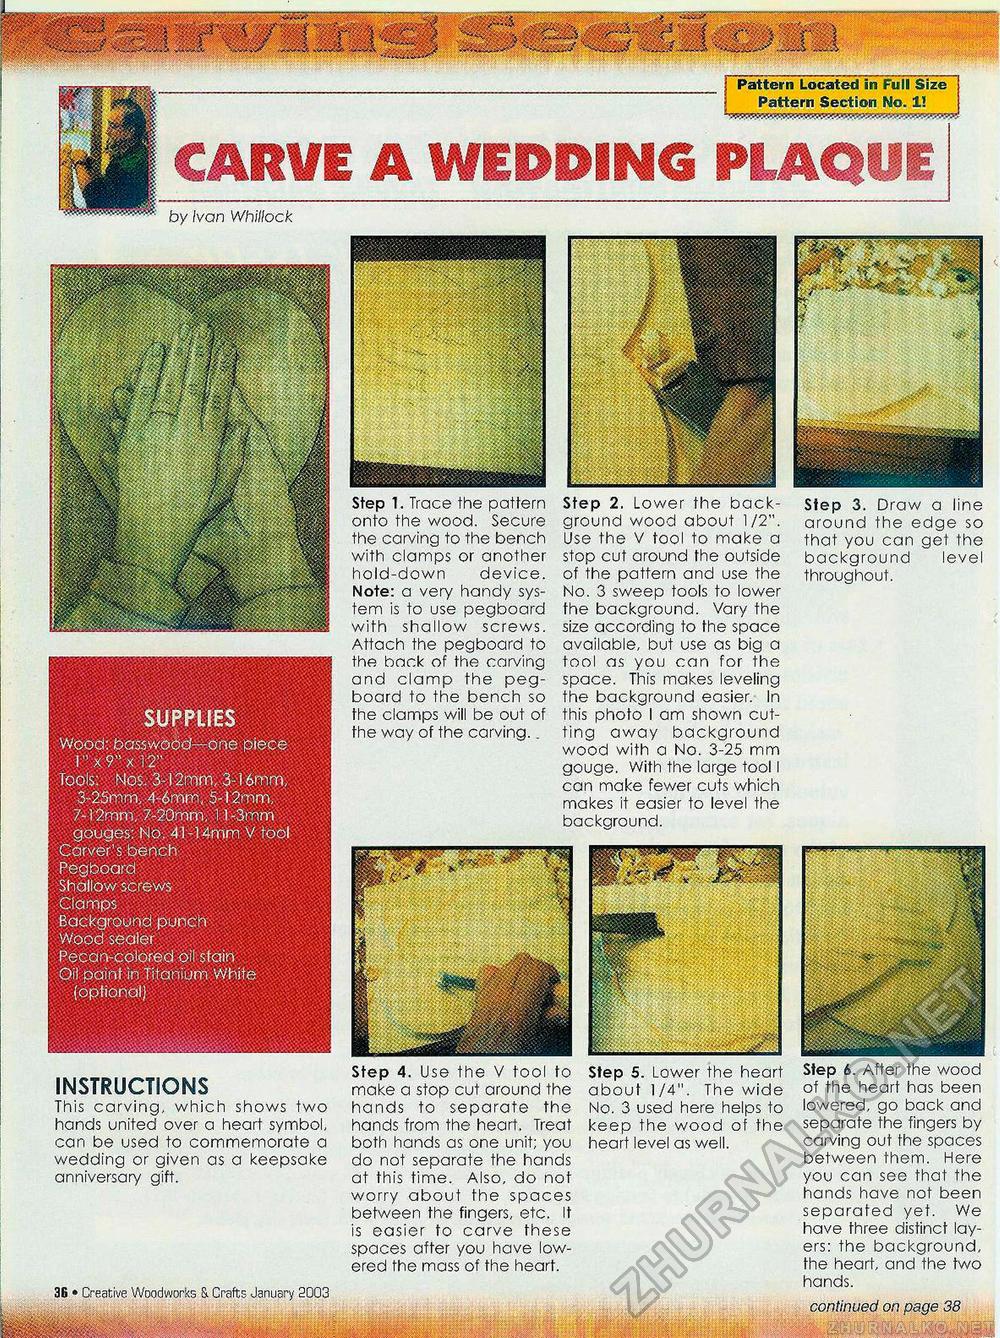
SUPPLIES Wood: basswood.....one piece I" x 9" x 12" Tools: Nos. 3-12mm, 3-16mm, 3-2Smm, 4-6mrri, 5-12mm, 7-12mm, 7-20mm. 11 -3mm gouges:; No, 41 -14mm V tool Carver's bench Peg board Shallow screws Clamps Background punch Wood sealer Pecan-colored oil stain Oil paint in Titanium White (optional) Pattern Located in Full Size Pattern Section No. 1! CARVE A WEDDING PLAQUE INSTRUCTIONS This carving, which shows two hands united over a heart symbol, can be used to commemorate a wedding or given as a keepsake anniversary gift. Creative Woodworks S. Crafts January 2003 • 25 Step 4. Use the V tool to make a stop cut around the hands to separate the hands from the heart, Treat both hands as one unit; you do not separate the hands at this time. Also, do not worry about the spaces between the fingers, etc. It is easier to carve these spaces after you have lowered the mass of the heart. Step 5. Lower the heart about 1/4". The wide No. 3 used here helps to keep the wood of the heart level as well. Step 6. After the wood of the heart has been lowered, go back and separate the fingers by carving out the spaces between them. Here you can see that the hands have not been separated yet. We have three distinct layers: the background, the heart, and the two hands. continued on page 38 by Ivan Whillock Step 1. Trace the pattern onto the wood. Secure the carving to the bench with clamps or another hold-down device. Note: a very handy system is to use pegboard with shallow screws. Attach the pegboard to the back of the carving and clamp the peg-board to the bench so the clamps will be out of the way of the carving.. Step 2. Lower the background wood about 1/2". Use the V tool to make a stop cut around the outside of the pattern and use the No. 3 sweep tools to lower the background. Vary the size according to the space available, but use as big a fool as you can for the space. This makes leveling the background easier. In this photo I am shown cutting away background wood with a No. 3-25 mm gouge. With the large tool I can make fewer cuts which makes it easier to level the background. Step 3. Draw a line around the edge so that you can get the background level throughout. |


