Creative Woodworks & crafts 2003-01, страница 79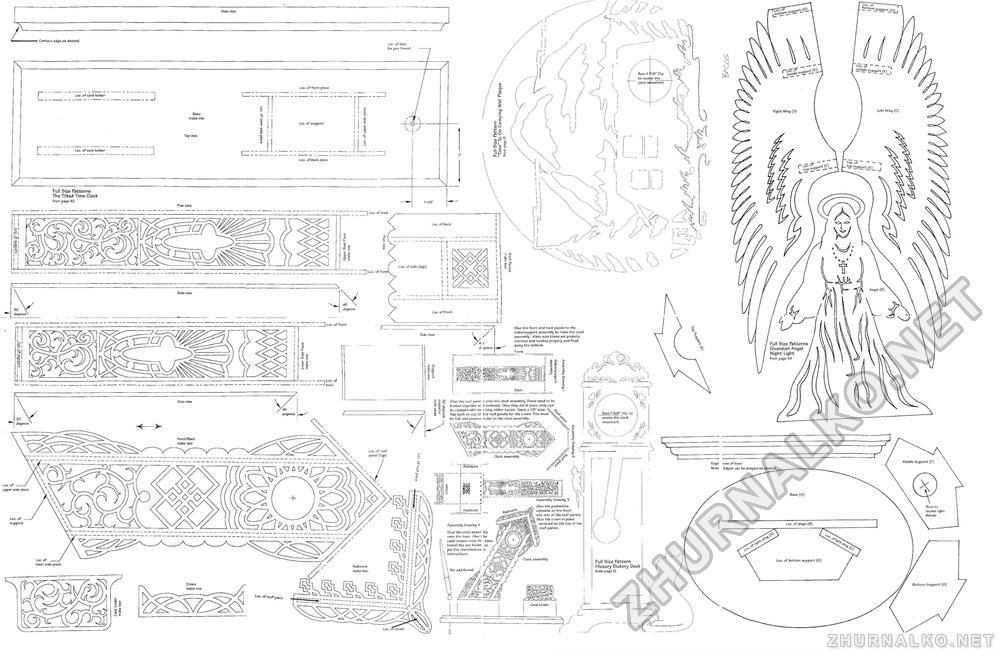
Cog. & bottow Loc. S? middle Right Wing (D) of — - top supf)£rtjEj Full Size Patterns Guardian Angel Night Light , from page 54 / Side view Contour edge as desired Bore 1-S/S"-Dia. to receive the clock movement Loc. of front piece Loc. of card holder Loc. of card holder Full Size Patterns The Tilted Time Clock from page 42 Plan view view Loc. of front | Loc. of front Glue the front and back pieces to the sides/support assembly to make the clock assembly. Make sure these are properly oriented and located properly and flush along the bottom Front Side view Glue the roof panel s onto the clock assembly. These need to be butted together an i centered. Once they are in place, they can be clamped with tw ~> long rubber bands. Sand a 1/S" wide flat spot on top of the roof panels for the crown. This must < be flat and perpenc icular to the clock assembly. VC^vSs^^sSS ^—v—v—v —v " Side view receive tne movement Front/Back make two Clock assembly Pediment Assembly Drawing 3 ■ • _ Glue the pediments 'J frfj centered on the front S\ and rear of the roof panels. VVi Glue the crown in place, > vA cer,tered on the top of the \ Va\ roof panels. Assembly Prywing 4 Glue the clock assen bly onto the base. Glue 1 he card holders onto th, : base. Install the pen hoidfii as per the manufacture! s instructions. I Clock assembly Full Size Pattern Hickory Pickory Pock from page 12 Pediment make two Crown make one Card holder Loc. of crown Loc- of angel (B) Loc. of bottom support (G) view of base Edges can be shaped as desired. Base(A) Bottom Support (G) |


