Creative Woodworks & crafts 2003-11, страница 24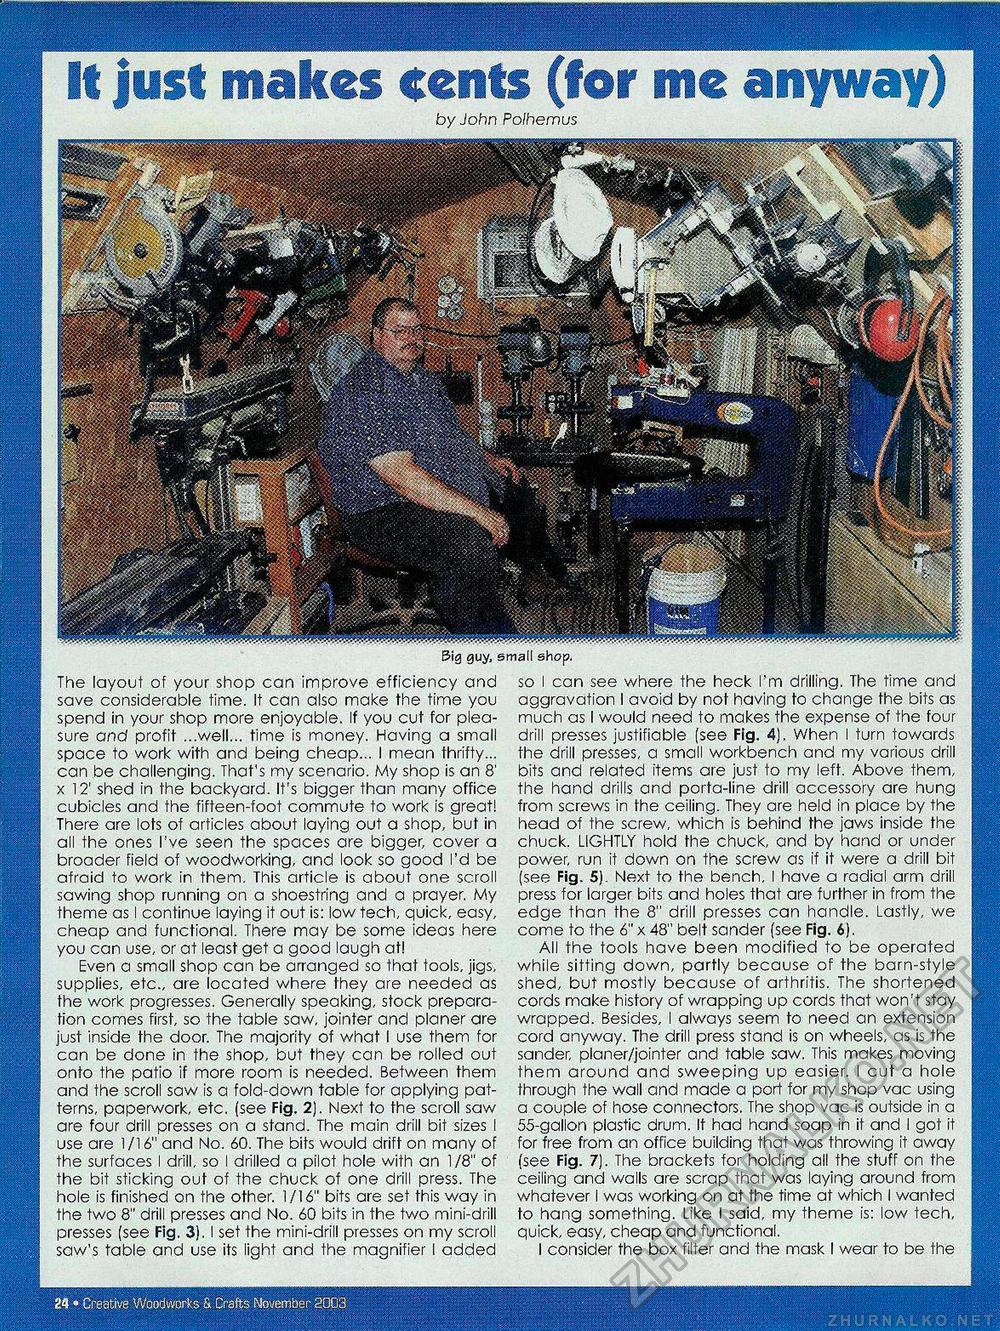
it just makes cents (for me anyway) by John Polhemus Big guy,! The layout of your shop can improve efficiency and save considerable time. It can also make the time you spend in your shop more enjoyable. If you cut for pleasure and profit ...well... time is money. Having a small space to work with and being cheap... I mean thrifty... can be challenging. That's my scenario. My shop is an 8' x 12' shed in the backyard. It's bigger than many office cubicles and the fifteen-foot commute to work is great! There are lots of articles about laying out a shop, but in all the ones I've seen the spaces are bigger, cover a broader field of woodworking, and look so good I'd be afraid to work in them. This article is about one scroll sawing shop running on a shoestring and a prayer. My theme as I continue laying it out is: low tech, quick, easy, cheap and functional. There may be some ideas here you can use, or at least get a good laugh at! Even a small shop can be arranged so that tools, jigs, supplies, etc., are located where they are needed as the work progresses. Generally speaking, stock preparation comes first, so the table saw, jointer and planer are just inside the door. The majority of what I use them for can be done in the shop, but they can be rolled out onto the patio if more room is needed. Between them and the scroll saw is a fold-down table for applying patterns, paperwork, etc. (see Fig. 2). Next to the scroll saw are four drill presses on a stand. The main drill bit sizes I use are 1/16" and No. 60. The bits would drift on many of the surfaces I drill, so I drilled a pilot hole with an 1/8" of the bit sticking out of the chuck of one drill press. The hole is finished on the other. 1/16" bits are set this way in the two 8" drill presses and No. 60 bits in the two mini-drill presses (see Fig. 3). I set the mini-drill presses on my scroll saw's table and use its light and the magnifier I added so I can see where the heck I'm drilling. The time and aggravation I avoid by not having to change the bits as much as I would need to makes the expense of the four drill presses justifiable (see Fig. 4). When I turn towards the drill presses, a small workbench and my various drill bits and related items are just to my left. Above them, the hand drills and porta-line drill accessory are hung from screws in the ceiling. They are held in place by the head of the screw, which is behind the jaws inside the chuck. LIGHTLY hold the chuck, and by hand or under power, run it down on the screw as if it were a drill bit (see Fig. 5). Next to the bench, I have a radial arm drill press for larger bits and holes that are further in from the edge than the 8" drill presses can handle. Lastly, we come to the 6" x 48" belt sander (see Fig. 6). All the tools have been modified to be operated while sitting down, partly because of the barn-style shed, but mostly because of arthritis. The shortened cords make history of wrapping up cords that won't stay wrapped. Besides, I always seem to need an extension cord anyway. The drill press stand is on wheels, as is the sander, planer/jointer and table saw. This makes moving them around and sweeping up easier. I cut a hole through the wall and made a port for my shop vac using a couple of hose connectors. The shop vac is outside in a 55-gallon plastic drum. It had hand soap in it and I got it for free from an office building that was throwing it away (see Fig. 7). The brackets for holding all the stuff on the ceiling and walls are scrap that was laying around from whatever I was working on at the time at which I wanted to hang something. Like I said, my theme is: low tech, quick, easy, cheap and functional. I consider the box filter and the mask I wear to be the 24 « Creative Woodworks S. Grafts November 2003 |


