Creative Woodworks & crafts 2004-01, страница 8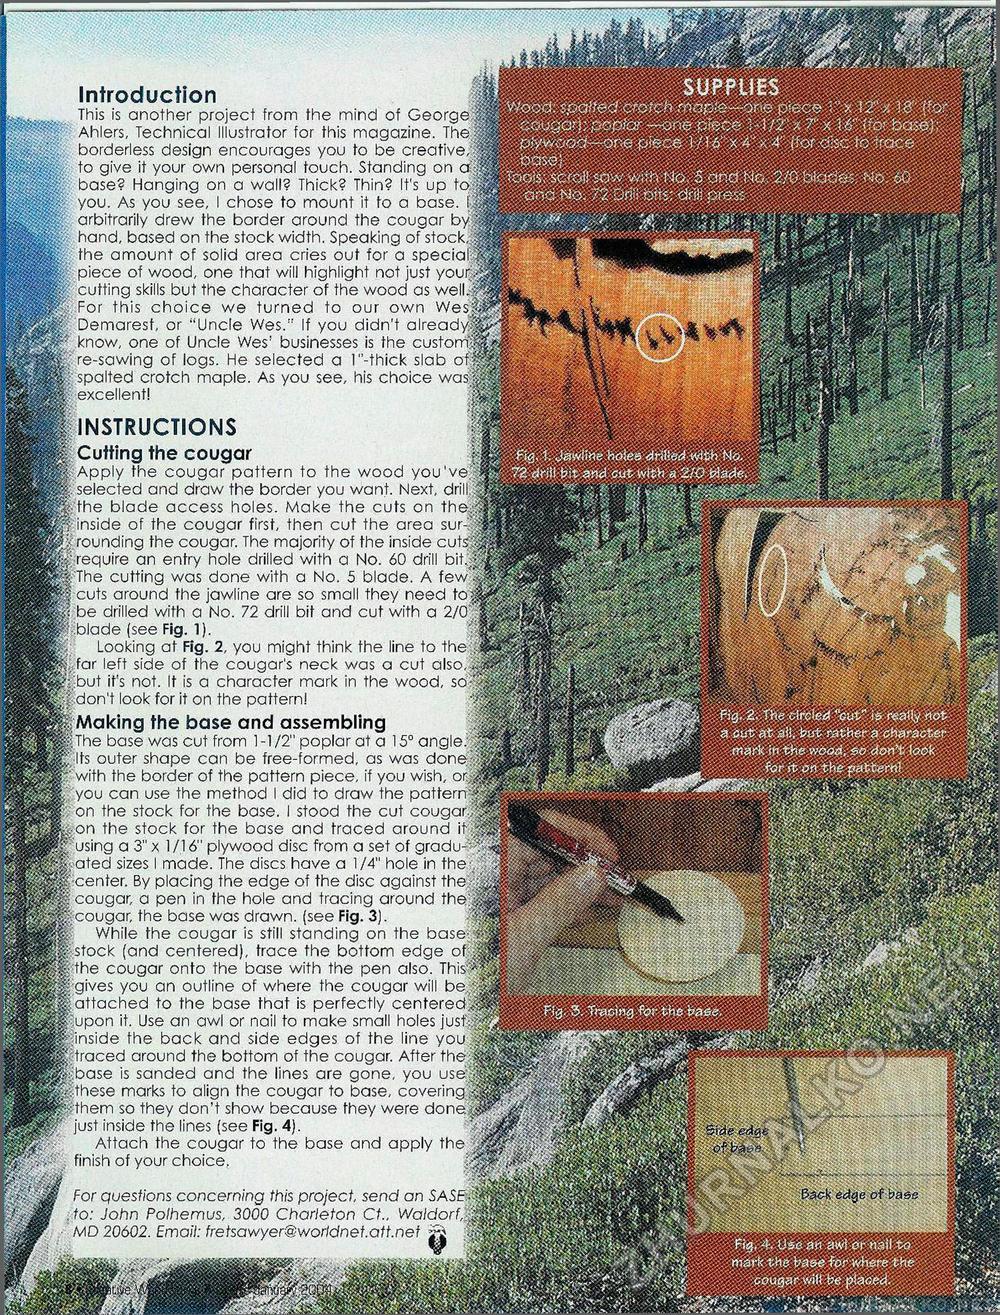
§§ WSMSm circlet is* really wot ||f|||g| bet character i jj| -mgrfc m the wdaa, || cforfi? look X for rfc * » the jpaJ%|§ Introduction .Jy| This is another project from the mind of George'f§||| Ahlers, Technical Illustrator for this magazine. Th< '-% borderless design encourages you to be creative to give it your own personal touch. Standing on aif|||i |H base? Hanging on a wall? Thick? Thin? It's up tq||gH| you. As you see, I chose to mount it to a base, fcjglfl arbitrarily drew the border around the cougar by|^@ pV hand, based on the stock width. Speaking of stock,;|||||P ||| the amount of solid area cries out for a special: H; piece of wood, one that will highlight not just youry§#| fe; cutting skills but the character of the wood as w<= I s||| For this choice we turned to our own Wesjp|m Demaresf, or "Uncle Wes." If you didn't already||£;Jg 0; know, one of Uncle Wes! businesses is the customm|ffi Kjre-sawing of logs. He selected a 1 "-thick slab °f.%|f|| if tspalted crotch maple. As you see, his choice wa^m excellent! Wm&k fcKggCy. •f'f.'f'SiMS p INSTRUCTIONS Ki Cutting the cougar §p. Apply the cougar pattern to the wood you've;^® §||;. selected and draw the border you want. Next, drill. |T' the blade access holes. Make the cuts on theff>f«l MB inside of the cougar first, then cut the area sur- JSi Wljlrounding the cougar. The majority of the inside cut: |p|| §fe: require an entry hole drilled with a No. 60 drill bit;M||| The cutting was done with a No. 5 blade. A few-«|||| ||P cuts around the jawline are so small they need to^|||f| mi) be drilled with a No. 72 drill bit and cut with a 2/0)f||ij ®?j;blade (see Fig. 1). m [ Looking at Fig. 2, you might think the line to the,':|||fl far left side of the cougar's neck was a cut also, ||j,:but it's not. It is a character mark in the wood, - J fet don't look for it on the pattern! IpMaking the base and assembling li11 |||iThe base was cut from 1 -1 /2" poplar at a 15° angle. ||l|l limits outer shape can be free-formed, as was doneT-Sgij Mr-with the border of the pottern piece, if you wish, or ^ts.you can use the method I did to draw the pattem-'^^fe m on the stock for the base. I stood the cut cougar,;||i| M0On the stock for the base and traced around iftMSH P? using a 3" x 1/16" plywood disc from a set of gradu- ^f' ffcated sizes I made. The discs have a 1/4" hole in the-, fe' center. By placing the edge of the disc against the • S|f|: cougar, a pen in the hole and tracing around the:M|p 111 cou9ar' the base was drawn, (see Fig. 3). fffl While the cougar is still standing on the basev«||p |;:|;:;Stock (and centered), trace the bottom edge of :.§|ffe p|f the cougar onto the base with the pen also. This*;|;||| |£||;gives you an outline of where the cougar will be. J'MSl |||| attached to the base that is perfectly centered>|||p |p| upon it. Use an awl or nail to make small holes just |||;?inside the back and side edges of the line you fM^ fe:-traced around the bottom of the cougar. After the ipjibase is sanded and the lines are gone, you use'-^M ^iithese marks to align the cougar to base, covering IpMlhem so they don't show because they were done|JP^| W just inside the lines (see Fig. 4). \0mBj Attach the cougar to the base and apply the mBS finish of your choice, For questions concerning this project, send an SAS£ to: John Polhemus, 3000 Charleton Ct„ Waldorf,-MD 20602. Ema/7: fretsawyer@worldnet.att.net jw ; |


