Creative Woodworks & crafts 2004-11, страница 12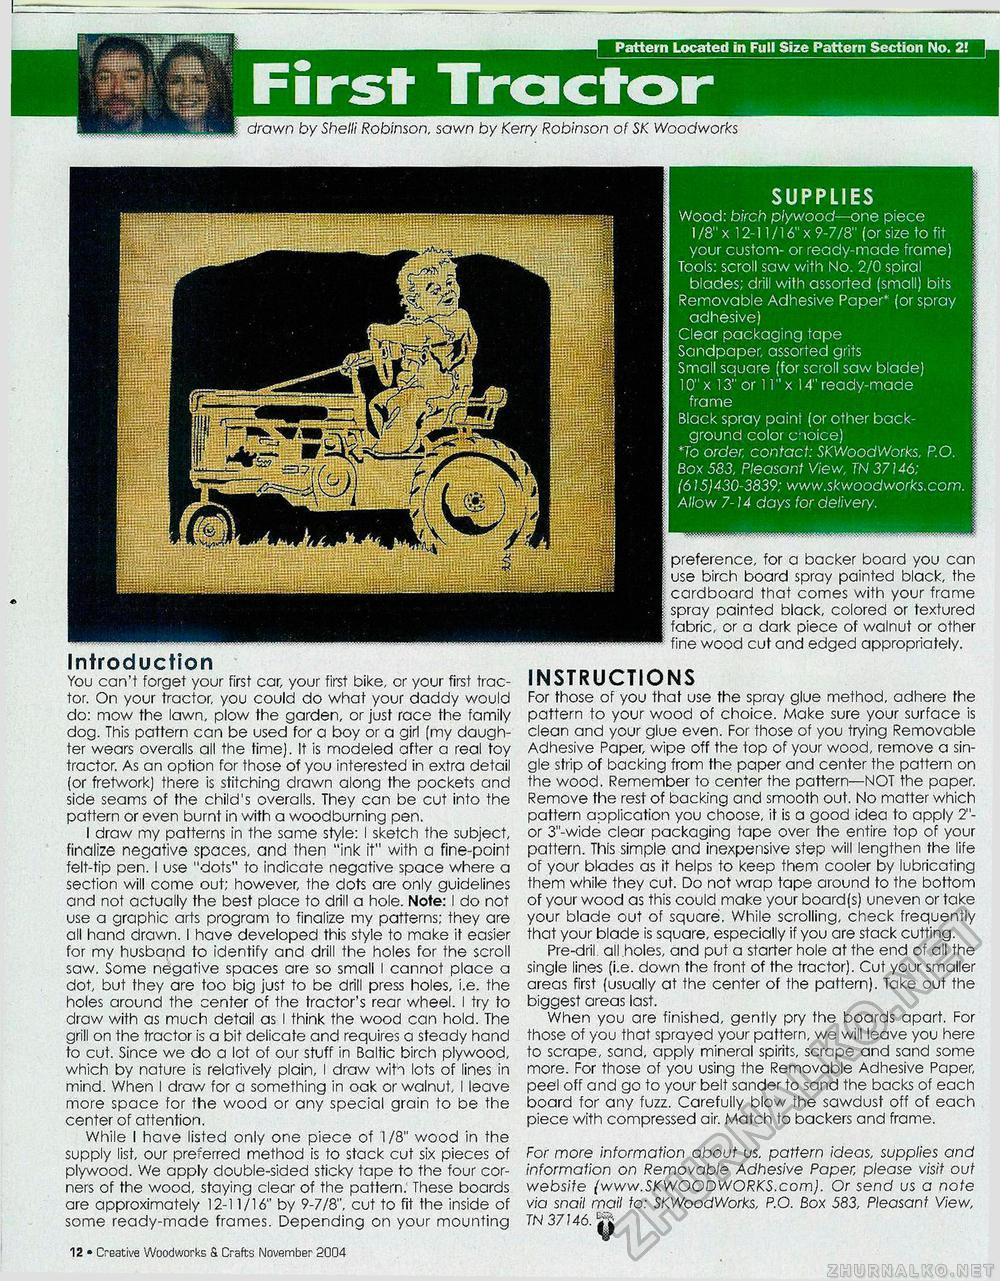
Pattern Located in Full Size Pattern Section No. 2! drawn by Shelli Robinson, sawn by Kerry Robinson of SK Woodworks SUPPLIES Wood: birch plywood—one piece 1 /8" x 12-11 /16" x 9-7/8" (or size to fit your custom- or ready-made frame) Tools: scroll saw with No. 2/0 spiral blades; drill with assorted (small) bits Removable Adhesive Paper* (or spray adhesive) Clear packaging tape Sandpaper, assorted grits Small square (for scroll saw blade) 10" x 13" or 11" x 14" ready-made frame Black spray paint (or other background color ooice) *To order, contact: SKWoodWorks. P.O. Box 583, Pleasant View, TN 37146: (615)430-3839: www.skwoodworks.com. Allow 7-14 days for delivery. Introduction You can't forget your first car, your first bike, or your first tractor. On your tractor, you could do what your daddy would do: mow the lawn, plow the garden, or just race the family dog. This pattern can be used for a boy or a girl (my daughter wears overalls all the time). It is modeled after a real toy tractor. As an option for those of you interested in extra detail (or fretwork) there is stitching drawn along the pockets and side seams of the child's overalls. They can be cut into the pattern or even burnt in with a woodburning pen. I draw my patterns in the same style: I sketch the subject, finalize negative spaces, and then "ink it" with a fine-point felt-tip pen. I use "dots" to indicate negative space where a section will come out; however, the dots are only guidelines and not actually the best place to drill a hole. Note: I do not use a graphic arts program to finalize my patterns; they are all hand drawn. I have developed this style to make it easier for my husband to identify and drill the holes for the scroll saw. Some negative spaces are so small I cannot place a dot, but they are too big just to be drill press holes, i.e. the holes around the center of the tractor's rear wheel. I try to draw with as much detail as I think the wood can hold. The grill on the tractor is a bit delicate and requires a steady hand to cut. Since we do a lot of our stuff in Baltic birch plywood, which by nature is relatively plain, I draw witn lots of lines in mind. When I draw for a something in oak or walnut, I leave more space for the wood or any special grain to be the center of attention. While I have listed only one piece of 1/8" wood in the supply list, our preferred method is to stack cut six pieces of plywood. We apply double-sided sticky tape to the four corners of the wood, staying clear of the pattern. These boards are approximately 12-11/16" by 9-7/8", cut to fit the inside of some ready-made frames. Depending on your mounting preference, for a backer board you can use birch board spray painted black, the cardboard that comes with your frame spray painted black, colored or textured fabric, or a dark piece of walnut or other fine wood cut and edged appropriately. INSTRUCTIONS For those of you that use the spray glue method, adhere the pattern to your wood of choice. Make sure your surface is clean and your glue even. For those of you trying Removable Adhesive Paper, wipe off the top of your wood, remove a single strip of backing from the paper and center the pattern on the wood. Remember to center the pattern—NOT the paper. Remove the rest of backing and smooth out. No matter which pattern application you choose, it is a good idea to apply 2"-or 3"-wide clear packaging tape over the entire top of your pattern. This simple and inexpensive step will lengthen the life of your blades as it helps to keep them cooler by lubricating them while they cut. Do not wrap tape around to the bottom of your wood as this could make your board(s) uneven or take your blade out of square. While scrolling, check frequently that your blade is square, especially if you are stack cutting. Pre-dril. all .holes, and put a starter hole at the end of all the single lines (i.e. down the front of the tractor). Cut your smaller areas first (usually at the center of the pattern). Take out the biggest areas last. When you are finished, gently pry the boards apart. For those of you that sprayed your pattern, we will leave you here to scrape, sand, apply mineral spirits, scrape and sand some more. For those of you using the Removable Adhesive Paper, peel off and go to your belt sander to sand the backs of each board for any fuzz. Carefully blow the sawdust off of each piece with compressed air. Match to backers and frame. For more information about us. pattern ideas, supplies and information on Removable Adhesive Paper, please visit out website (www.SKWOODWORKS.comj. Or send us a note via snail mail to: SKWoodWorks, P.O. Box 583, Pleasant View, TN 37146. H 12 • Creative Woodworks S. Crafts November 2004 |


