Creative Woodworks & crafts 2004-11, страница 16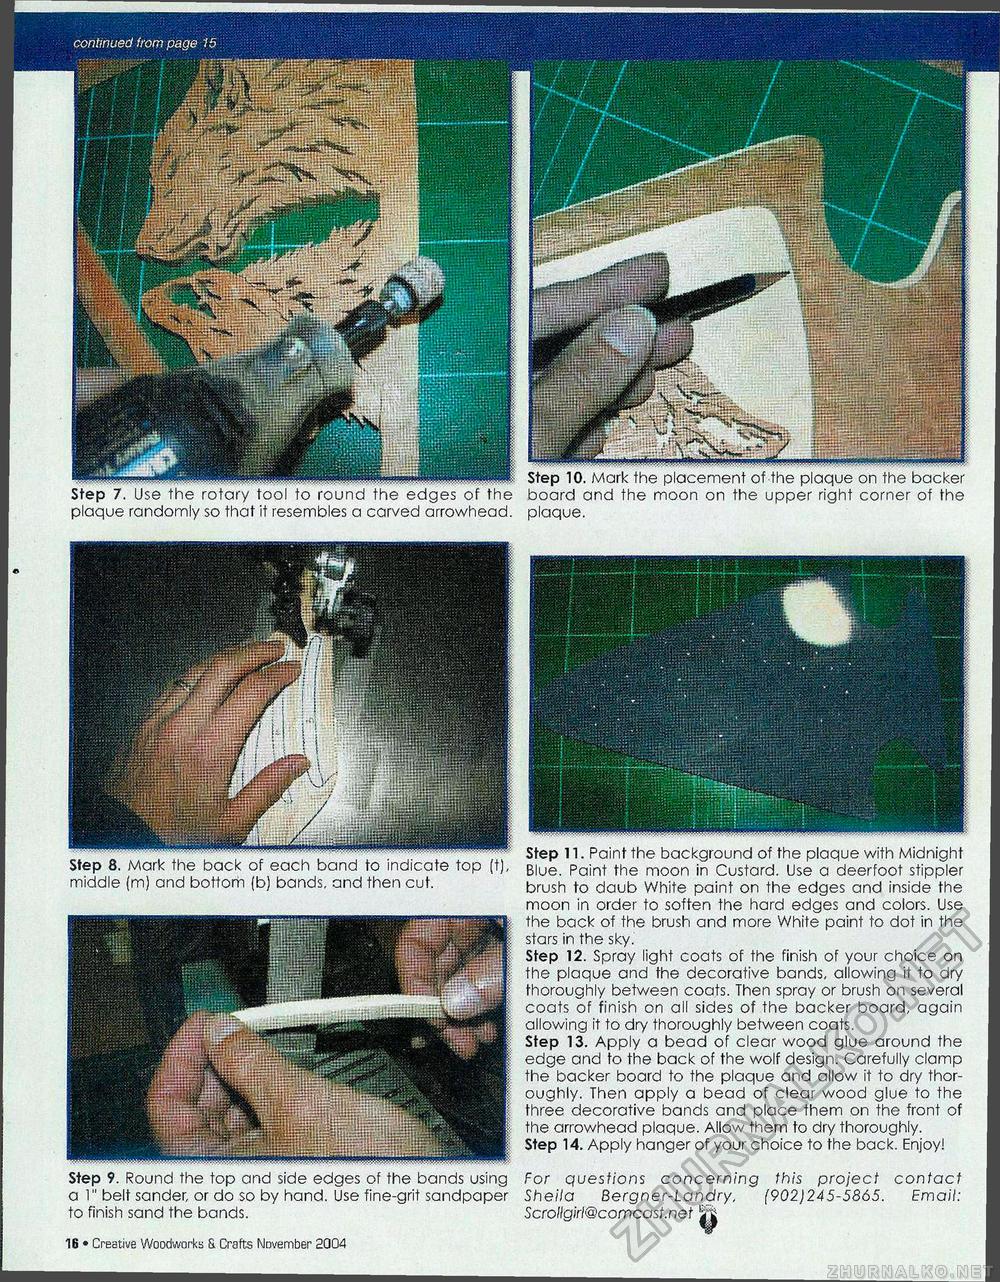
continued from page 15 Step 10. Mark the placement of the plaque on the backer board and the moon on the upper right comer of the plaque. Step 7. Use the rotary tool to round the edges of the plaque randomly so that it resembles a carved arrowhead. Step 8. Mark the back of each band to indicate top (t), middle (m) and bottom (b) bands, and then cut. Step 11. Paint the background of the plaque with Midnight Blue. Paint the moon in Custard. Use a deerfoot stippler brush to daub White paint on the edges and inside the moon in order to soften the hard edges and colors. Use the back of the brush and more White paint to dot in the stars in the sky. Step 12. Spray light coats of the finish of your choice on the plaque and the decorative bands, allowing it to dry thoroughly between coats. Then spray or brush on several coats of finish on all sides of the backer board, again allowing it to dry thoroughly between coats. Step 13. Apply a bead of clear wood glue around the edge and to the back of the wolf design. Carefully clamp the backer board to the plaque and allow it to dry thoroughly. Then apply a bead of clear wood glue to the three decorative bands and place them on the front of the arrowhead plaque. Allow them to dry thoroughly. Step 14. Apply hanger of your choice to the back. Enjoy! Step 9. Round the top and side edges of the bands using a 1" belt sander, or do so by hand. Use fine-grit sandpaper to finish sand the bands. 16 • Creative Woodworks S. Crafts November 2004 For questions concerning this project contact Sheila Bergner-Landry, (902)245-5865. Email: Scrollgirl@comcast.net ^ |


