Creative Woodworks & crafts 2005-04, страница 53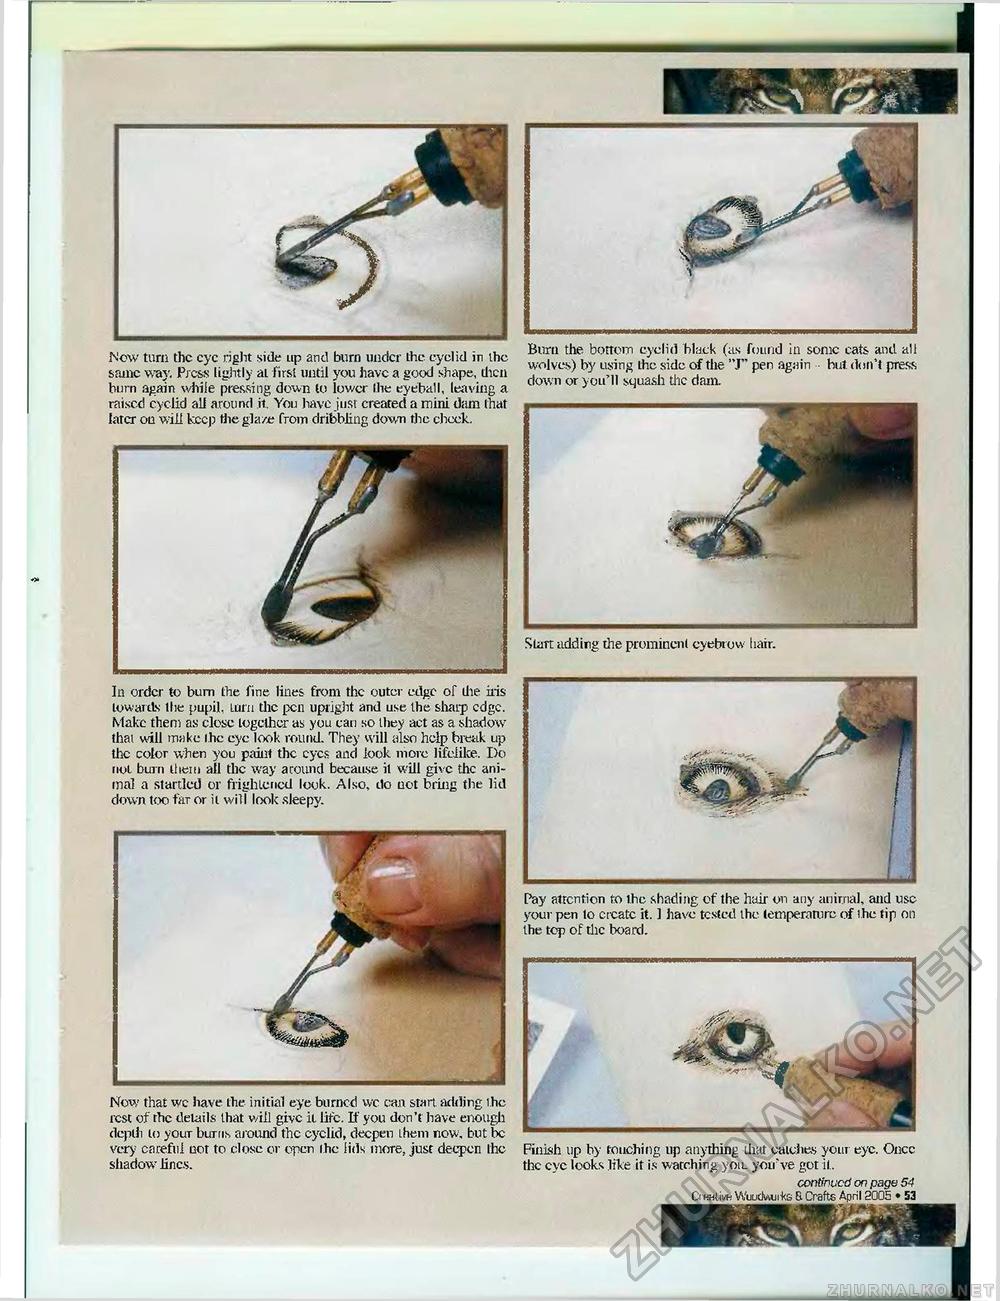
I Burn the bottom eyelid black (as found in some cats and all wolves) by using the side of the "J" pen again hut don't press down or you'll squash the dam. Now turn the eye right side up and burn under the eyelid in the same way. Press lightly at first until you have a good shape, dicn burn again while pressing down to lower the eyeball, leaving a raised eyelid all around it. You have just created a mini dam that later ou will keep the glaze from dribbling down the check. Start adding the prominent eyebrow hair. In order to burn the fine lines from the outer edge of die iris towards the pupil, turn the pen upright and use the sharp edge. Make them as closc together as you can so they act as a shadow that will make the eye look round. They will also help break up the color when you paint the eyes and look more lifelike. Do not burn them all the way around because it will give the animal a startled or frightened look. Also, do uot bring the lid down too far or it will look sleepy. Pay attention to the shading of the hair 011 any animal, and use your pen lo crcatc it. 1 have tested the lemperanire of the tip on the top of the board. Now that we have the initial eye burned wc can start adding the rest of the details that will give it lite. If you don't have enough depth to youT burns around the eyelid, deepen them now. but be very careful uot to closc or open the lids more, just deepen the shadowr lines. Finish tip by touching up anything that catches your eye. Oncc the eye looks like it is watching you. you've got it. continued on page 54 O-HHiivH WuucUuite & Crafts April 2005 • 53 |


