Creative Woodworks & crafts 2005-06, страница 6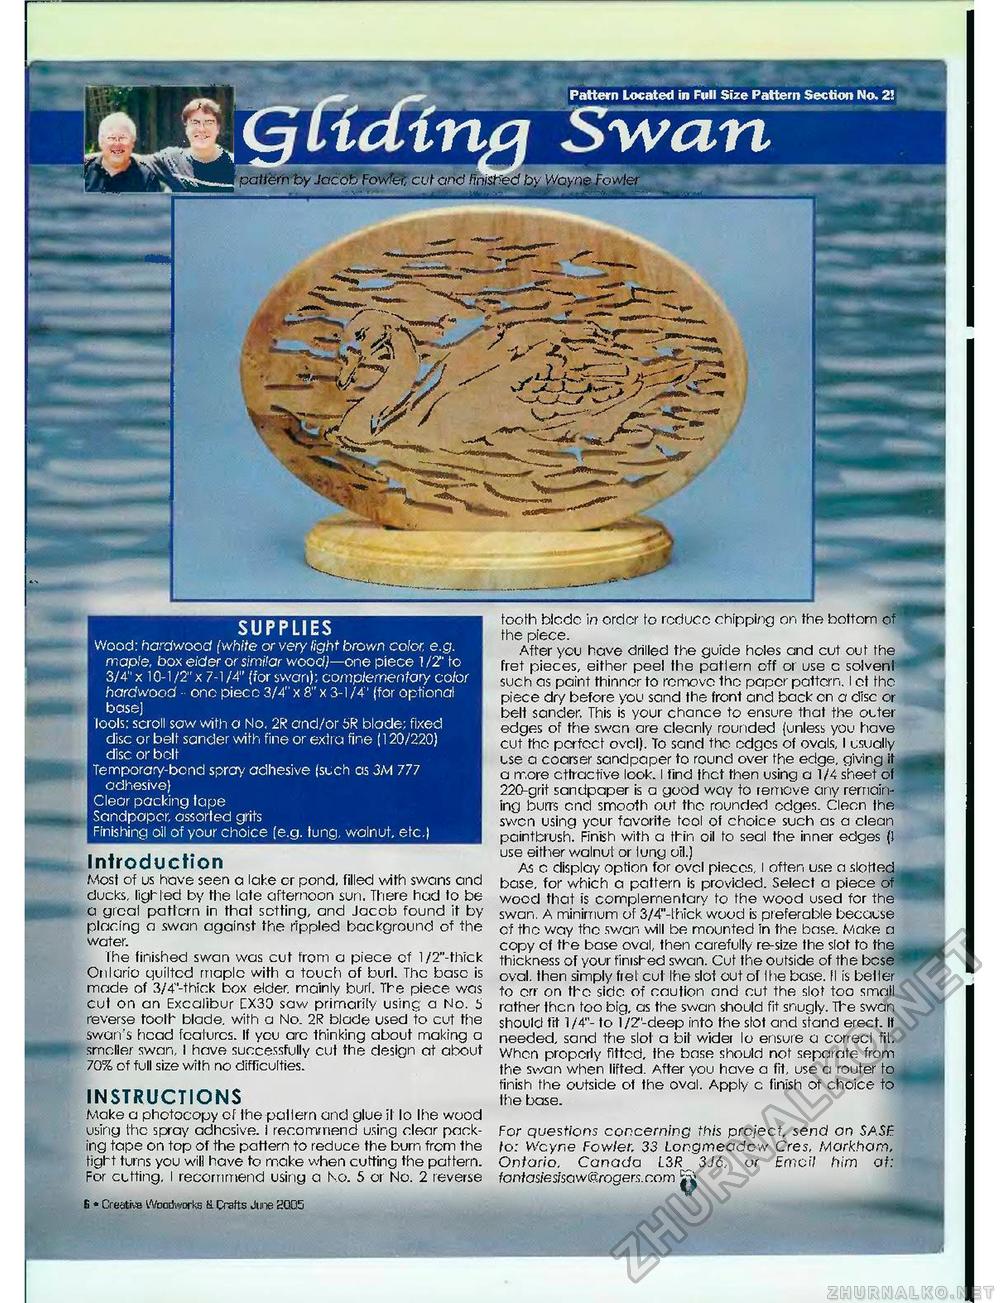
Pattern Located in Full Size Pattern Section No. 21 wan f pattern by Jacob FowfSt cut and tinistied by Wayne Fowler ...... " —• ■grf'--- ——a^iaM. SUPPLIES Wood: hardwood (white or very light brown color, e.g. maple, box eider or similar woodj—one piece 1 IT to 3/4" x 10-1/2" x 7-1 /4" (for swan); complementary color hardwood ■ one piecc 3/4" x 8" x 3-1/4'' (for optional base] tools; scroll saw with a No. 2R and/or 5R blade; fixed disc or belt sander with fine or extra fine (120/220) disc or bolt Temporary-bond spray adhesive (such as 3M 777 adhesive) Clear packing tape Sandpaper, assorted grits Finishing oil of your choice [e.g. tung, walnut, etc.) Introduction Most of us have seen a lake c-r pond, filled with swans and ducks, lighted by the late afternoon sun. There had to be a grcal pattern in that setting, and Jacob found it by placing a swan against the rippled background of the water. The finished swan was cut from a piece of l/2"-thick Onlario quilted maple with a touch of burl. The base is mode of 3/4"-thick box elder, mainly burl. The piece was cut on an Excalibur CX30 saw primarily using a No. 5 reverse toolh blade, with a No. 2R blade used to cut the swan's head features. If you arc thinking about making a smeller swan, I have successfully cut the design at about 70% of full size with no difficulties. INSTRUCTIONS Make a photocopy of the patlern and glue il io Ihe wood using the spray adhesive. I recommend using clear packing tape on top of the patlern to reduce the burn from the tight turns you will have to make when cutting the pattern. For cutting. I recommend using a No. 5 or No. 2 reverse For questions concerning this project, send on SASF to: H'cyne Fowler. 33 Longmeadc-w Cres, Markham, Ontario, Canada L3R 3J6, or Emcil him at: fontasiesisaw@rogers.com Sri tooth biede in order to roduco chipping on the bottom of the piece. After you have drilled the guide holes and cut out the fret pieces, either peel the patlern off or use c solvent * such as paint thinner to remove the paper pattern. I ot the piece dry before you sand the front and back on a disc or belt sander. This is your chance to ensure that the outer edges of the swen are eleenly rounded (unless you have cut the perfcct oval). To sand the edges of ovals, i usually use a coarser sandpaper to round over the edge, giving it ^ a rr.ore cttractive look. I find thct then using a 1/4 sheet ot 220-grit sandpaper is a good way to remove any remaining burrs and smooth out the rounded edges. Clean the swen using ycur favorite tool of choice such as a clean paintbrush. Finish with a thin oil to seal the inner edges (1 use either walnut or lung oil.) As c display option for ovel pieces. I after, use a slotted__ base, for which a pattern is provided. Select a piece of ' wood that is complementary to the wood used for the swan. A minimum of 3/4"-lhick wood is preferable because of the way the swan will be mounted in the base. Make a copy of the base oval, then carefully re-size the slot to the V| thickness of your finished swan. Cut the outside of the bese * oval, then simply frel cut Ihe slot out of Ihe base. II is betler to err on the side of caution and cut the slot too small rather then too big, as the swan should fit snugly. The swan should fit 1/4"- to l/Z'-deep into the slot and stand erect. If needed, sand the slot a bit wider lo ensure a correal fit. When property fitted, the base should not separate from the swan when lifted. After you have a fit, use a router to finish the outside of the oval. Apply c finish of choice to ihe base. £ • Creative Woodworks K. Crafts June SQ05 |


