Creative Woodworks & crafts 2005-09, страница 38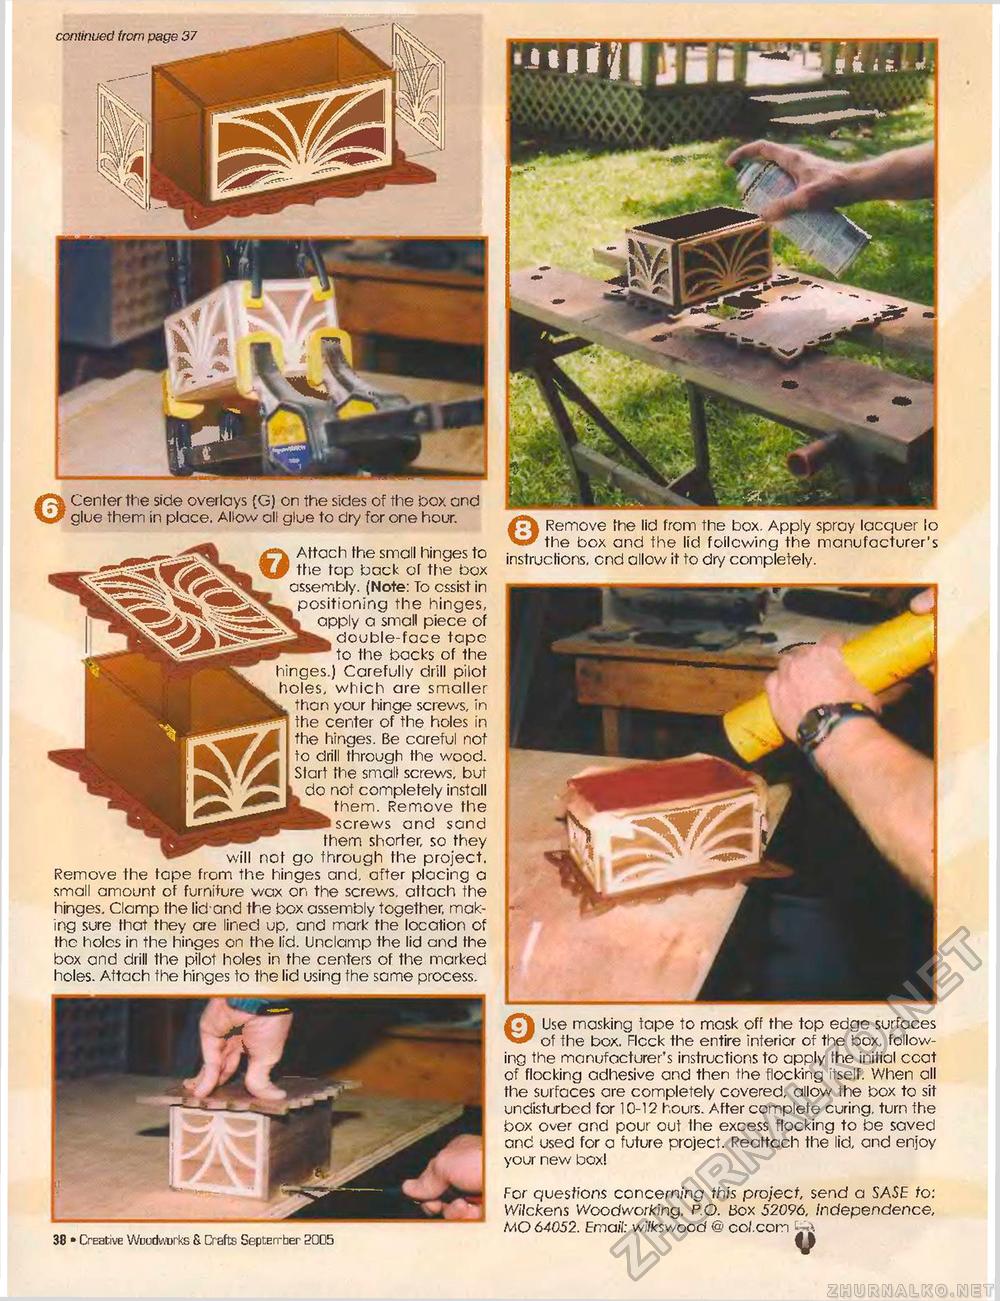
Center the side overlays (G) on the sides of the box and glue them in place. Allow all glue to dry for one hour. 38 • Creative Wbcdwnrks & Crafts September 2005 ©Remove the lid from the box. Apply spray lacquer lo the box and fhe lid following the manufacturer's instructions, end allow it to dry completely. ©Use masking tape to mask off the top edge surfaces of the box. Flock the entire interior of the box, following the manufacturer's instructions to apply the initial coat of flocking adhesive and then the flocking itself. When all fhe surfaces are completely covered, allow the box to sit undisturbed for 10-12 hours. After complete curing, turn fhe box over and pour out the excess flocking to be saved and used for a future project. Reattach the lid, and enjoy your new box! For questions concerning fh/s project, send a SASE to: Wile kens Woodworking. P.O. Box 52096, Independence, MO 64052. Email: wi/kswood @ co/.com 0 Attach fhe small hinges to the top back of the box assembly. (Note: To cssist in positioning the hinges, apply a small piece of double-face tape to the backs of the ) Carefully drill pilot which are smaller your hinge screws, in ;enter of the holes in linges. Be careful not ill through fhe wood, fhe small screws, but not completely install them. Remove the screws and sand them shorter, so they will not go through the project. Remove the tope from the hinges and. after placing a small amount of furniture wax on the screws, attach the hinges. Clamp the lid'and the box assembly together, making sure that they are lined up. and mark the location of the holes in the hinges on the lid. Unclamp the lid and the box and drill the pilot holes in the centers of the marked holes. Attach the hinges to the lid using the same process. |


