Creative Woodworks & crafts 2009-04, страница 27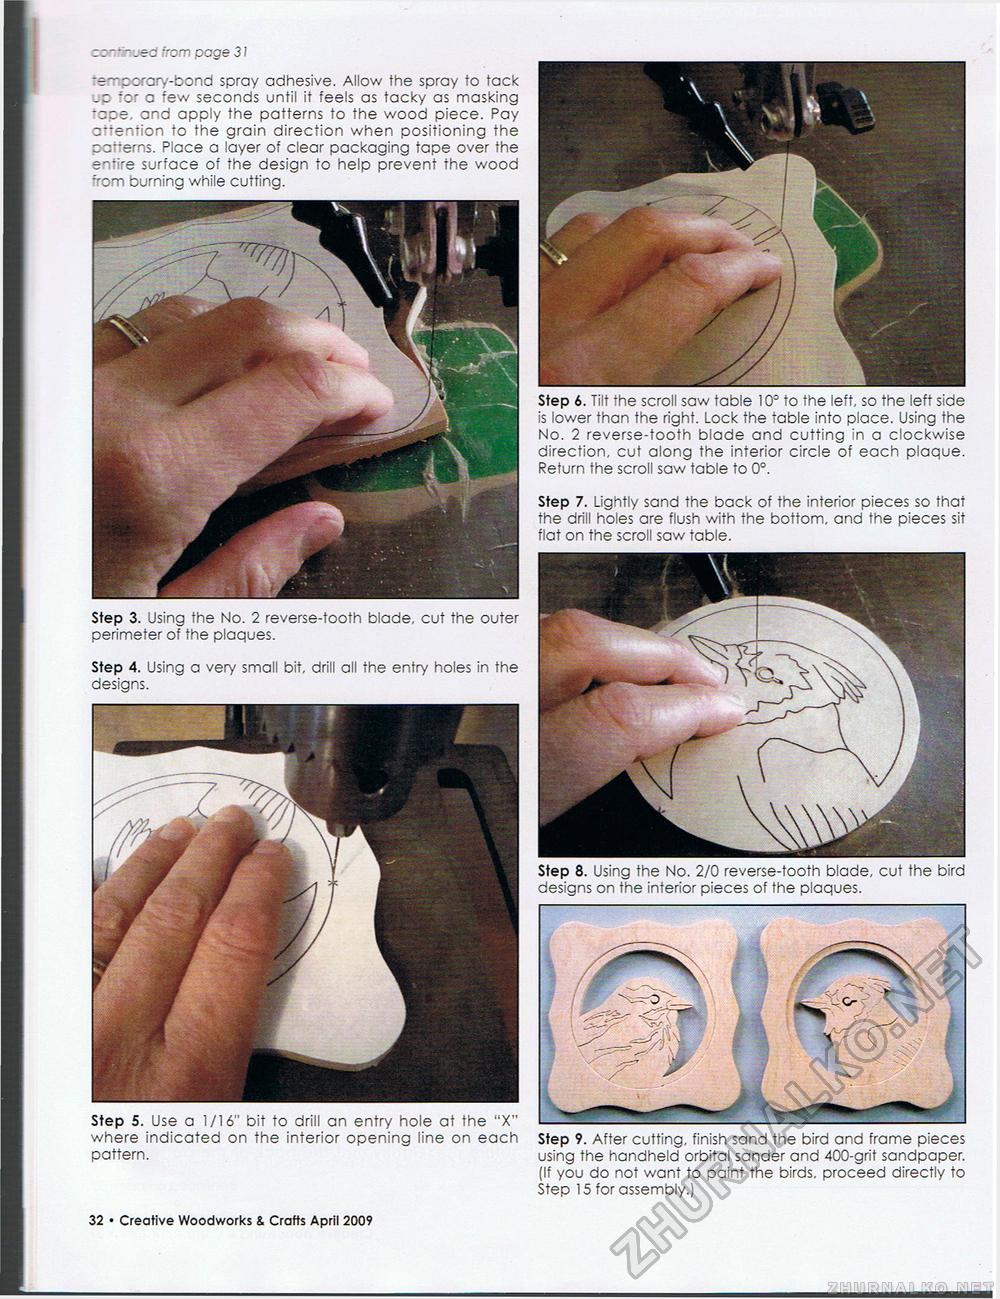
r r — jed from page 31 "e^ccrory-bond spray adhesive. Allow the spray to tack *or a few seconds until it feels as tacky as masking -ace., and apply the patterns to the wood piece. Pay attention to the grain direction when positioning the cat-ems. Place a layer of clear packaging tape over the er*ire surface of the design to help prevent the wood Tom burning while cutting. Step 3. Using the No. 2 reverse-tooth blade, cut the outer perimeter of the plaques. Step 4. Using a very small bit, drill all the entry holes in the designs. Step 5. Use a 1/16" bit to drill an entry hole at the "X" where indicated on the interior opening line on each pattern. Step 6. Tilt the scroll saw table 10° to the left, so the left side is lower than the right. Lock the table into place. Using the No. 2 reverse-tooth blade and cutting in a clockwise direction, cut along the interior circle of each plaque. Return the scroll saw table to 0°. Step 7. Lightly sand the back of the interior pieces so that the drill holes are flush with the bottom, and the pieces sit flat on the scroll saw table. Step 8. Using the No. 2/0 reverse-tooth blade, cut the bird designs on the interior pieces of the plaques. Step 9. After cutting, finish sand the bird and frame pieces using the handheld orbital sander and 400-grit sandpaper. (If you do not want to paint the birds, proceed directly to Step 15 for assembly.) 32 • Creative Woodworks & Crafts April 2009 |


