Creative Woodworks & crafts 2009-04, страница 6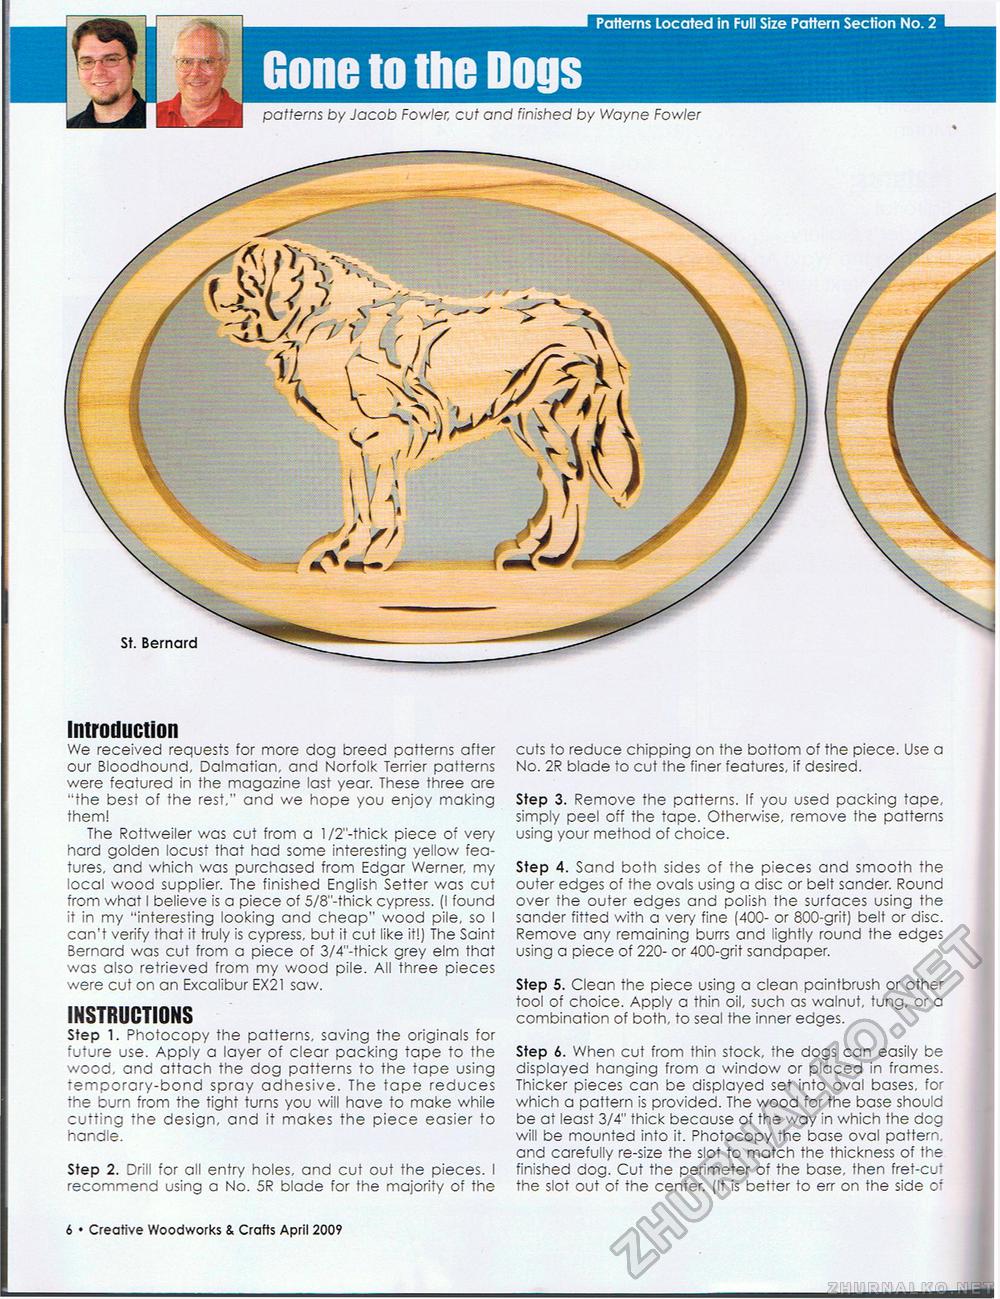
Introduction We received requests for more dog breed patterns after our Bloodhound, Dalmatian, and Norfolk Terrier patterns were featured in the magazine last year. These three are "the best of the rest," and we hope you enjoy making them! The Rottweiler was cut from a l/2"-thick piece of very hard golden locust that had some interesting yellow features, and which was purchased from Edgar Werner, my local wood supplier. The finished English Setter was cut from what I believe is a piece of 5/8"-thick cypress. (I found it in my "interesting looking and cheap" wood pile, so I can't verify that it truly is cypress, but it cut like it!) The Saint Bernard was cut from a piece of 3/4"-thick grey elm that was also retrieved from my wood pile. All three pieces were cut on an Excalibur EX21 saw. INSTRUCTIONS Step 1. Photocopy the patterns, saving the originals for future use. Apply a layer of clear packing tape to the wood, and attach the dog patterns to the tape using temporary-bond spray adhesive. The tape reduces the burn from the tight turns you will have to make while cutting the design, and it makes the piece easier to handle. Step 2. Drill for all entry holes, and cut out the pieces. I recommend using a No. 5R blade for the majority of the cuts to reduce chipping on the bottom of the piece. Use a No. 2R blade to cut the finer features, if desired. Step 3. Remove the patterns. If you used packing tape, simply peel off the tape. Otherwise, remove the patterns using your method of choice. Step 4. Sand both sides of the pieces and smooth the outer edges of the ovals using a disc or belt sander. Round over the outer edges and polish the surfaces using the sander fitted with a very fine (400- or 800-grit) belt or disc. Remove any remaining burrs and lightly round the edges using a piece of 220- or 400-grit sandpaper. Step 5. Clean the piece using a clean paintbrush or other tool of choice. Apply a thin oil, such as walnut, tung, or a combination of both, to seal the inner edges. Step 6. When cut from thin stock, the dogs can easily be displayed hanging from a window or placed in frames. Thicker pieces can be displayed set into oval bases, for which a pattern is provided. The wood for the base should be at least 3/4" thick because of the way in which the dog will be mounted into it. Photocopy the base oval pattern, and carefully re-size the slot to match the thickness of the finished dog. Cut the perimeter of the base, then fret-cut the slot out of the center. (It is better to err on the side of Creative Woodworks & Crafts April 2009 • 11 St. Bernard |


