Creative Woodworks & crafts-103-2004-Holiday, страница 45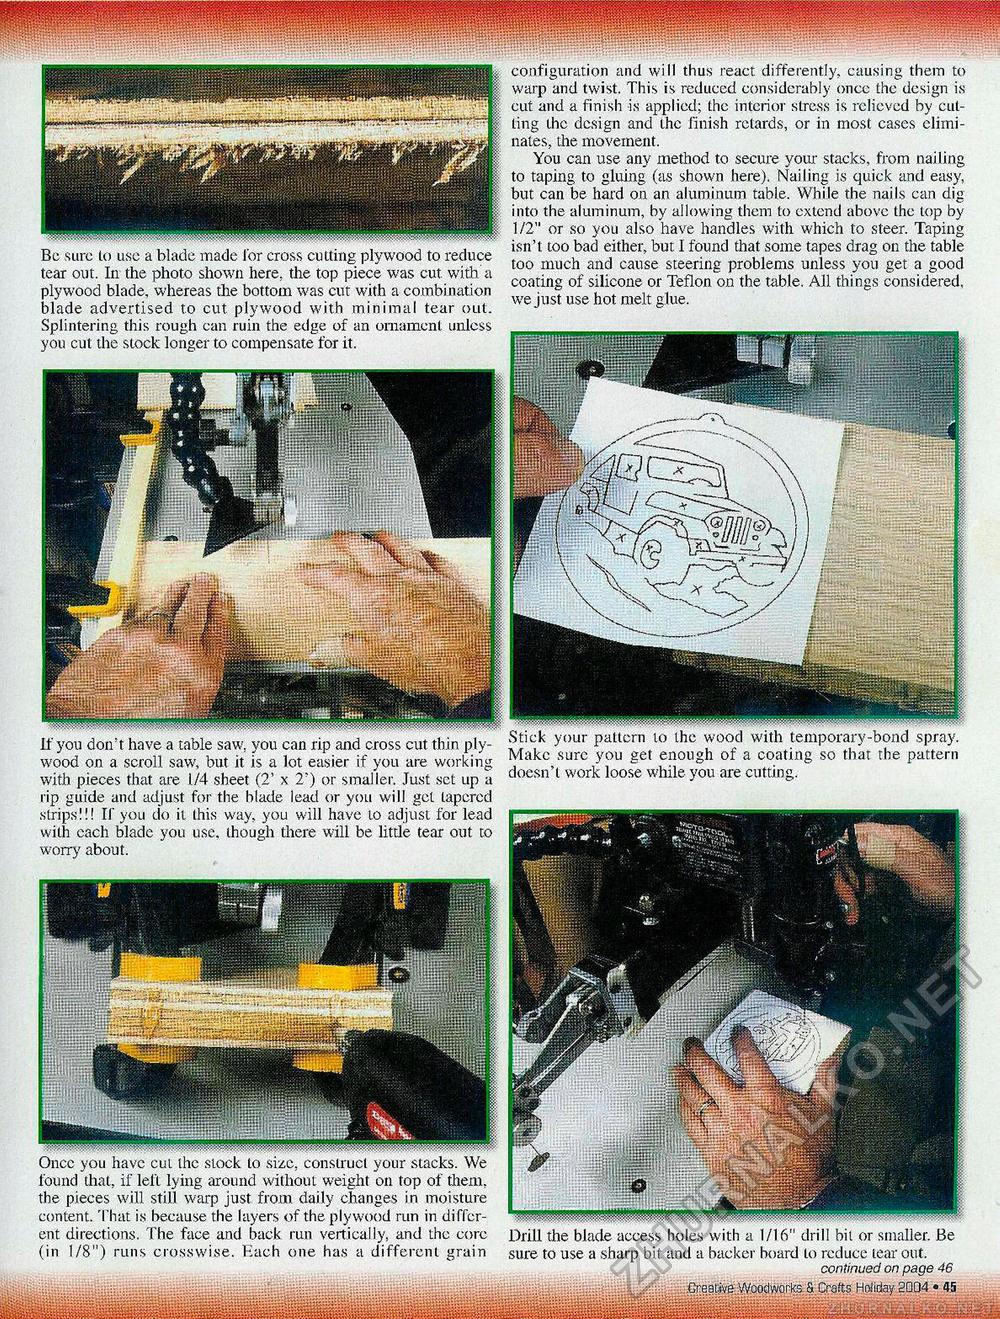
Be sure to use a blade made lor cross cutting plywood to reduce tear out. In the photo shown here, the top piece was cut with a plywood blade, whereas the bottom was cut with a combination blade advertised to cut plywood with minimal tear out. Splintering this rough can ruin the edge of an ornament unless you cut the stock longer to compensate for it. configuration and will thus react, differently, causing them to warp and twist. This is reduced considerably once the design is cut and a finish is applied; the interior stress is relieved by cutting the design and the finish retards, or in most cases eliminates, the movement. You can use any method to secure your stacks, from nailing to taping to gluing (as shown here). Nailing is quick and easy, but can be hard on an aluminum table. While the nails can dig into the aluminum, by allowing them to extend above the top by 1/2" or so you also have handles with which to steer. Taping isn't loo bad either, but I found that some tapes drag on the table too much and cause steering problems unless you get a good coating of silicone or Teflon on the table. All things considered, we just use hot melt glue. If you don't have a table saw, you can rip and cross cut thin plywood on a scroll saw, but it is a lot. easier if you are working with pieces that are 1/4 sheet (2' x 2') or smaller. .Tust set up a rip guide and adjust for the blade lead or you will get tapered strips!!! If you do it this way, you will have to adjust for lead with each blade you use. though there will be little tear out to worry about. Make sure you get enough of a coating so that the pattern doesn't work loose while you are cutting. found that, if left lying around without the pieces will still warp just from content. That is because the layers of th ent directions. The face and back run (in 1/8") runs crosswise. Each one top of them, in moisture run in di ffer-and the core fereiit grain Drill the blade access holes with a 1/16" drill bit or smaller. Be sure to use a sharp bit and a backer board to reduce tear out. continued on page 46 Creative Woodworks & Crafts Holiday 2004 • 45 |


