Creative Woodworks & crafts-111-2005-Holiday, страница 75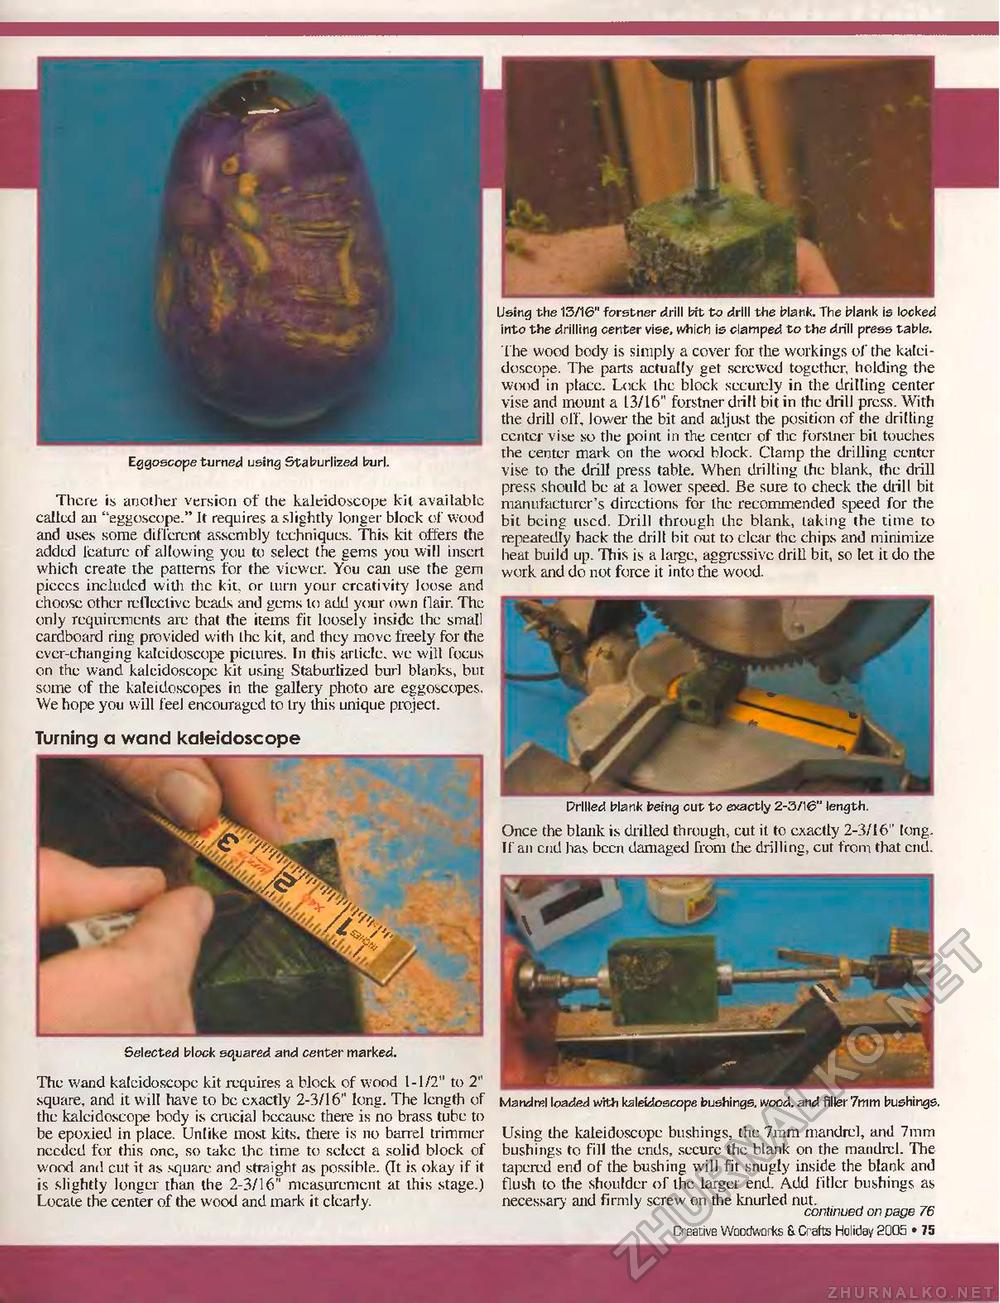
% mm K Eggoscope turned using Staburlized burl. There is another version of the kaleidoscope kit available cailtxl ail "eggoscope." It requires a slightly longer block of wood and uses some different assembly techniques. This kit otters the added leature of allowing you to select the gems you will insert which create the patterns for the viewer. You can use the gem pieccs included with the kit. or turn your creativity loose and choose other reflective beads and gems to add your own flair. The only requirements are that the items fit loosely inside the small cardboard ring provided with the kit, and they move freely for the ever-changing kaleidoscope pictures. In this article, we will focus on the wand kaleidoscope kit using Staburlized burl blanks, but some of the kaleidoscopes in the gallery photo are eggoxcopes. We hope you will feel encouraged to try this unique project. Turning a wand kaleidoscope Using the 13/16" forstner drill bit to drill the blank. The blank is locked into the drilling center vise, tvhich is clamped to the drill press table. The wood body is simply a cover for the workings of the kaleidoscope. The parts actually get screwed together, holding the wood in place. Lock the block securely in the drilling center vise and mount a 13/16" forstner drift bit in the drill press. With the drill off, lower the bit and adjust the position of the drilling center vise so the point in the center of the forstner bit touches the center mark on the wood block. Clamp the drilling center vise to the drill press table. When drilling the blank, the drill press should be at a lower speed. Be sure to check the drill bit manufacturer's directions for the recommended speed for the bit being used. Drill through the blank, taking the time to repeatedly hack the drill bit out to clear the chips and minimize heat build up. This is a large, aggressive drill bit, so let it do the work and do not force it into the wood. E Prilled blank being cut to exactly 2-3/16" length. Once the blank is drilled through, cut it to exactly 2-3/16" long. If an end has been damaged from the drilling, cut from that end. Selected block squared and center marked. The wand kaleidoscope kit requires a block of wood 1-1/2" to 2" square, and it will have to be exactly 2-3/16" long. The length of the kaleidoscope body is crucial because there is no brass tube to be epoxied in place. Unlike most kits, there is no barrel trimmer needed for this one, so take the time to select a solid block of wood and cut it as square and straight as possible. (It is okay if it is slightly longer than the 2-3/16" measurement at this stage.) Locale the center of the wood and mark it clearly. Mandrel loaded wilt) kaleidoscope bushings, wood, and filler 7mm bushings. Using the kaleidoscope bushings, the 7mm mandrel, and 7mm bushings to fill the ends, secure the blank on the mandrel. The tapered end of the bushing will fit snugly inside the blank and flush to the shoulder of the larger end. Add filler bushings as necessary and firmly screw on the knurled nut. continued on page 76 Creative Woodworks 8. Crafts Holiday 2Q05 • 75 |


