Creative Woodworks & crafts-125-2007-Holiday, страница 11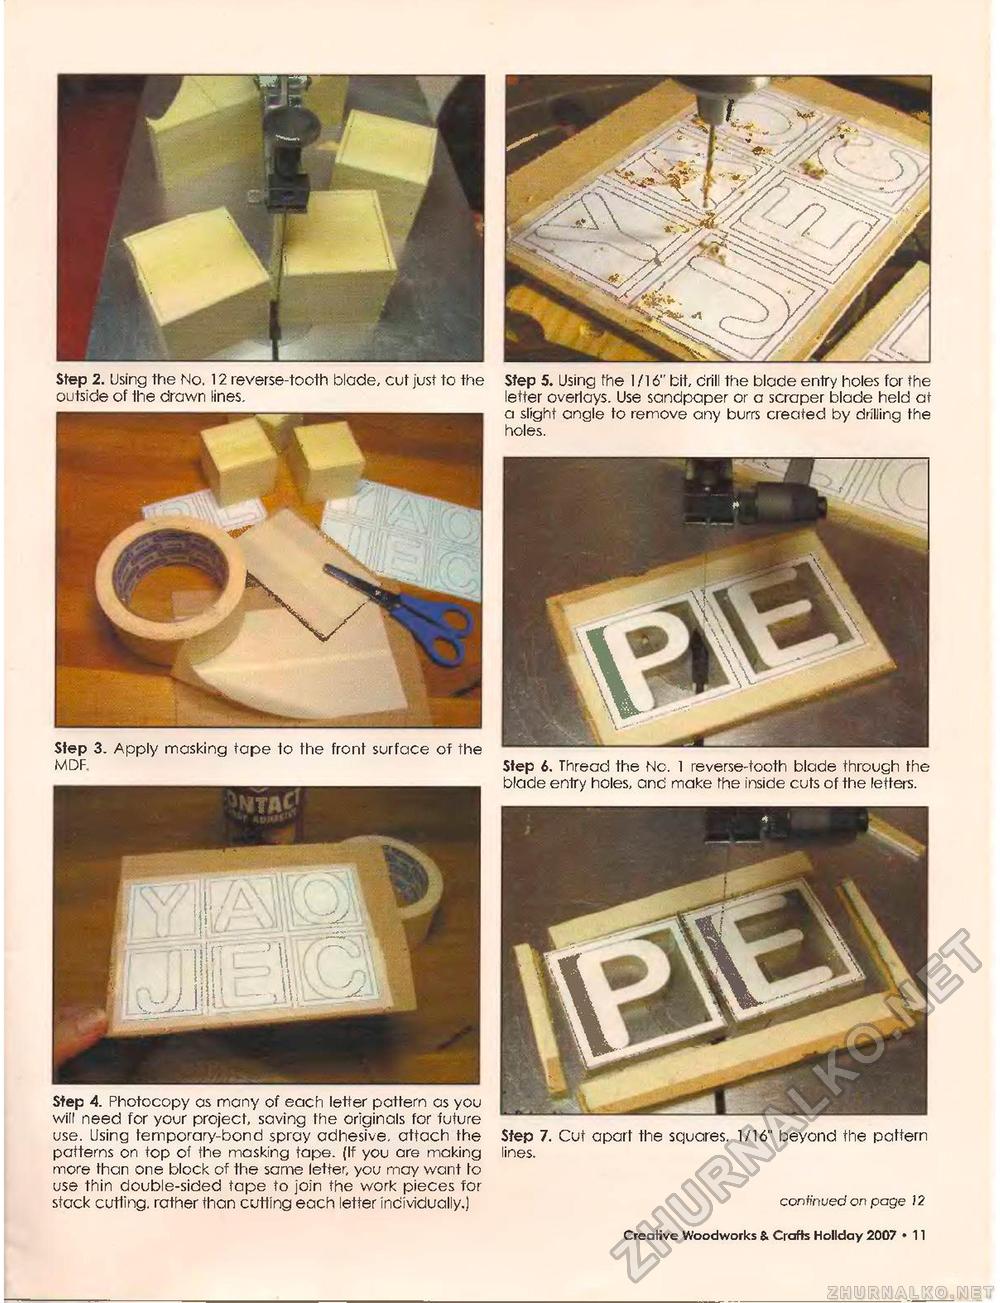
Step 2. Using the No. 12 reverse-tooth blade, cut just to the outside of the drawn lines. Step 3. Apply masking tape io the front surface of the MDF. Step 4. Photocopy as many of each letter pattern as you will need for your project, saving the originals for future use. Using temporary-bond spray adhesive, attach the patterns on top of the masking tape. (If you are making more than one block of the same letter, you may want fo use thin double-sided tape to join the work pieces for stack cutting, rather than cutting each letter individually.) Step 5. Using the 1/16" bit, drill the blade entry holes for the letter overlays. Use sandpaper or a scraper blade held at a slight angle to remove any burrs created by drilling the holes. Step 6. Thread the Nc. 1 reverse-tooth blade through the blade entry holes, and make the inside cuts of the letters. Step 7. Cut apart the squares, 1/16" beyond the pattern lines. continued on page )2 Creative Woodworks & Crafts Holiday 2007 • 11 |


