Creative Woodworks & crafts-125-2007-Holiday, страница 21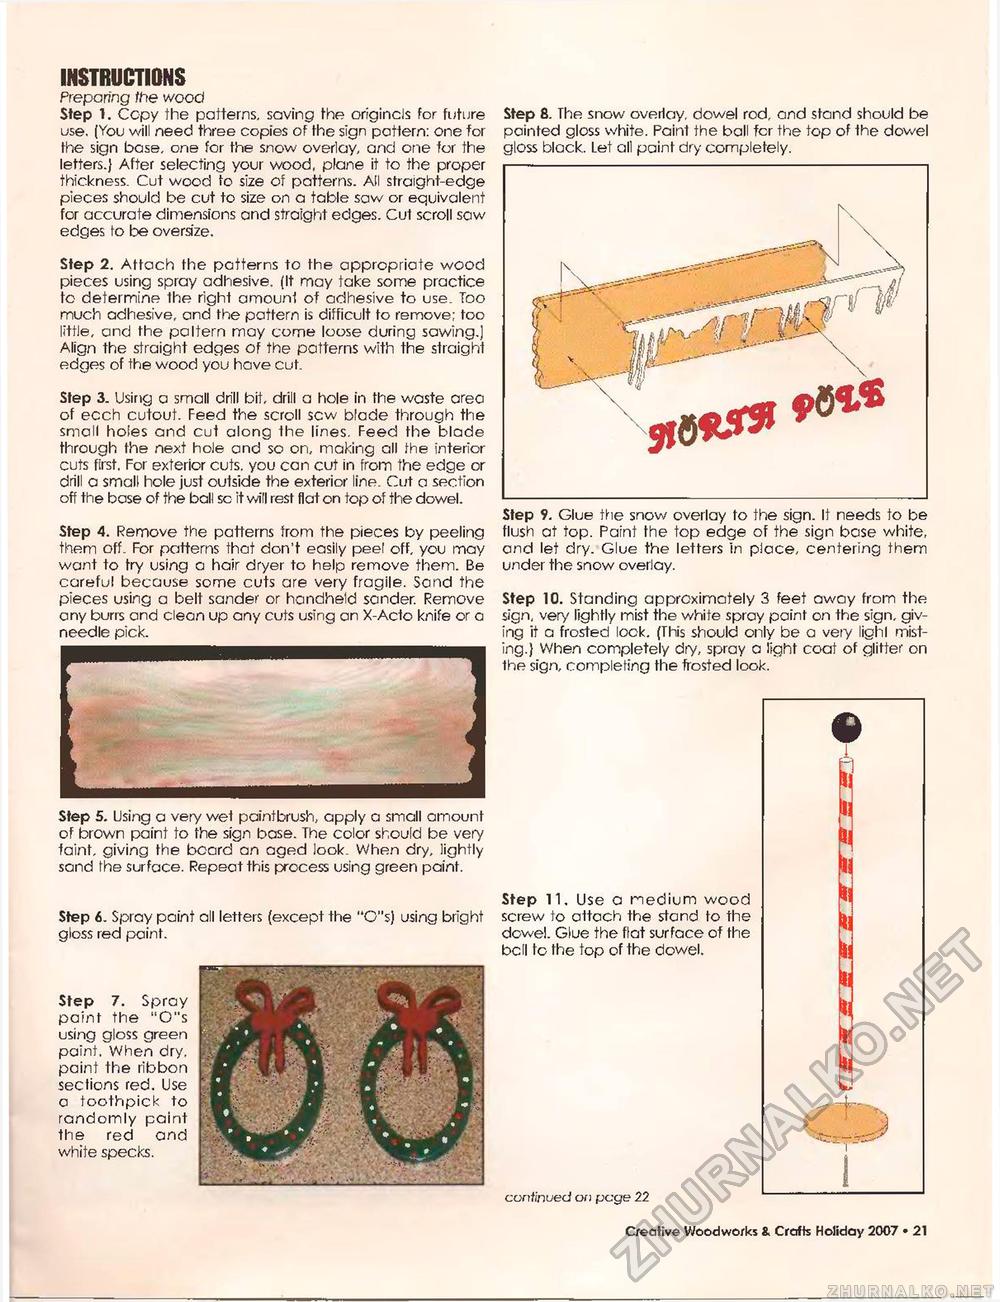
INSTRUCTIONS Preparing the wood Step 1. Copy the patterns, saving the origincls for future use. (You will need three copies of the sign pattern: one for the sign base, one for the snow overlay, and one for the letters.) After selecting your wood, plane it to the proper thickness. Cut wood to size of patterns. All straight-edge pieces should be cut to size on a table saw or equivalent for accurate dimensions and straight edges. Cut scroll saw edges to be oversize. Step 2. Attach the patterns to the appropriate wood pieces using spray adhesive. (It may take some practice to determine the right amount of adhesive to use. Too much adhesive, and the pattern is difficult to remove; too little, and the paltern may come loose during sawing.) Align the straight edges of the patterns with the straight edges of the wood you have cut. Step 3. Using a small drill bit, drill a hole in the waste area of ecch cutout. Feed the scroll sew blade through the small holes and cut along 1he lines. Feed the blade through the next hole and so on, making all the interior cuts first. For exterior cuts, you can cut in from the edge or drill a small hole just outside the exterior line. Cut a section off the base of the ball sc it will rest flat on top of the dowel. Step 4. Remove the patterns from the pieces by peeling them off. For patterns that don't easily peel off, you may want to try using a hair dryer to help remove them. Be careful because some cuts are very fragile. Sand the pieces using a belt sander or handheld sender. Remove any burrs and Clean up any cuts using an X-Acto knife or a needle pick. Step 5. Using a very wet paintbrush, apply a small amount of brown paint to fhe sign base. The color should be very faint, giving the beard an aged look. When dry, lightly sand the surface. Repeat this process using green paint. Step 6. Spray paint all letters (except the "G"s) using bright gloss red paint. Step 7. Spray paint the "0"s using gloss green paint. When dry. paint the ribbon sections red. Use a toothpick to randomly paint the red and white specks. Step 8. The snow overlay, dowel rod, and stand should be painted gloss white. Paint the ball for the top of the dowel gloss block. Let all paint dry completely. Step 9. Glue the snow overlay to the sign. It needs to be flush at top. Paint the top edge of the sign base white, and let dry. Glue the letters in place, centering them under the snow overlay. Step 10. Standing approximately 3 feet away from the sign, very lightly mist the white spray paint on the sign, giving it a frosted lock. (This should only be a vety light misting.) When completely dry, spray a light coat of glitter on the sign, completing the frosted look. Step 11. Use a medium wood screw to attach the stand to the dc-wel. Glue the flat surface of the bell to the top of the dowel. continued on pege 22 21 ■ Creative Woodworks S. Crafts Holiday 2007 - |


