Popular Woodworking 2001-02 № 120, страница 66
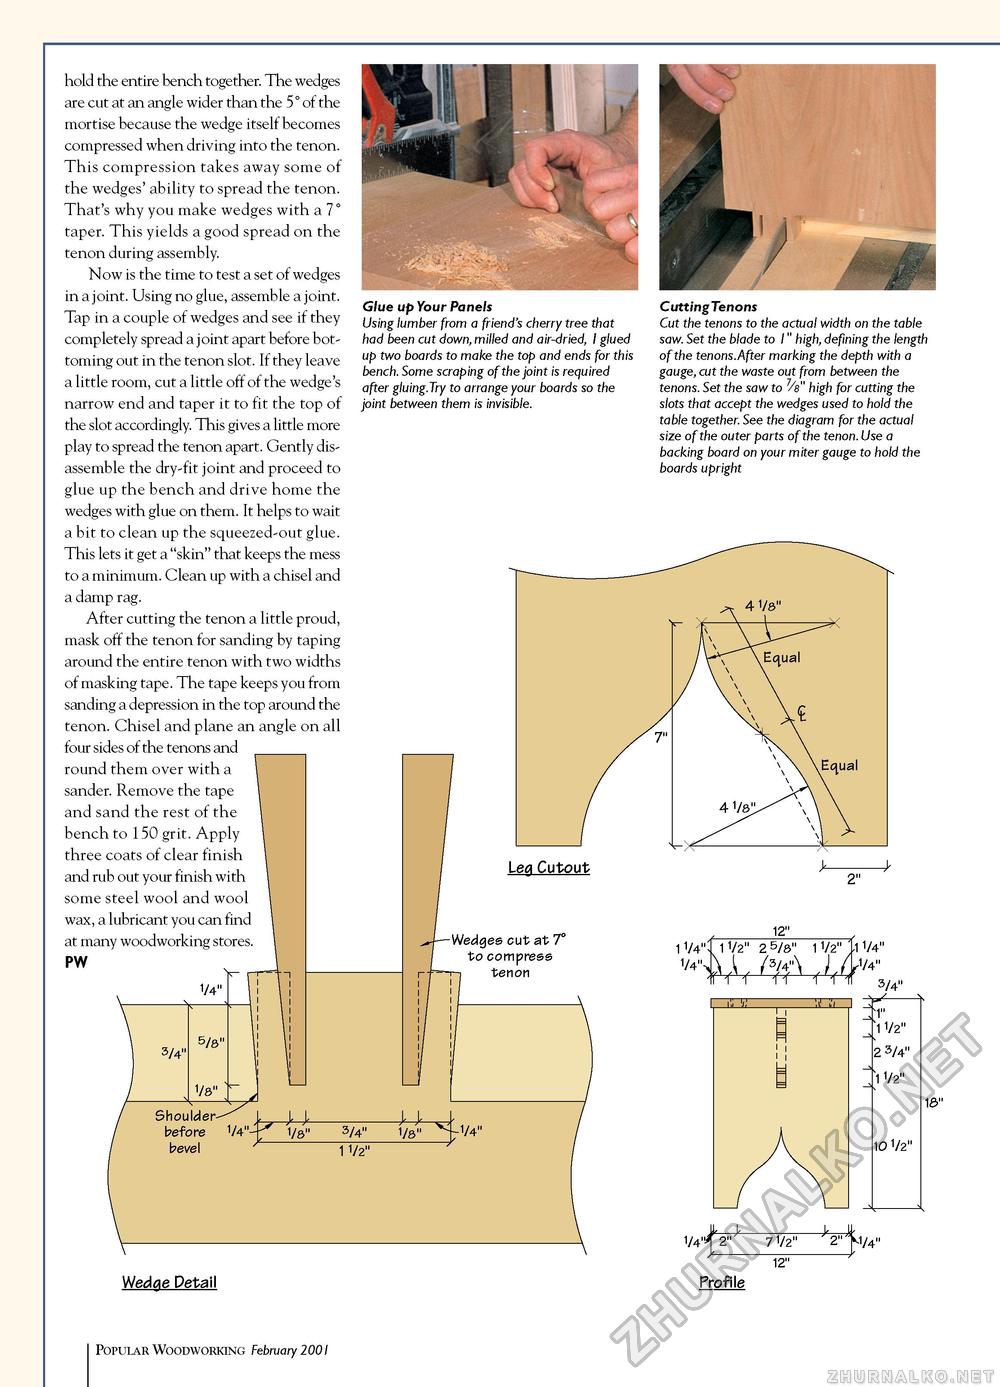
hold the entire bench together. The wedges are cut at an angle wider than the 5° of the mortise because the wedge itself becomes compressed when driving into the tenon. This compression takes away some of the wedges' ability to spread the tenon. That's why you make wedges with a 7° taper. This yields a good spread on the tenon during assembly. Now is the time to test a set of wedges in a joint. Using no glue, assemble a joint. Tap in a couple of wedges and see if they completely spread a joint apart before bottoming out in the tenon slot. If they leave a little room, cut a little off of the wedge's narrow end and taper it to fit the top of the slot accordingly. This gives a little more play to spread the tenon apart. Gently disassemble the dry-fit joint and proceed to glue up the bench and drive home the wedges with glue on them. It helps to wait a bit to clean up the squeezed-out glue. This lets it get a "skin" that keeps the mess to a minimum. Clean up with a chisel and a damp rag. After cutting the tenon a little proud, mask off the tenon for sanding by taping around the entire tenon with two widths of masking tape. The tape keeps you from sanding a depression in the top around the tenon. Chisel and plane an angle on all four sides of the tenons and _ round them over with a sander. Remove the tape and sand the rest of the bench to 150 grit. Apply three coats of clear finish and rub out your finish with some steel wool and wool wax, a lubricant you can find at many woodworking stores. PW
Shoulder^^ before 1/4"-bevel Glue up Your Panels Using lumber from a friend's cherry tree that had been cut down, milled and air-dried, I glued up two boards to make the top and ends for this bench. Some scraping of the joint is required after gluing.Try to arrange your boards so the joint between them is invisible. Shoulder^^ before 1/4"-bevel 1/8" 3/4" 1 1/2" Cutting Tenons Cut the tenons to the actual width on the table saw. Set the blade to 1" high, defining the length of the tenons.After marking the depth with a gauge, cut the waste out from between the tenons. Set the saw to 7/e" high for cutting the slots that accept the wedges used to hold the table together. See the diagram for the actual size of the outer parts of the tenon. Use a backing board on your miter gauge to hold the boards upright Leg Cutout -Wedges cut at 7° to compress tenon 12" 1 1/4" V4\ 1 1/2" 2 5/8" 1 V2"tl 1/4" ^V3/4Mr41/4'3/4" 1/8" 1 1/2" 2 5/8" 1 V2"tl 1/4" ^V3/4Mr41/4'3/4"
18" 18" Wedge Detail V4^ Profile 12" Popular Woodworking February 2001 |
||||||||||||||||||||||||||||||||||


