Popular Woodworking 2001-08 № 123, страница 47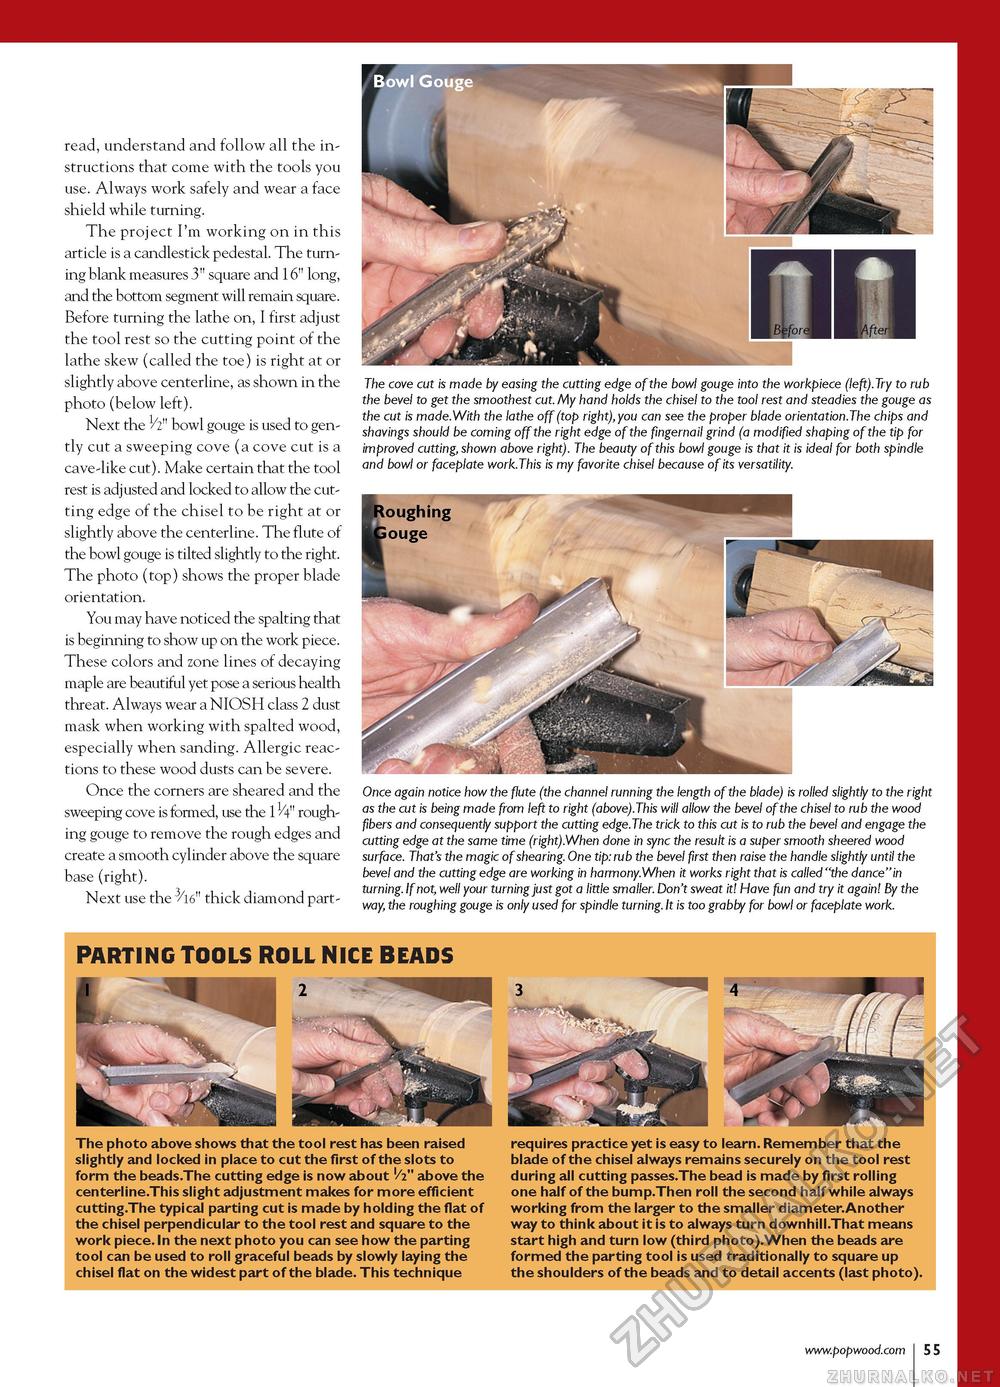
read, understand and follow all the instructions that come with the tools you use. Always work safely and wear a face shield while turning. The project I'm working on in this article is a candlestick pedestal. The turning blank measures 3" square and 16" long, and the bottom segment will remain square. Before turning the lathe on, I first adjust the tool rest so the cutting point of the lathe skew (called the toe) is right at or slightly above centerline, as shown in the photo (below left). Next the 1/2" bowl gouge is used to gently cut a sweeping cove (a cove cut is a cave-like cut). Make certain that the tool rest is adjusted and locked to allow the cutting edge of the chisel to be right at or slightly above the centerline. The flute of the bowl gouge is tilted slightly to the right. The photo (top) shows the proper blade orientation. You may have noticed the spalting that is beginning to show up on the work piece. These colors and zone lines of decaying maple are beautiful yet pose a serious health threat. Always wear a NIOSH class 2 dust mask when working with spalted wood, especially when sanding. Allergic reactions to these wood dusts can be severe. Once the corners are sheared and the sweeping cove is formed, use the 11/4" roughing gouge to remove the rough edges and create a smooth cylinder above the square base (right). Next use the 3/16" thick diamond part- The cove cut is made by easing the cutting edge of the bowl gouge into the workpiece (left).Try to rub the bevel to get the smoothest cut. My hand holds the chisel to the tool rest and steadies the gouge as the cut is made.With the lathe off (top right), you can see the proper blade orientation.The chips and shavings should be coming off the right edge of the fingernail grind (a modified shaping of the tip for improved cutting, shown above right). The beauty of this bowl gouge is that it is ideal for both spindle and bowl or faceplate work.This is my favorite chisel because of its versatility. Once again notice how the flute (the channel running the length of the blade) is rolled slightly to the right as the cut is being made from left to right (above).This will allow the bevel of the chisel to rub the wood fibers and consequently support the cutting edge.The trick to this cut is to rub the bevel and engage the cutting edge at the same time (right).When done in sync the result is a super smooth sheered wood surface. That's the magic of shearing. One tip: rub the bevel first then raise the handle slightly until the bevel and the cutting edge are working in harmony.When it works right that is called "the dance"in turning. If not, well your turning just got a little smaller. Don't sweat it! Have fun and try it again! By the way, the roughing gouge is only used for spindle turning. It is too grabby for bowl or faceplate work. PARTING TOOLS ROLL NICE BEADS The photo above shows that the tool rest has been raised slightly and locked in place to cut the first of the slots to form the beads.The cutting edge is now about '/i" above the centerline.This slight adjustment makes for more efficient cutting.The typical parting cut is made by holding the flat of the chisel perpendicular to the tool rest and square to the work piece. In the next photo you can see how the parting tool can be used to roll graceful beads by slowly laying the chisel flat on the widest part of the blade. This technique requires practice yet is easy to learn. Remember that the blade of the chisel always remains securely on the tool rest during all cutting passes.The bead is made by first rolling one half of the bump.Then roll the second half while always working from the larger to the smaller diameter.Another way to think about it is to always turn downhill.That means start high and turn low (third photo).When the beads are formed the parting tool is used traditionally to square up the shoulders of the beads and to detail accents (last photo). |


