Popular Woodworking 2002-04 № 127, страница 60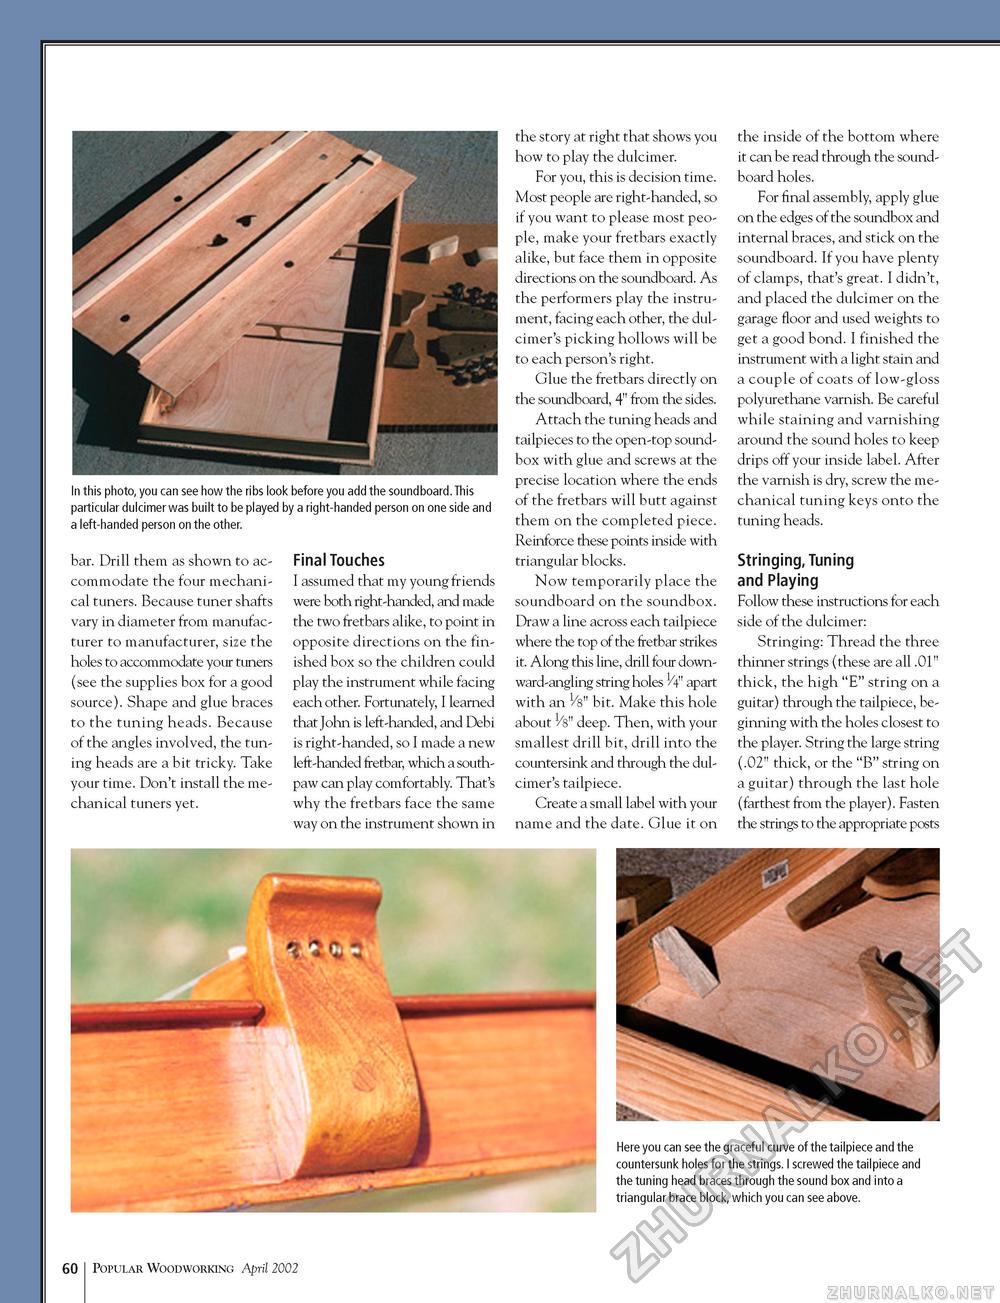
In this photo, you can see how the ribs look before you add the soundboard.This particular dulcimer was built to be played by a right-handed person on one side and a left-handed person on the other. bar. Drill them as shown to accommodate the four mechanical tuners. Because tuner shafts vary in diameter from manufacturer to manufacturer, size the holes to accommodate your tuners (see the supplies box for a good source). Shape and glue braces to the tuning heads. Because of the angles involved, the tuning heads are a bit tricky. Take your time. Don't install the mechanical tuners yet. Final Touches I assumed that my young friends were both right-handed, and made the two fretbars alike, to point in opposite directions on the finished box so the children could play the instrument while facing each other. Fortunately, I learned that John is left-handed, and Debi is right-handed, so I made a new left-handed fretbar, which a southpaw can play comfortably. That's why the fretbars face the same way on the instrument shown in the story at right that shows you how to play the dulcimer. For you, this is decision time. Most people are right-handed, so if you want to please most people, make your fretbars exactly alike, but face them in opposite directions on the soundboard. As the performers play the instrument, facing each other, the dulcimer's picking hollows will be to each person's right. Glue the fretbars directly on the soundboard, 4" from the sides. Attach the tuning heads and tailpieces to the open-top soundbox with glue and screws at the precise location where the ends of the fretbars will butt against them on the completed piece. Reinforce these points inside with triangular blocks. Now temporarily place the soundboard on the soundbox. Draw a line across each tailpiece where the top of the fretbar strikes it. Along this line, drill four downward-angling string holes H" apart with an 1/8" bit. Make this hole about V8" deep. Then, with your smallest drill bit, drill into the countersink and through the dulcimer's tailpiece. Create a small label with your name and the date. Glue it on the inside of the bottom where it can be read through the soundboard holes. For final assembly, apply glue on the edges of the soundbox and internal braces, and stick on the soundboard. If you have plenty of clamps, that's great. I didn't, and placed the dulcimer on the garage floor and used weights to get a good bond. I finished the instrument with a light stain and a couple of coats of low-gloss polyurethane varnish. Be careful while staining and varnishing around the sound holes to keep drips off your inside label. After the varnish is dry, screw the mechanical tuning keys onto the tuning heads. Stringing,Tuning and Playing Follow these instructions for each side of the dulcimer: Stringing: Thread the three thinner strings (these are all .01" thick, the high "E" string on a guitar) through the tailpiece, beginning with the holes closest to the player. String the large string (.02" thick, or the "B" string on a guitar) through the last hole (farthest from the player). Fasten the strings to the appropriate posts Here you can see the graceful curve of the tailpiece and the countersunk holes for the strings. I screwed the tailpiece and the tuning head braces through the sound box and into a triangular brace block, which you can see above. 60 Popular Woodworking April 2002 |


