Popular Woodworking 2002-06 № 128, страница 22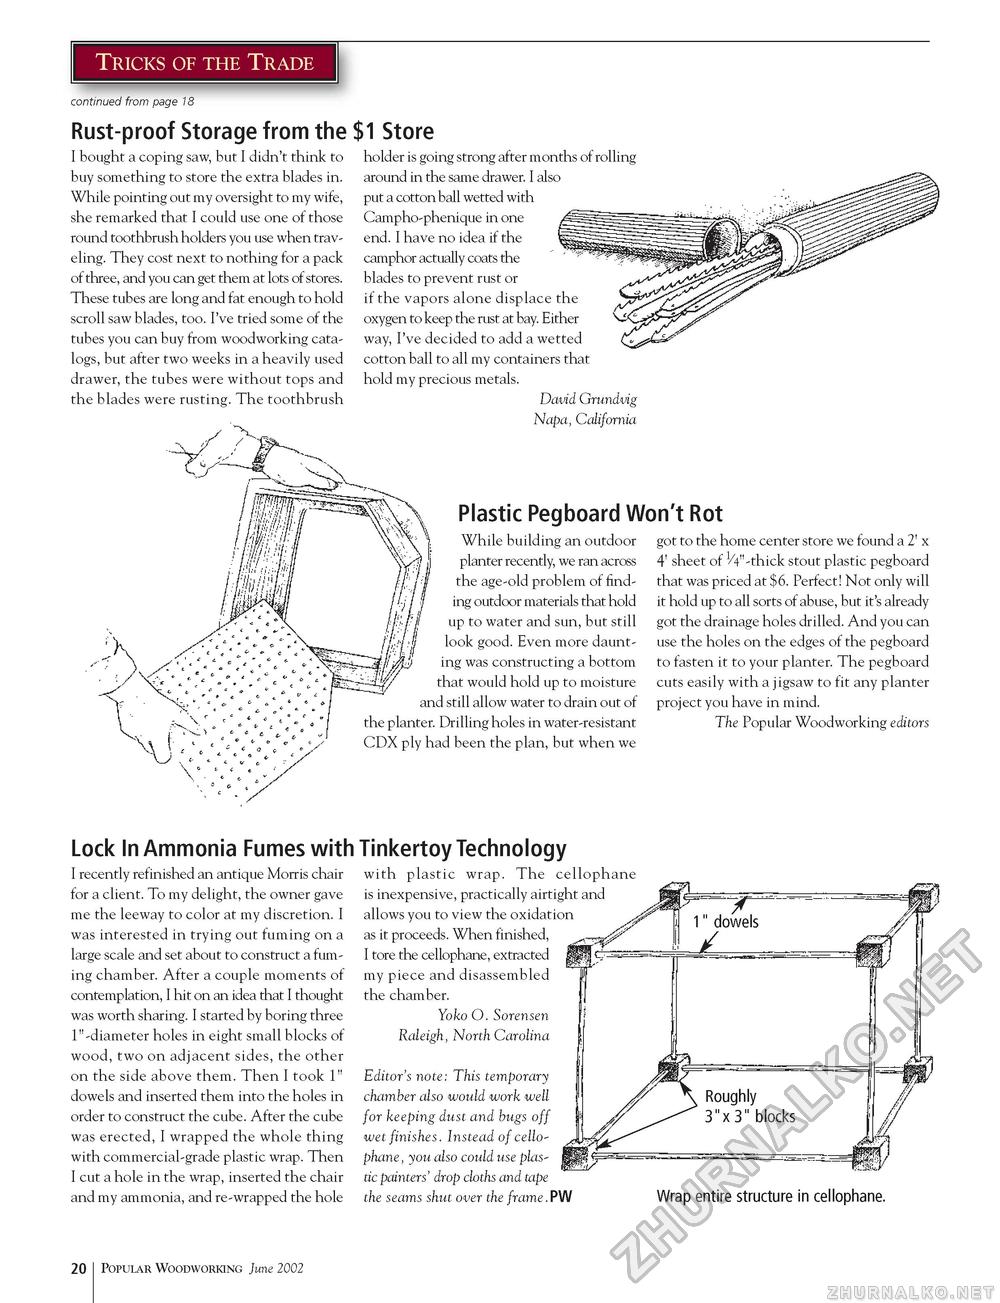
Rust-proof Storage from the I bought a coping saw, but I didn't think to buy something to store the extra blades in. While pointing out my oversight to my wife, she remarked that I could use one of those round toothbrush holders you use when traveling. They cost next to nothing for a pack of three, and you can get them at lots of stores. These tubes are long and fat enough to hold scroll saw blades, too. I've tried some of the tubes you can buy from woodworking catalogs, but after two weeks in a heavily used drawer, the tubes were without tops and the blades were rusting. The toothbrush $1 Store holder is going strong after months of rolling around in the same drawer. I also put a cotton ball wetted with Campho-phenique in one end. I have no idea if the camphor actually coats the blades to prevent rust or if the vapors alone displace the oxygen to keep the rust at bay. Either way, I've decided to add a wetted cotton ball to all my containers that hold my precious metals. David Grundvig Napa, California Plastic Pegboard Won't Rot While building an outdoor got to the home center store we found a 2' x planter recently, we ran across the age-old problem of finding outdoor materials that hold up to water and sun, but still look good. Even more daunting was constructing a bottom that would hold up to moisture and still allow water to drain out of the planter. Drilling holes in water-resistant CDX ply had been the plan, but when we 4' sheet of VV'-thick stout plastic pegboard that was priced at $6. Perfect! Not only will it hold up to all sorts of abuse, but it's already got the drainage holes drilled. And you can use the holes on the edges of the pegboard to fasten it to your planter. The pegboard cuts easily with a jigsaw to fit any planter project you have in mind. The Popular Woodworking editors Lock In Ammonia Fumes with Tinkertoy Technology I recently refinished an antique Morris chair for a client. To my delight, the owner gave me the leeway to color at my discretion. I was interested in trying out fuming on a large scale and set about to construct a fuming chamber. After a couple moments of contemplation, I hit on an idea that I thought was worth sharing. I started by boring three 1"-diameter holes in eight small blocks of wood, two on adjacent sides, the other on the side above them. Then I took 1" dowels and inserted them into the holes in order to construct the cube. After the cube was erected, I wrapped the whole thing with commercial-grade plastic wrap. Then I cut a hole in the wrap, inserted the chair and my ammonia, and re-wrapped the hole with plastic wrap. The cellophane is inexpensive, practically airtight and allows you to view the oxidation as it proceeds. When finished, I tore the cellophane, extracted my piece and disassembled the chamber. Yoko O. Sorensen Raleigh, North Carolina Editor's note: This temporary chamber also would work well for keeping dust and bugs off wet finishes. Instead of cellophane, you also could use plastic painters' drop cloths and tape the seams shut over the frame.PW Wrap entire structure in cellophane. 20 Popular Woodworking June 2002 |


