Popular Woodworking 2002-06 № 128, страница 30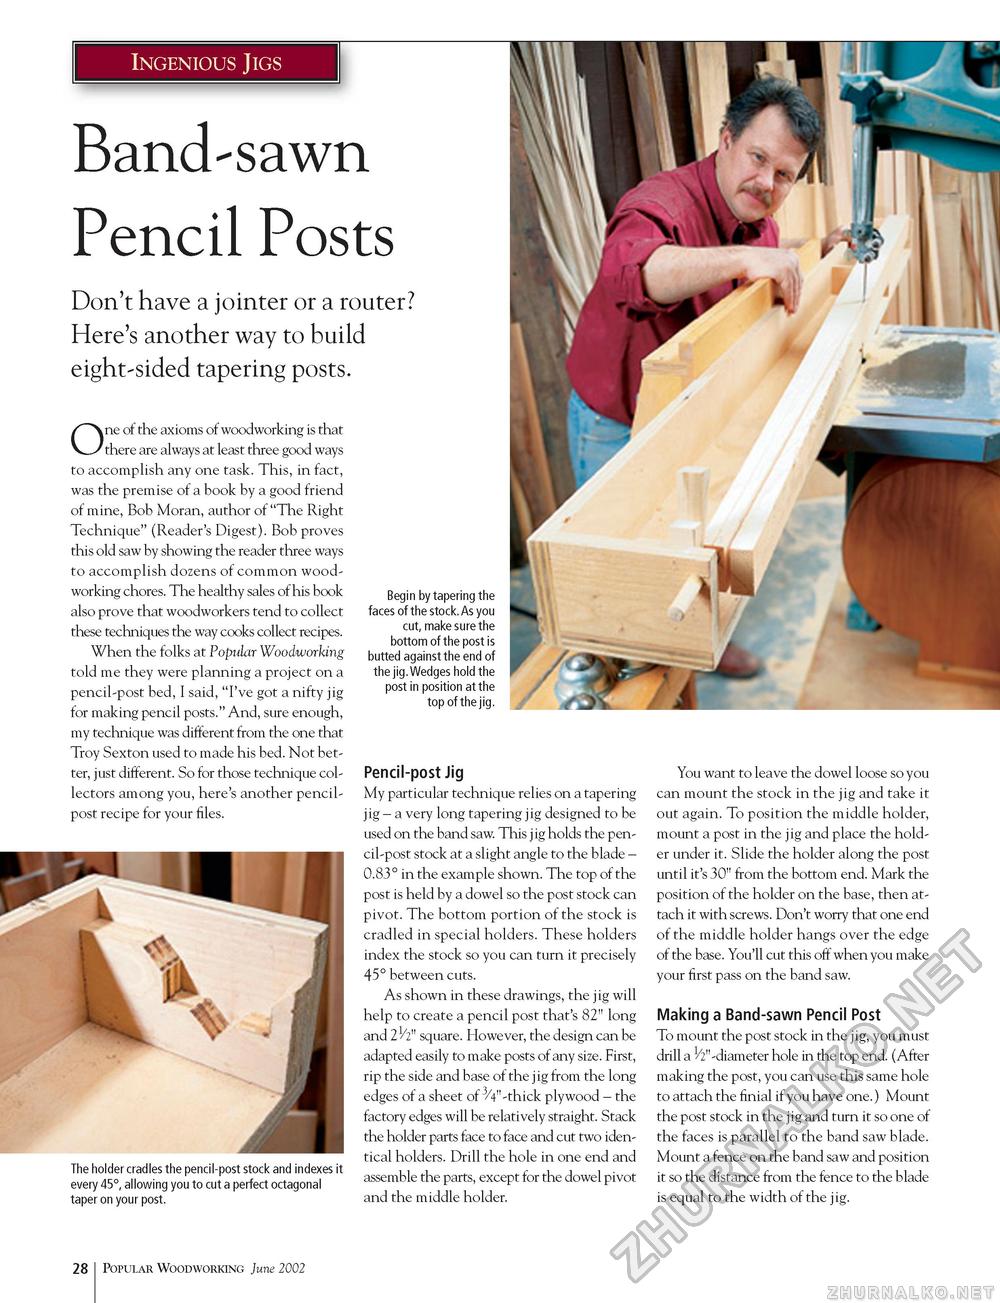
Ingenious Jigs Band-sawn Pencil Posts Don't have a jointer or a router? Here's another way to build eight-sided tapering posts. One of the axioms of woodworking is that there are always at least three good ways to accomplish any one task. This, in fact, was the premise of a book by a good friend of mine, Bob Moran, author of "The Right Technique" (Reader's Digest). Bob proves this old saw by showing the reader three ways to accomplish dozens of common woodworking chores. The healthy sales of his book also prove that woodworkers tend to collect these techniques the way cooks collect recipes. When the folks at Popular Woodworking told me they were planning a project on a pencil-post bed, I said, "I've got a nifty jig for making pencil posts." And, sure enough, my technique was different from the one that Troy Sexton used to made his bed. Not better, just different. So for those technique collectors among you, here's another pencil-post recipe for your files. The holder cradles the pencil-post stock and indexes it every 45°, allowing you to cut a perfect octagonal taper on your post. Begin by tapering the faces of the stock. As you cut, make sure the bottom of the post is butted against the end of the jig. Wedges hold the post in position at the top of the jig. Pencil-post Jig My particular technique relies on a tapering jig - a very long tapering jig designed to be used on the band saw. This jig holds the pencil-post stock at a slight angle to the blade -0.83° in the example shown. The top of the post is held by a dowel so the post stock can pivot. The bottom portion of the stock is cradled in special holders. These holders index the stock so you can turn it precisely 45° between cuts. As shown in these drawings, the jig will help to create a pencil post that's 82" long and 21/2" square. However, the design can be adapted easily to make posts of any size. First, rip the side and base of the jig from the long edges of a sheet of 3/4"-thick plywood - the factory edges will be relatively straight. Stack the holder parts face to face and cut two identical holders. Drill the hole in one end and assemble the parts, except for the dowel pivot and the middle holder. You want to leave the dowel loose so you can mount the stock in the jig and take it out again. To position the middle holder, mount a post in the jig and place the holder under it. Slide the holder along the post until it's 30" from the bottom end. Mark the position of the holder on the base, then attach it with screws. Don't worry that one end of the middle holder hangs over the edge of the base. You'll cut this off when you make your first pass on the band saw. Making a Band-sawn Pencil Post To mount the post stock in the jig, you must drill a ^"-diameter hole in the top end. (After making the post, you can use this same hole to attach the finial if you have one.) Mount the post stock in the jig and turn it so one of the faces is parallel to the band saw blade. Mount a fence on the band saw and position it so the distance from the fence to the blade is equal to the width of the jig. 28 Popular Woodworking June 2002 |


