Popular Woodworking 2002-10 № 130, страница 68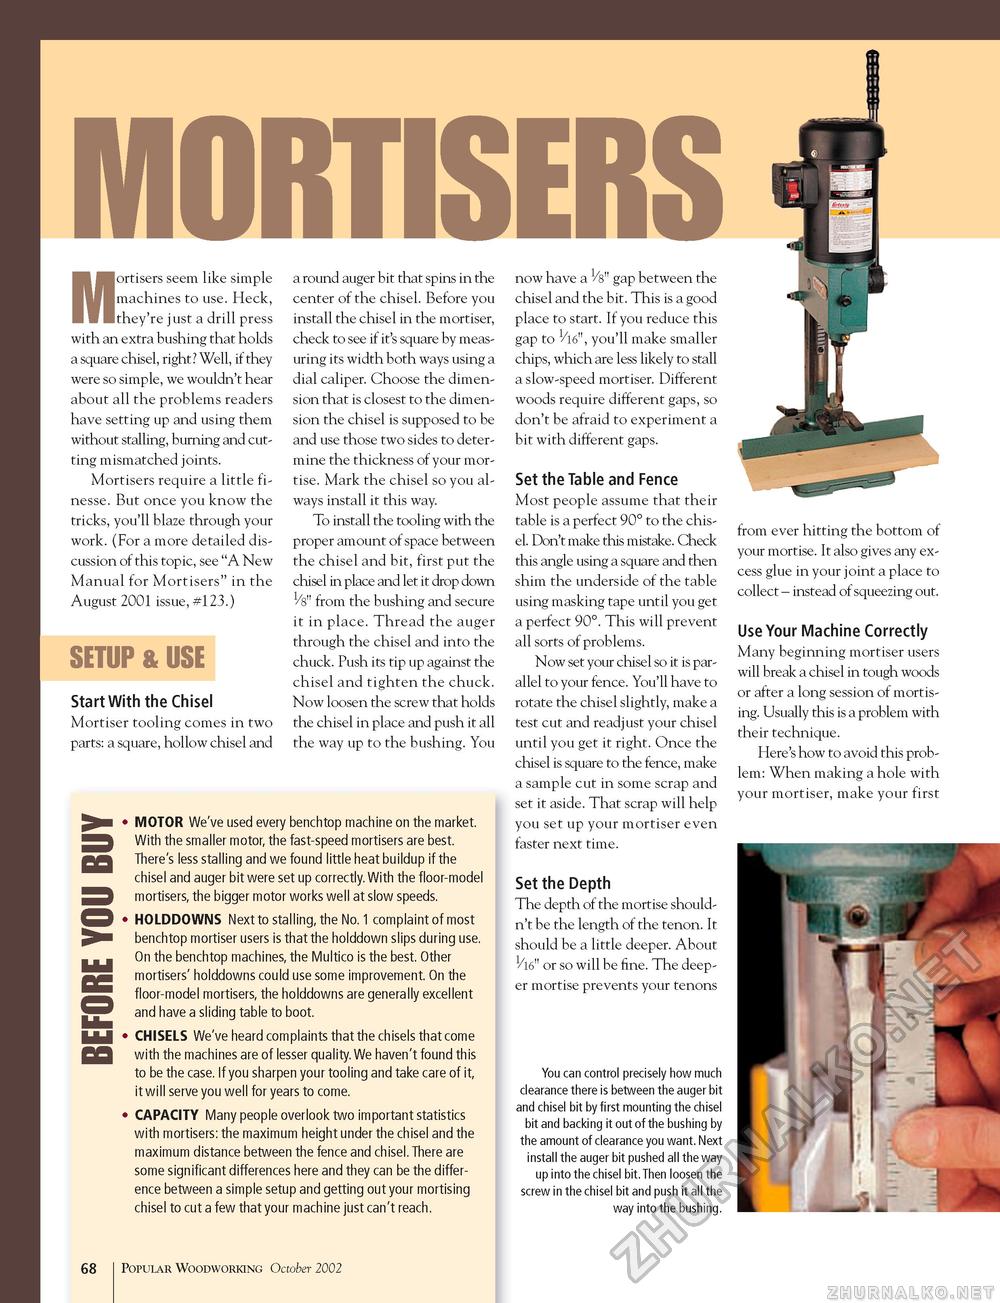
MORTISERS M Iortisers seem like simple machines to use. Heck, they're just a drill press with an extra bushing that holds a square chisel, right? Well, if they were so simple, we wouldn't hear about all the problems readers have setting up and using them without stalling, burning and cutting mismatched joints. Mortisers require a little finesse. But once you know the tricks, you'll blaze through your work. (For a more detailed discussion of this topic, see "A New Manual for Mortisers" in the August 2001 issue, #123.) SETUP & USE Start With the Chisel Mortiser tooling comes in two parts: a square, hollow chisel and a round auger bit that spins in the center of the chisel. Before you install the chisel in the mortiser, check to see if it's square by measuring its width both ways using a dial caliper. Choose the dimension that is closest to the dimension the chisel is supposed to be and use those two sides to determine the thickness of your mortise. Mark the chisel so you always install it this way. To install the tooling with the proper amount of space between the chisel and bit, first put the chisel in place and let it drop down 1/8" from the bushing and secure it in place. Thread the auger through the chisel and into the chuck. Push its tip up against the chisel and tighten the chuck. Now loosen the screw that holds the chisel in place and push it all the way up to the bushing. You MOTOR We've used every benchtop machine on the market. With the smaller motor, the fast-speed mortisers are best. There's less stalling and we found little heat buildup if the chisel and auger bit were set up correctly. With the floor-model mortisers, the bigger motor works well at slow speeds. HOLDDOWNS Next to stalling, the No. 1 complaint of most benchtop mortiser users is that the holddown slips during use. On the benchtop machines, the Multico is the best. Other mortisers' holddowns could use some improvement. On the floor-model mortisers, the holddowns are generally excellent and have a sliding table to boot. CHISELS We've heard complaints that the chisels that come with the machines are of lesser quality. We haven't found this to be the case. If you sharpen your tooling and take care of it, it will serve you well for years to come. CAPACITY Many people overlook two important statistics with mortisers: the maximum height under the chisel and the maximum distance between the fence and chisel. There are some significant differences here and they can be the difference between a simple setup and getting out your mortising chisel to cut a few that your machine just can't reach. now have a V8" gap between the chisel and the bit. This is a good place to start. If you reduce this gap to 1/l6", you'll make smaller chips, which are less likely to stall a slow-speed mortiser. Different woods require different gaps, so don't be afraid to experiment a bit with different gaps. Set the Table and Fence Most people assume that their table is a perfect 90° to the chisel. Don't make this mistake. Check this angle using a square and then shim the underside of the table using masking tape until you get a perfect 90°. This will prevent all sorts of problems. Now set your chisel so it is parallel to your fence. You'll have to rotate the chisel slightly, make a test cut and readjust your chisel until you get it right. Once the chisel is square to the fence, make a sample cut in some scrap and set it aside. That scrap will help you set up your mortiser even faster next time. Set the Depth The depth of the mortise shouldn't be the length of the tenon. It should be a little deeper. About or so will be fine. The deeper mortise prevents your tenons You can control precisely how much clearance there is between the auger bit and chisel bit by first mounting the chisel bit and backing it out of the bushing by the amount of clearance you want. Next install the auger bit pushed all the way up into the chisel bit. Then loosen the screw in the chisel bit and push it all the way into the bushing. from ever hitting the bottom of your mortise. It also gives any excess glue in your joint a place to collect - instead of squeezing out. Use Your Machine Correctly Many beginning mortiser users will break a chisel in tough woods or after a long session of mortising. Usually this is a problem with their technique. Here's how to avoid this problem: When making a hole with your mortiser, make your first 68 Popular Woodworking October 2002 |


