Popular Woodworking 2002-12 № 131, страница 46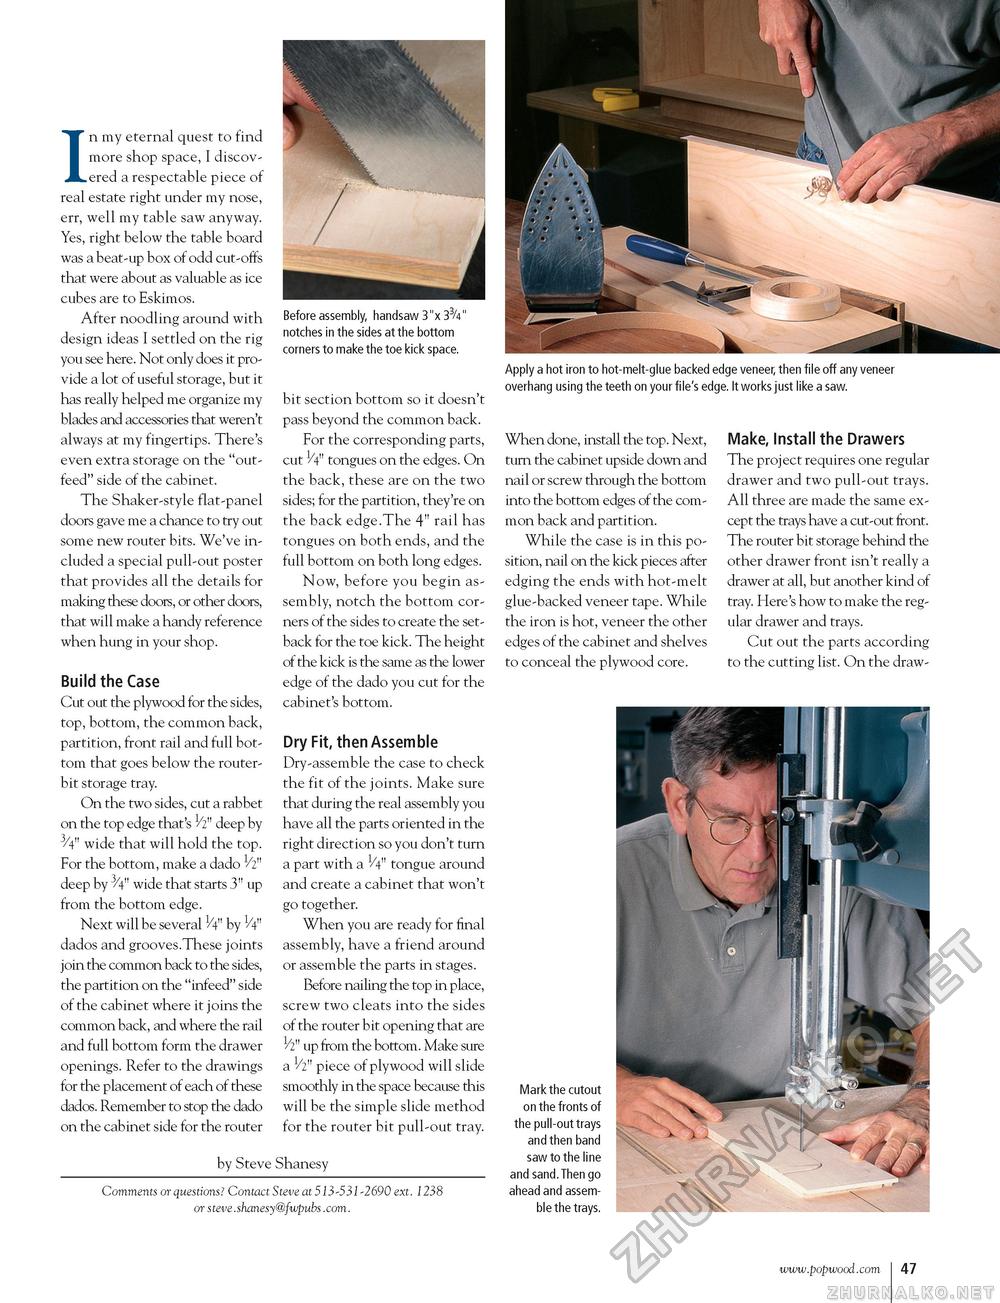
In my eternal quest to find more shop space, I discovered a respectable piece of real estate right under my nose, err, well my table saw anyway. Yes, right below the table board was a beat-up box of odd cut-offs that were about as valuable as ice cubes are to Eskimos. After noodling around with design ideas I settled on the rig you see here. Not only does it provide a lot of useful storage, but it has really helped me organize my blades and accessories that weren't always at my fingertips. There's even extra storage on the "out-feed" side of the cabinet. The Shaker-style flat-panel doors gave me a chance to try out some new router bits. We've included a special pull-out poster that provides all the details for making these doors, or other doors, that will make a handy reference when hung in your shop. Build the Case Cut out the plywood for the sides, top, bottom, the common back, partition, front rail and full bottom that goes below the router-bit storage tray. On the two sides, cut a rabbet on the top edge that's V2" deep by 3/4" wide that will hold the top. For the bottom, make a dado 1/2" deep by 3/4" wide that starts 3" up from the bottom edge. Next will be several 1/4" by 1/4n dados and grooves.These joints join the common back to the sides, the partition on the "infeed" side of the cabinet where it joins the common back, and where the rail and full bottom form the drawer openings. Refer to the drawings for the placement of each of these dados. Remember to stop the dado on the cabinet side for the router Before assembly, handsaw 3"x 33/4 notches in the sides at the bottom corners to make the toe kick space. bit section bottom so it doesn't pass beyond the common back. For the corresponding parts, cut 1/4" tongues on the edges. On the back, these are on the two sides; for the partition, they're on the back edge.The 4" rail has tongues on both ends, and the full bottom on both long edges. Now, before you begin assembly, notch the bottom corners of the sides to create the setback for the toe kick. The height of the kick is the same as the lower edge of the dado you cut for the cabinet's bottom. Dry Fit, then Assemble Dry-assemble the case to check the fit of the joints. Make sure that during the real assembly you have all the parts oriented in the right direction so you don't turn a part with a 1/4" tongue around and create a cabinet that won't go together. When you are ready for final assembly, have a friend around or assemble the parts in stages. Before nailing the top in place, screw two cleats into the sides of the router bit opening that are 1/2" up from the bottom. Make sure a 1/2" piece of plywood will slide smoothly in the space because this will be the simple slide method for the router bit pull-out tray. Apply a hot iron to hot-melt-glue backed edge veneer, then file off any veneer overhang using the teeth on your file's edge. It works just like a saw. When done, install the top. Next, turn the cabinet upside down and nail or screw through the bottom into the bottom edges of the common back and partition. While the case is in this position, nail on the kick pieces after edging the ends with hot-melt glue-backed veneer tape. While the iron is hot, veneer the other edges of the cabinet and shelves to conceal the plywood core. Make, Install the Drawers The project requires one regular drawer and two pull-out trays. All three are made the same except the trays have a cut-out front. The router bit storage behind the other drawer front isn't really a drawer at all, but another kind of tray. Here's how to make the regular drawer and trays. Cut out the parts according to the cutting list. On the draw- by Steve Shanesy Comments or questions? Contact Steve at 513-531-2690 ext. 1238 or steve.shanesy@fwpubs.com. Mark the cutout on the fronts of the pull-out trays and then band saw to the line and sand. Then go ahead and assemble the trays. |


