Popular Woodworking 2002-12 № 131, страница 53
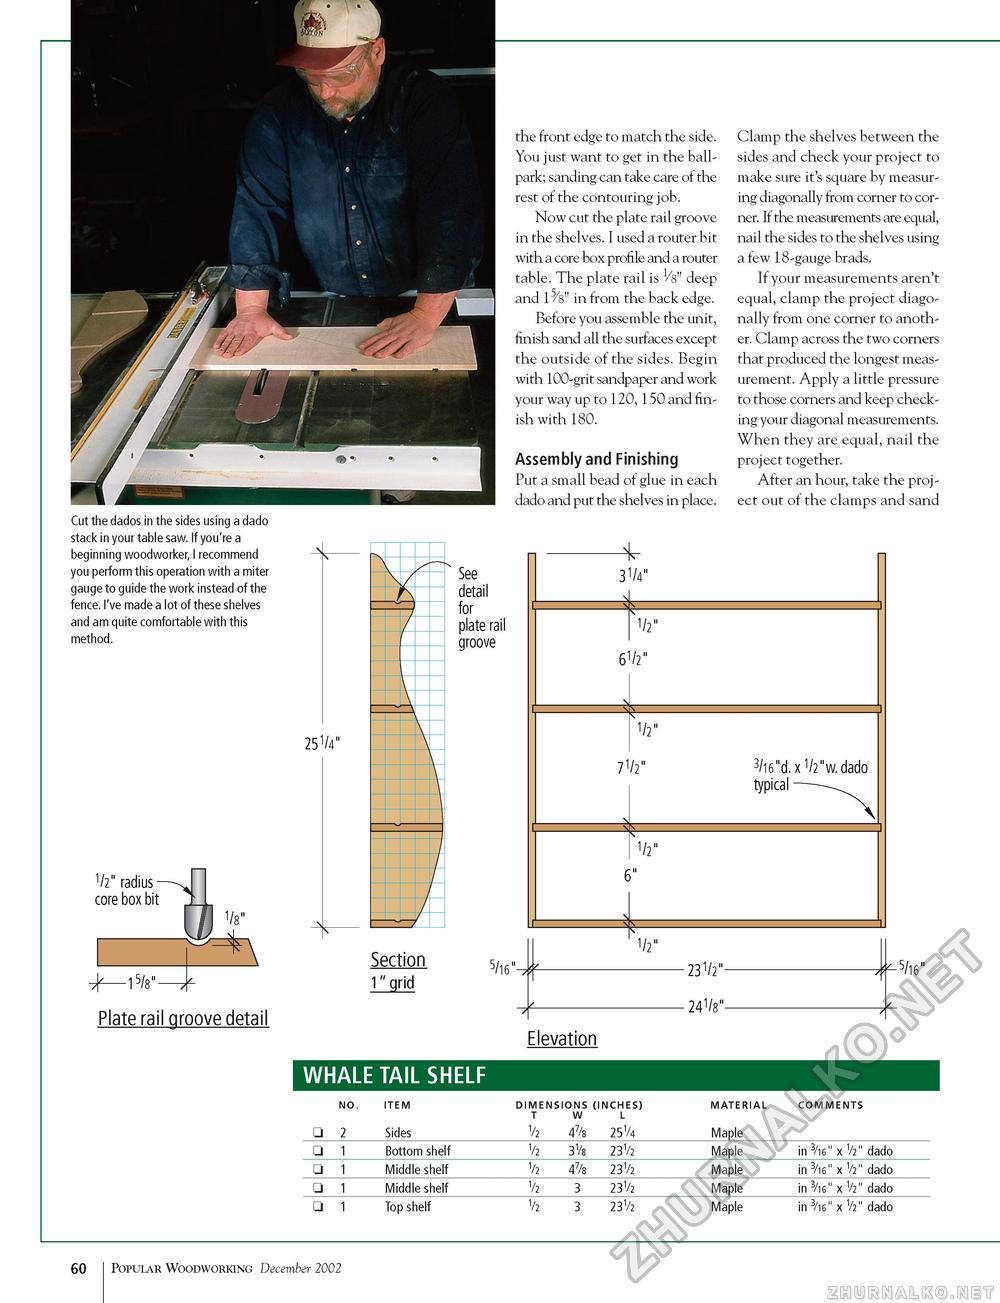
Cut the dados in the sides using a dado stack in your table saw. If you're a beginning woodworker, I recommend you perform this operation with a miter gauge to guide the work instead of the fence. I've made a lot of these shelves and am quite comfortable with this method. \ 25V4" 1/2" radius-core box bit -15/8"- 1/8" \ the front edge to match the side. You just want to get in the ballpark; sanding can take care of the rest of the contouring job. Now cut the plate rail groove in the shelves. I used a router bit with a core box profile and a router table. The plate rail is Vs" deep and 15/8" in from the back edge. Before you assemble the unit, finish sand all the surfaces except the outside of the sides. Begin with 100-grit sandpaper and work your way up to 120, 150 and finish with 180. Assembly and Finishing Put a small bead of glue in each dado and put the shelves in place. Section 1" grid Plate rail groove detail WHALE TAIL SHELF Clamp the shelves between the sides and check your project to make sure it's square by measuring diagonally from corner to corner. If the measurements are equal, nail the sides to the shelves using a few 18-gauge brads. If your measurements aren't equal, clamp the project diagonally from one corner to another. Clamp across the two corners that produced the longest measurement. Apply a little pressure to those corners and keep checking your diagonal measurements. When they are equal, nail the project together. After an hour, take the project out of the clamps and sand See detail for plate rail groove nI 5/l6% ■7^5/l6" Elevation
60 Popular Woodworking December 2002 |
||||||||||||||||||||||||||||||||||||||||||||||||


