Popular Woodworking 2003-02 № 132, страница 28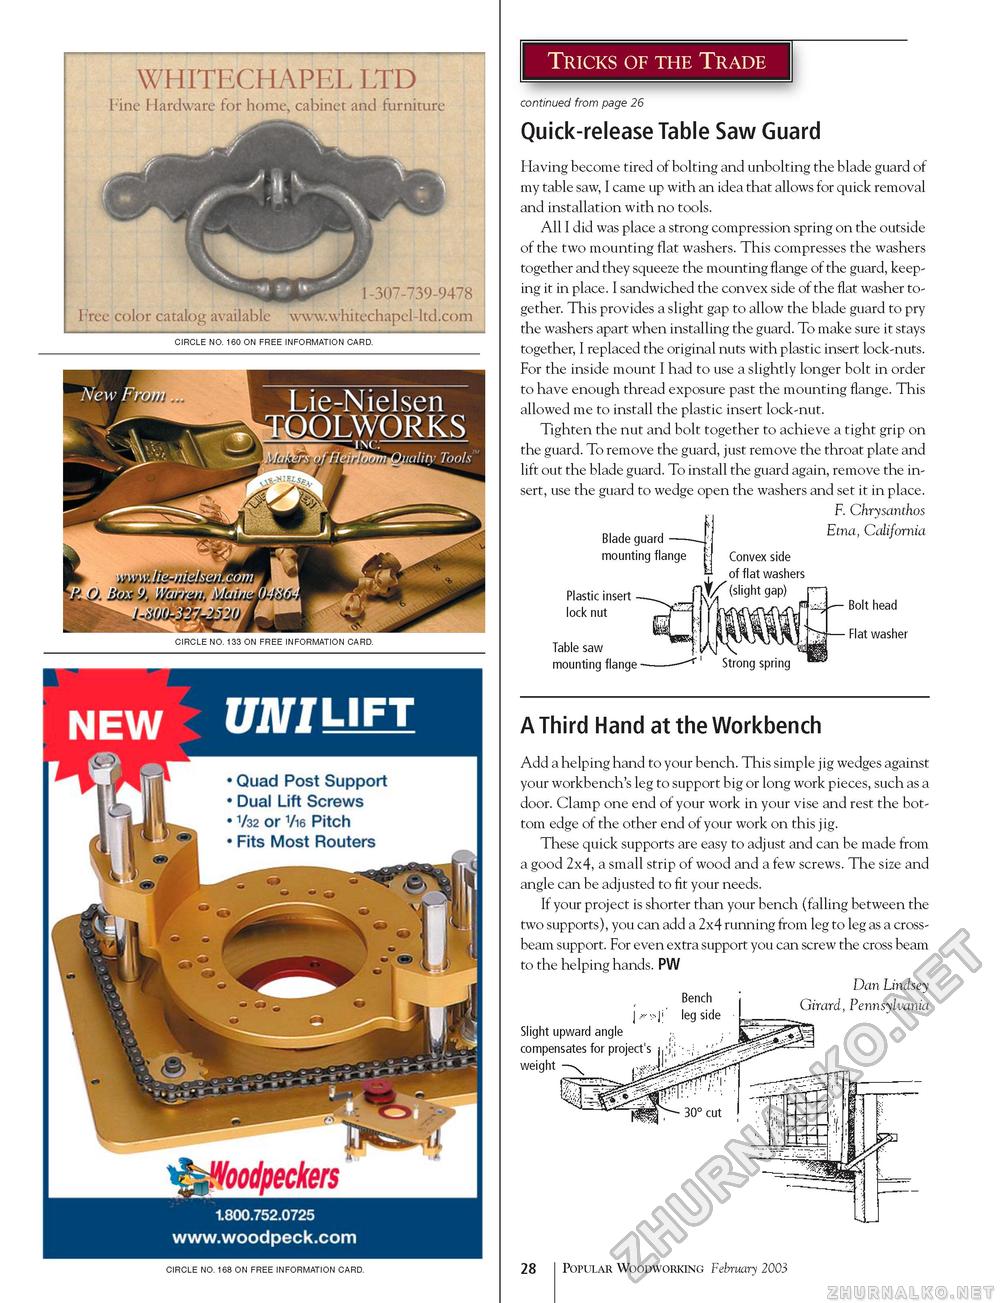
CIRCLE NO. 160 ON FREE INFORMATION CARD. CIRCLE NO. 133 ON FREE INFORMATION CARD. NEW UN I Ufl 1.800.752.0725 www.woodpeck.com continued from page 26 Quick-release Table Saw Guard Having become tired of bolting and unbolting the blade guard of my table saw, I came up with an idea that allows for quick removal and installation with no tools. All I did was place a strong compression spring on the outside of the two mounting flat washers. This compresses the washers together and they squeeze the mounting flange of the guard, keeping it in place. I sandwiched the convex side of the flat washer together. This provides a slight gap to allow the blade guard to pry the washers apart when installing the guard. To make sure it stays together, I replaced the original nuts with plastic insert lock-nuts. For the inside mount I had to use a slightly longer bolt in order to have enough thread exposure past the mounting flange. This allowed me to install the plastic insert lock-nut. Tighten the nut and bolt together to achieve a tight grip on the guard. To remove the guard, just remove the throat plate and lift out the blade guard. To install the guard again, remove the insert, use the guard to wedge open the washers and set it in place. F. Chrysanthos Blade guard-- mounting flange Plastic insert lock nut Table saw mounting flange Convex side . of flat washers J/ (slight gap) ' Etna, California Bolt head Flat washer Strong spring A Third Hand at the Workbench Add a helping hand to your bench. This simple jig wedges against your workbench's leg to support big or long work pieces, such as a door. Clamp one end of your work in your vise and rest the bottom edge of the other end of your work on this jig. These quick supports are easy to adjust and can be made from a good 2x4, a small strip of wood and a few screws. The size and angle can be adjusted to fit your needs. If your project is shorter than your bench (falling between the two supports), you can add a 2x4 running from leg to leg as a crossbeam support. For even extra support you can screw the cross beam to the helping hands. PW Dan Lindsey Girard, Pennsylvania Slight upward angle compensates for project's weight Bench leg side CIRCLE NO. 168 ON FREE INFORMATION CARD. 28 Popular Woodworking February 2003 |


