Popular Woodworking 2003-02 № 132, страница 88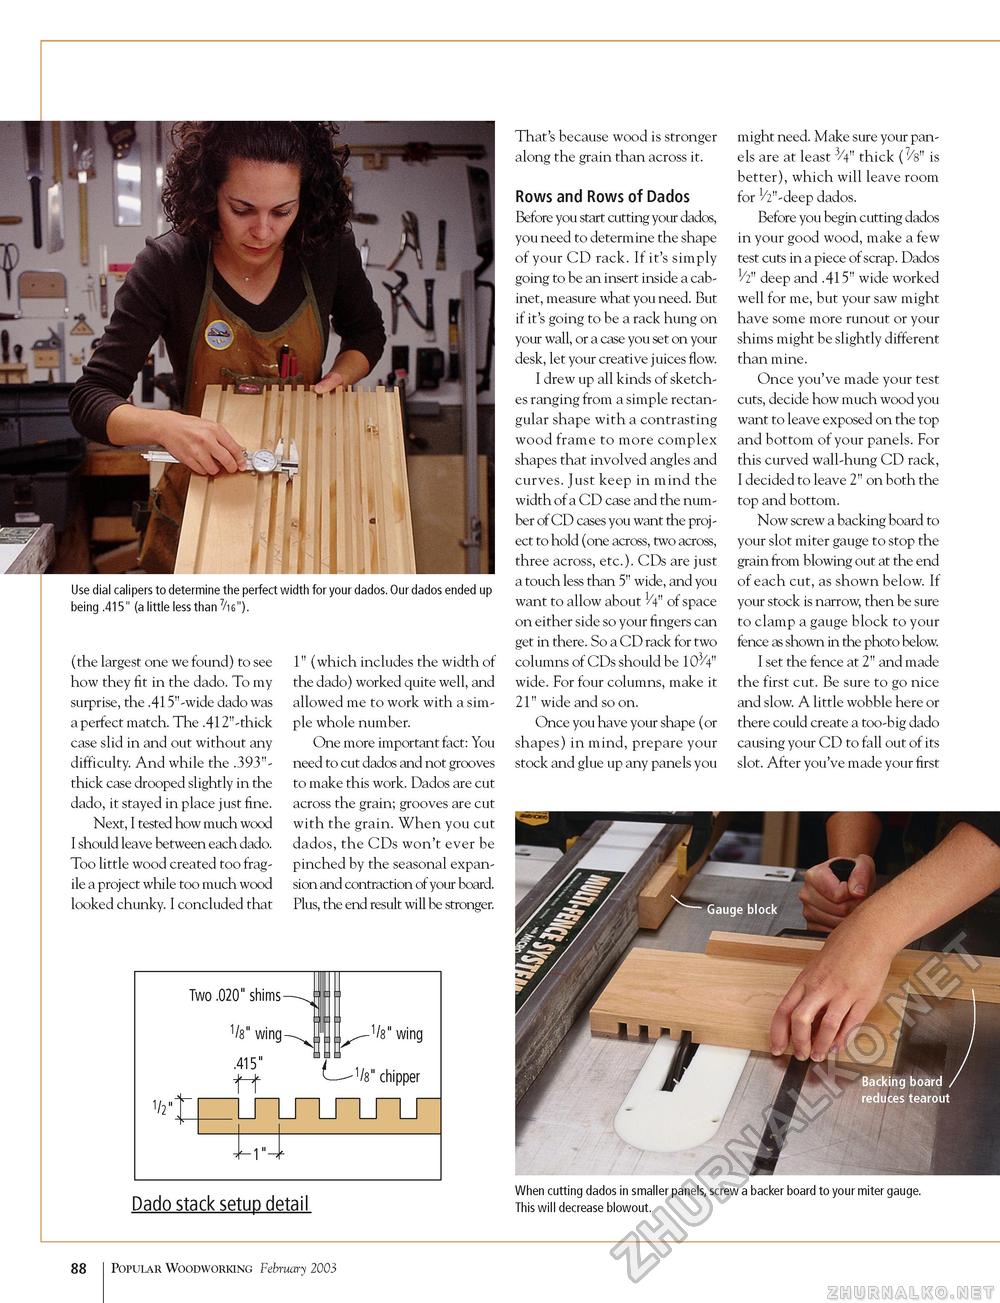
Use dial calipers to determine the perfect width for your dados. Our dados ended up being .415" (a little less than 7/i6"). (the largest one we found) to see how they fit in the dado. To my surprise, the .415"-wide dado was a perfect match. The .412"-thick case slid in and out without any difficulty. And while the .393"-thick case drooped slightly in the dado, it stayed in place just fine. Next, I tested how much wood I should leave between each dado. Too little wood created too fragile a project while too much wood looked chunky. I concluded that Two .020" shims 1" (which includes the width of the dado) worked quite well, and allowed me to work with a simple whole number. One more important fact: You need to cut dados and not grooves to make this work. Dados are cut across the grain; grooves are cut with the grain. When you cut dados, the CDs won't ever be pinched by the seasonal expansion and contraction of your board. Plus, the end result will be stronger. 1/2" 1/8" wing 1/8" chipper That's because wood is stronger along the grain than across it. Rows and Rows of Dados Before you start cutting your dados, you need to determine the shape of your CD rack. If it's simply going to be an insert inside a cabinet, measure what you need. But if it's going to be a rack hung on your wall, or a case you set on your desk, let your creative juices flow. I drew up all kinds of sketches ranging from a simple rectangular shape with a contrasting wood frame to more complex shapes that involved angles and curves. Just keep in mind the width of a CD case and the number of CD cases you want the project to hold (one across, two across, three across, etc.). CDs are just a touch less than 5" wide, and you want to allow about 1/4" of space on either side so your fingers can get in there. So a CD rack for two columns of CDs should be 103/4" wide. For four columns, make it 21" wide and so on. Once you have your shape (or shapes) in mind, prepare your stock and glue up any panels you might need. Make sure your panels are at least 3/4" thick (7/s" is better), which will leave room for h" -deep dados. Before you begin cutting dados in your good wood, make a few test cuts in a piece of scrap. Dados 1/2" deep and .415" wide worked well for me, but your saw might have some more runout or your shims might be slightly different than mine. Once you've made your test cuts, decide how much wood you want to leave exposed on the top and bottom of your panels. For this curved wall-hung CD rack, I decided to leave 2" on both the top and bottom. Now screw a backing board to your slot miter gauge to stop the grain from blowing out at the end of each cut, as shown below. If your stock is narrow, then be sure to clamp a gauge block to your fence as shown in the photo below. I set the fence at 2" and made the first cut. Be sure to go nice and slow. A little wobble here or there could create a too-big dado causing your CD to fall out of its slot. After you've made your first Dado stack setup detail When cutting dados in smaller panels, screw a backer board to your miter gauge. This will decrease blowout. 88 Popular Woodworking February 2003 |


