Popular Woodworking 2003-08 № 135, страница 59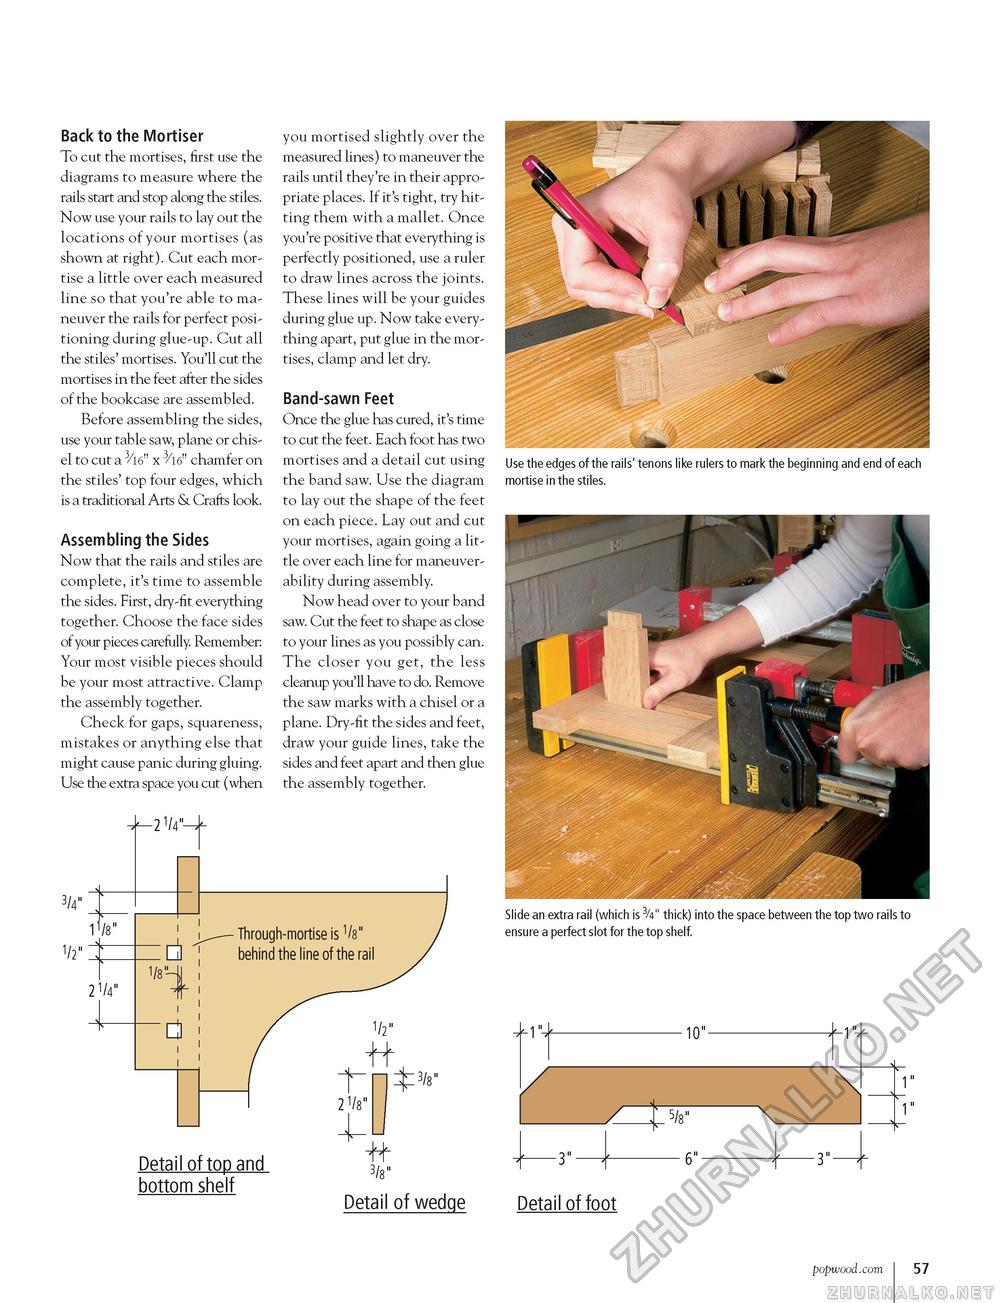
Back to the Mortiser To cut the mortises, first use the diagrams to measure where the rails start and stop along the stiles. Now use your rails to lay out the locations of your mortises (as shown at right). Cut each mortise a little over each measured line so that you're able to maneuver the rails for perfect positioning during glue-up. Cut all the stiles' mortises. You'll cut the mortises in the feet after the sides of the bookcase are assembled. Before assembling the sides, use your table saw, plane or chisel to cut a x 3V chamfer on the stiles' top four edges, which is a traditional Arts & Crafts look. Assembling the Sides Now that the rails and stiles are complete, it's time to assemble the sides. First, dry-fit everything together. Choose the face sides of your pieces carefully. Remember: Your most visible pieces should be your most attractive. Clamp the assembly together. Check for gaps, squareness, mistakes or anything else that might cause panic during gluing. Use the extra space you cut (when ■4—21/4'-4- you mortised slightly over the measured lines) to maneuver the rails until they're in their appropriate places. If it's tight, try hitting them with a mallet. Once you're positive that everything is perfectly positioned, use a ruler to draw lines across the joints. These lines will be your guides during glue up. Now take everything apart, put glue in the mortises, clamp and let dry. Band-sawn Feet Once the glue has cured, it's time to cut the feet. Each foot has two mortises and a detail cut using the band saw. Use the diagram to lay out the shape of the feet on each piece. Lay out and cut your mortises, again going a little over each line for maneuverability during assembly. Now head over to your band saw. Cut the feet to shape as close to your lines as you possibly can. The closer you get, the less cleanup you'll have to do. Remove the saw marks with a chisel or a plane. Dry-fit the sides and feet, draw your guide lines, take the sides and feet apart and then glue the assembly together. 3/4" 1/2" Through-mortise is 1/8" 2 1/4" Detail of top and bottom shelf 3/8" Detail of wedge 1 Use the edges of the rails' tenons like rulers to mark the beginning and end of each mortise in the stiles. Slide an extra rail (which is 3/4" thick) into the space between the top two rails to ensure a perfect slot for the top shelf. 1" 1" -10"- . 5/8" -3"- 6"- -3"- Detail of foot www.popwood.com 57 |


