Popular Woodworking 2003-10 № 136, страница 94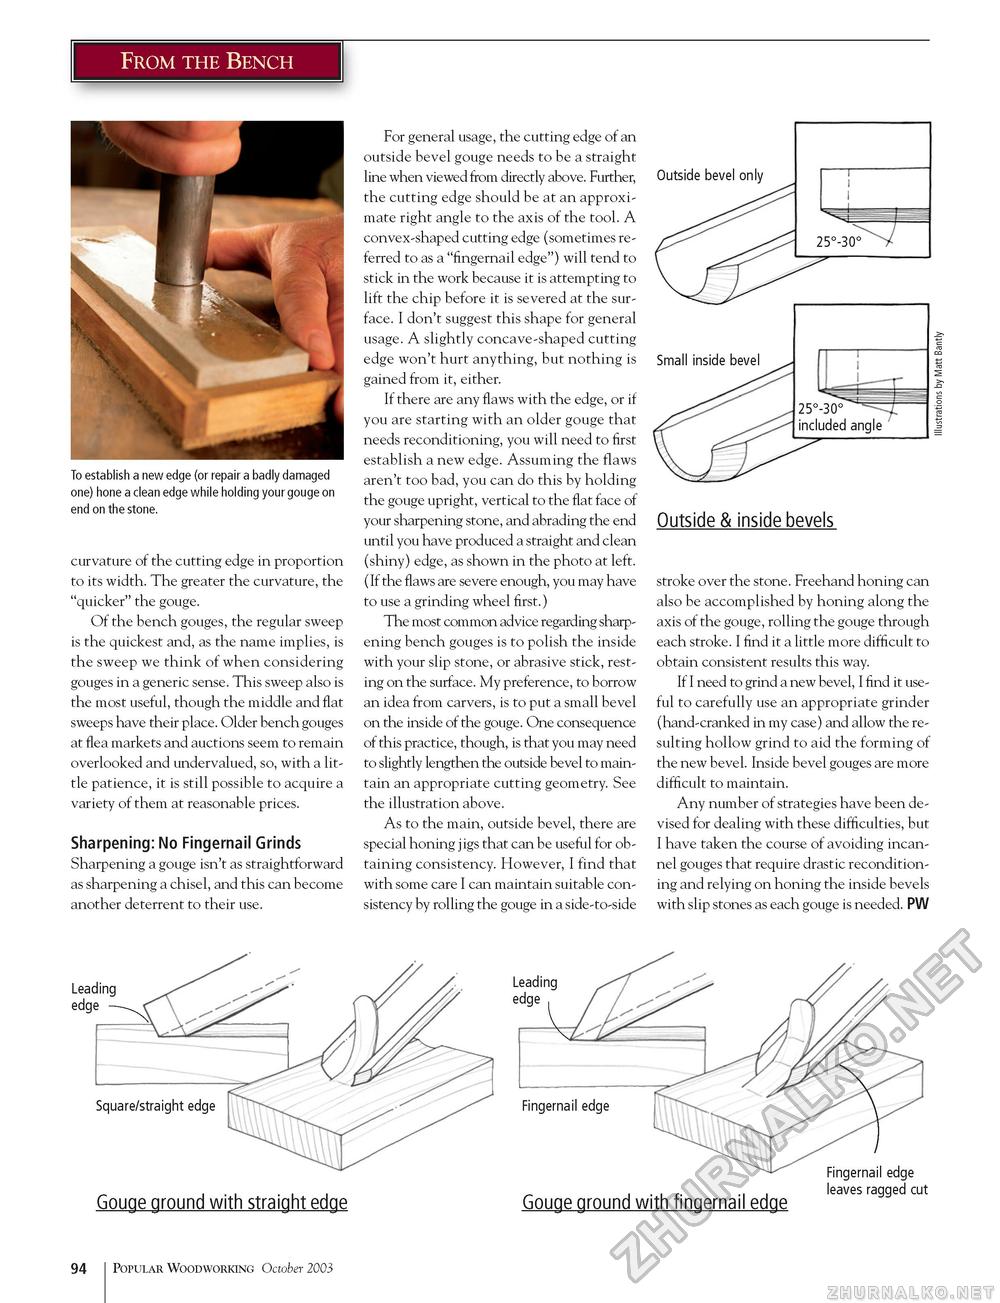
From the Bench To establish a new edge (or repair a badly damaged one) hone a clean edge while holding your gouge on end on the stone. curvature of the cutting edge in proportion to its width. The greater the curvature, the "quicker" the gouge. Of the bench gouges, the regular sweep is the quickest and, as the name implies, is the sweep we think of when considering gouges in a generic sense. This sweep also is the most useful, though the middle and flat sweeps have their place. Older bench gouges at flea markets and auctions seem to remain overlooked and undervalued, so, with a little patience, it is still possible to acquire a variety of them at reasonable prices. Sharpening: No Fingernail Grinds Sharpening a gouge isn't as straightforward as sharpening a chisel, and this can become another deterrent to their use. For general usage, the cutting edge of an outside bevel gouge needs to be a straight line when viewed from directly above. Further, the cutting edge should be at an approximate right angle to the axis of the tool. A convex-shaped cutting edge (sometimes referred to as a "fingernail edge") will tend to stick in the work because it is attempting to lift the chip before it is severed at the surface. I don't suggest this shape for general usage. A slightly concave-shaped cutting edge won't hurt anything, but nothing is gained from it, either. If there are any flaws with the edge, or if you are starting with an older gouge that needs reconditioning, you will need to first establish a new edge. Assuming the flaws aren't too bad, you can do this by holding the gouge upright, vertical to the flat face of your sharpening stone, and abrading the end until you have produced a straight and clean (shiny) edge, as shown in the photo at left. (If the flaws are severe enough, you may have to use a grinding wheel first.) The most common advice regarding sharpening bench gouges is to polish the inside with your slip stone, or abrasive stick, resting on the surface. My preference, to borrow an idea from carvers, is to put a small bevel on the inside of the gouge. One consequence of this practice, though, is that you may need to slightly lengthen the outside bevel to maintain an appropriate cutting geometry. See the illustration above. As to the main, outside bevel, there are special honing jigs that can be useful for obtaining consistency. However, I find that with some care I can maintain suitable consistency by rolling the gouge in a side-to-side Outside bevel only Outside & inside bevels stroke over the stone. Freehand honing can also be accomplished by honing along the axis of the gouge, rolling the gouge through each stroke. I find it a little more difficult to obtain consistent results this way. If I need to grind a new bevel, I find it useful to carefully use an appropriate grinder (hand-cranked in my case) and allow the resulting hollow grind to aid the forming of the new bevel. Inside bevel gouges are more difficult to maintain. Any number of strategies have been devised for dealing with these difficulties, but I have taken the course of avoiding incan-nel gouges that require drastic reconditioning and relying on honing the inside bevels with slip stones as each gouge is needed. PW Gouge ground with straight edge Gouge ground with fingernail edge Fingernail edge leaves ragged cut 94 Popular Woodworking October 2003 |


