Popular Woodworking 2003-11 № 137, страница 92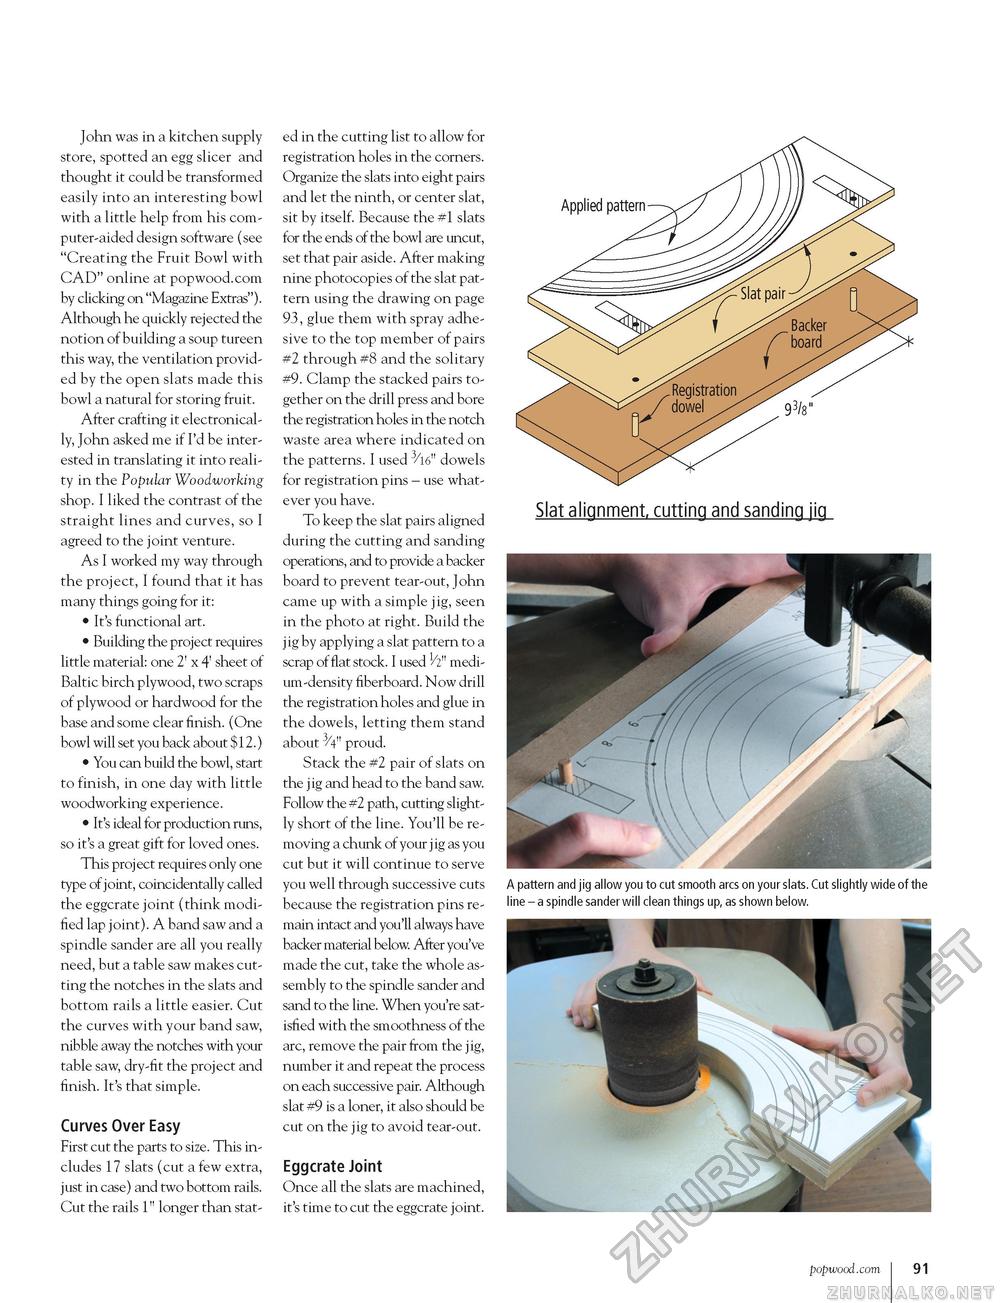
John was in a kitchen supply store, spotted an egg slicer and thought it could be transformed easily into an interesting bowl with a little help from his computer-aided design software (see "Creating the Fruit Bowl with CAD" online at popwood.com by clicking on "Magazine Extras"). Although he quickly rejected the notion of building a soup tureen this way, the ventilation provided by the open slats made this bowl a natural for storing fruit. After crafting it electronically, John asked me if I'd be interested in translating it into reality in the Popular Woodworking shop. I liked the contrast of the straight lines and curves, so I agreed to the joint venture. As I worked my way through the project, I found that it has many things going for it: • It's functional art. • Building the project requires little material: one 2' x 4' sheet of Baltic birch plywood, two scraps of plywood or hardwood for the base and some clear finish. (One bowl will set you back about $12.) • You can build the bowl, start to finish, in one day with little woodworking experience. • It's ideal for production runs, so it's a great gift for loved ones. This project requires only one type of joint, coincidentally called the eggcrate joint (think modified lap joint). A band saw and a spindle sander are all you really need, but a table saw makes cutting the notches in the slats and bottom rails a little easier. Cut the curves with your band saw, nibble away the notches with your table saw, dry-fit the project and finish. It's that simple. Curves Over Easy First cut the parts to size. This includes 17 slats (cut a few extra, just in case) and two bottom rails. Cut the rails 1" longer than stat ed in the cutting list to allow for registration holes in the corners. Organize the slats into eight pairs and let the ninth, or center slat, sit by itself. Because the #1 slats for the ends of the bowl are uncut, set that pair aside. After making nine photocopies of the slat pattern using the drawing on page 93, glue them with spray adhesive to the top member of pairs #2 through #8 and the solitary #9. Clamp the stacked pairs together on the drill press and bore the registration holes in the notch waste area where indicated on the patterns. I used 3/16" dowels for registration pins - use whatever you have. To keep the slat pairs aligned during the cutting and sanding operations, and to provide a backer board to prevent tear-out, John came up with a simple jig, seen in the photo at right. Build the jig by applying a slat pattern to a scrap of flat stock. I used 1/2" medium-density fiberboard. Now drill the registration holes and glue in the dowels, letting them stand about 3/4" proud. Stack the #2 pair of slats on the jig and head to the band saw. Follow the #2 path, cutting slightly short of the line. You'll be removing a chunk of your jig as you cut but it will continue to serve you well through successive cuts because the registration pins remain intact and you'll always have backer material below. After you've made the cut, take the whole assembly to the spindle sander and sand to the line. When you're satisfied with the smoothness of the arc, remove the pair from the jig, number it and repeat the process on each successive pair. Although slat #9 is a loner, it also should be cut on the jig to avoid tear-out. Eggcrate Joint Once all the slats are machined, it's time to cut the eggcrate joint. A pattern and jig allow you to cut smooth arcs on your slats. Cut slightly wide of the line - a spindle sander will clean things up, as shown below. popwood.com 91 |


