Popular Woodworking 2003-12 № 138, страница 51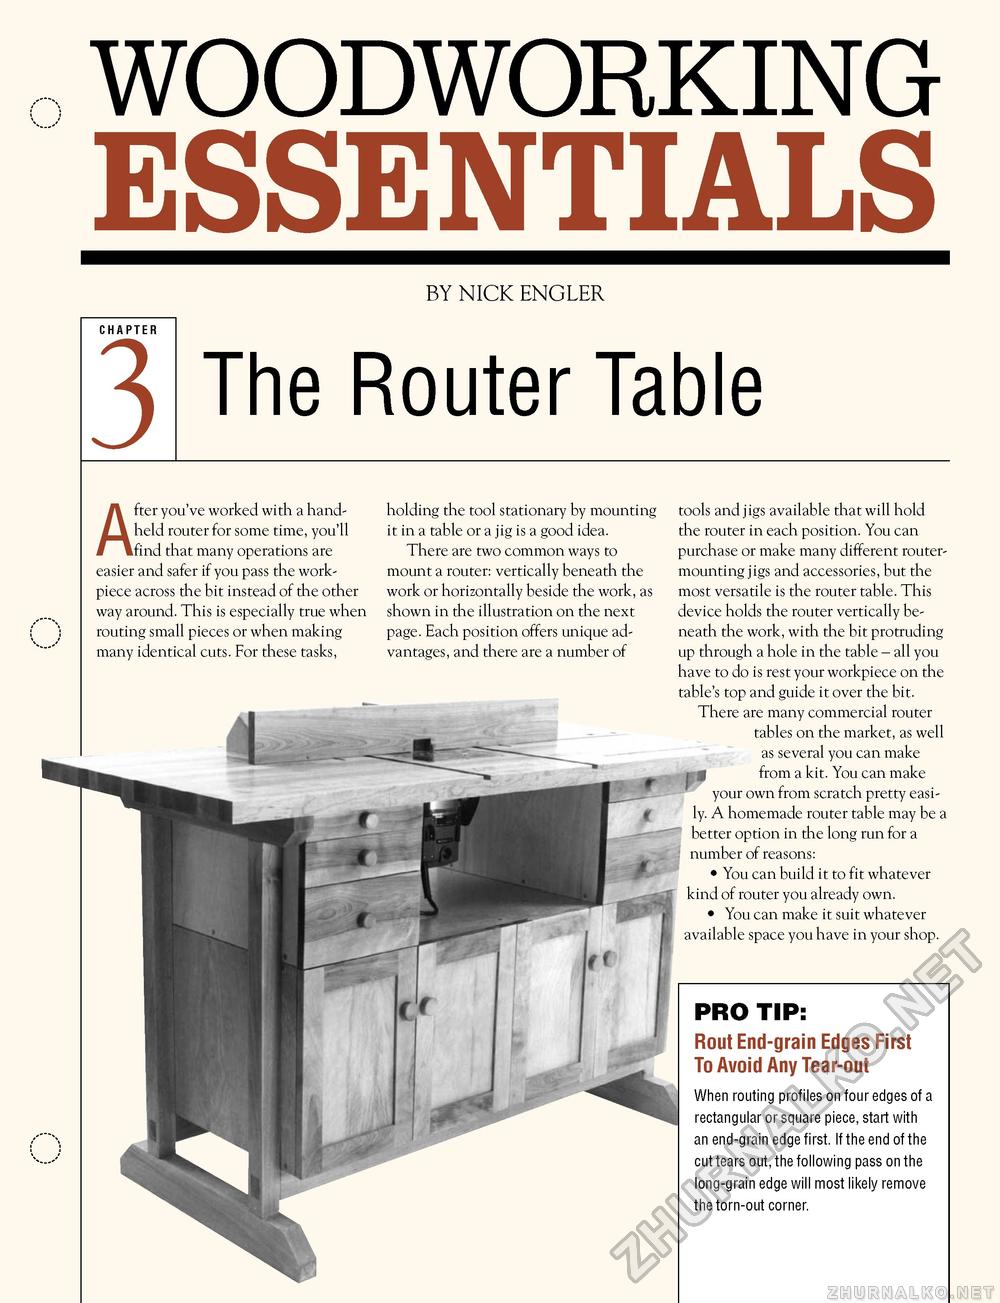
WOODWORKING ESSENTIALSBY NICK ENGLER The Router Table After you've worked with a handheld router for some time, you'll find that many operations are easier and safer if you pass the work-piece across the bit instead of the other way around. This is especially true when routing small pieces or when making many identical cuts. For these tasks, holding the tool stationary by mounting it in a table or a jig is a good idea. There are two common ways to mount a router: vertically beneath the work or horizontally beside the work, as shown in the illustration on the next page. Each position offers unique advantages, and there are a number of tools and jigs available that will hold the router in each position. You can purchase or make many different router-mounting jigs and accessories, but the most versatile is the router table. This device holds the router vertically beneath the work, with the bit protruding up through a hole in the table - all you have to do is rest your workpiece on the table's top and guide it over the bit. There are many commercial router tables on the market, as well as several you can make from a kit. You can make your own from scratch pretty easily. A homemade router table may be a better option in die long run for a number of reasons: • You can build it to fit whatever kind of router you already own. • You can make it suit whatever available space you have in your shop. PRO TIP: Rout End-grain Edges First To Avoid Any Tear-out When routing profiles on four edges of a rectangular or square piece, start with an end-grain edge first. If the end of the cut tears out, the following pass on the long-grain edge will most likely remove the torn-out corner. |


