Popular Woodworking 2004-04 № 140, страница 26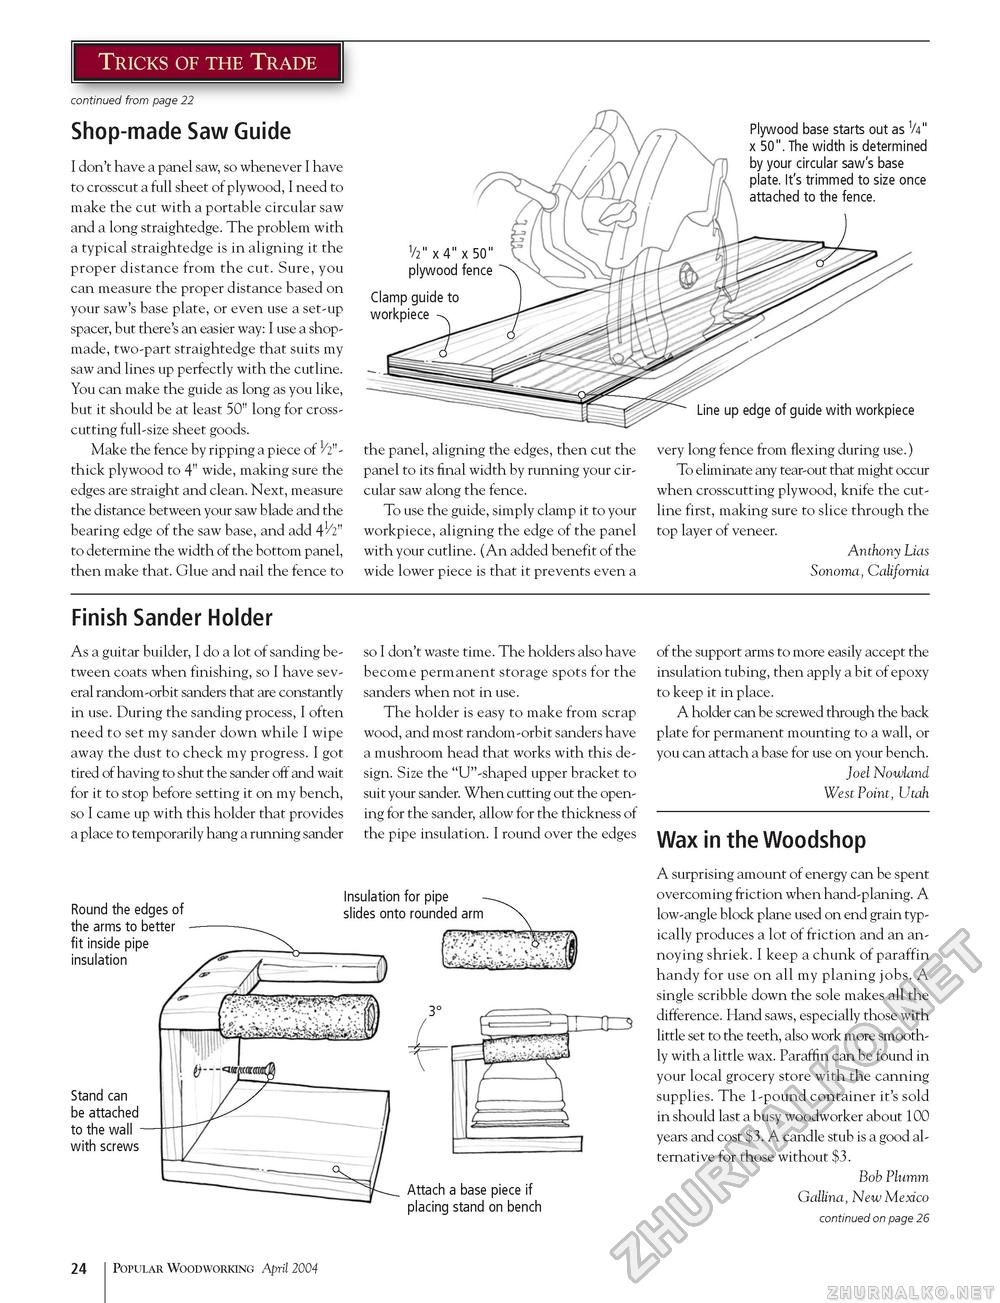
Shop-made Saw Guide I don't have a panel saw, so whenever I have to crosscut a full sheet of plywood, I need to make the cut with a portable circular saw and a long straightedge. The problem with a typical straightedge is in aligning it the proper distance from the cut. Sure, you can measure the proper distance based on your saw's base plate, or even use a set-up spacer, but there's an easier way: I use a shop-made, two-part straightedge that suits my saw and lines up perfectly with the cutline. You can make the guide as long as you like, but it should be at least 50" long for cross-cutting full-size sheet goods. Make the fence by ripping a piece of 1/2"-thick plywood to 4" wide, making sure the edges are straight and clean. Next, measure the distance between your saw blade and the bearing edge of the saw base, and add 412" to determine the width of the bottom panel, then make that. Glue and nail the fence to Plywood base starts out as V4" x 50". The width is determined by your circular saw's base plate. It's trimmed to size once attached to the fence. V2" x 4" x 50" plywood fence Clamp guide to workpiece the panel, aligning the edges, then cut the panel to its final width by running your circular saw along the fence. To use the guide, simply clamp it to your workpiece, aligning the edge of the panel with your cutline. (An added benefit of the wide lower piece is that it prevents even a Line up edge of guide with workpiece very long fence from flexing during use.) To eliminate any tear-out that might occur when crosscutting plywood, knife the cut-line first, making sure to slice through the top layer of veneer. Anthony Lias Sonoma, California Finish Sander Holder As a guitar builder, I do a lot of sanding between coats when finishing, so I have several random-orbit sanders that are constantly in use. During the sanding process, I often need to set my sander down while I wipe away the dust to check my progress. I got tired of having to shut the sander off and wait for it to stop before setting it on my bench, so I came up with this holder that provides a place to temporarily hang a running sander so I don't waste time. The holders also have become permanent storage spots for the sanders when not in use. The holder is easy to make from scrap wood, and most random-orbit sanders have a mushroom head that works with this design. Size the "U"-shaped upper bracket to suit your sander. When cutting out the opening for the sander, allow for the thickness of the pipe insulation. I round over the edges of the support arms to more easily accept the insulation tubing, then apply a bit of epoxy to keep it in place. A holder can be screwed through the back plate for permanent mounting to a wall, or you can attach a base for use on your bench. Joel Nowland West Point, Utah Wax in the Woodshop A surprising amount of energy can be spent overcoming friction when hand-planing. A low-angle block plane used on end grain typically produces a lot of friction and an annoying shriek. I keep a chunk of paraffin handy for use on all my planing jobs. A single scribble down the sole makes all the difference. Hand saws, especially those with little set to the teeth, also work more smoothly with a little wax. Paraffin can be found in your local grocery store with the canning supplies. The 1-pound container it's sold in should last a busy woodworker about 100 years and cost $3. A candle stub is a good alternative for those without $3. Bob Plumm Gallina, New Mexico continued on page 26 Round the edges of the arms to better fit inside pipe insulation Insulation for pipe slides onto rounded arm Stand can be attached to the wall with screws i v 1 *r...' 7\v,,r\ v. v1 ^ ~.....• Attach a base piece if placing stand on bench 24 Popular Woodworking April 2004 |


