Popular Woodworking 2004-04 № 140, страница 47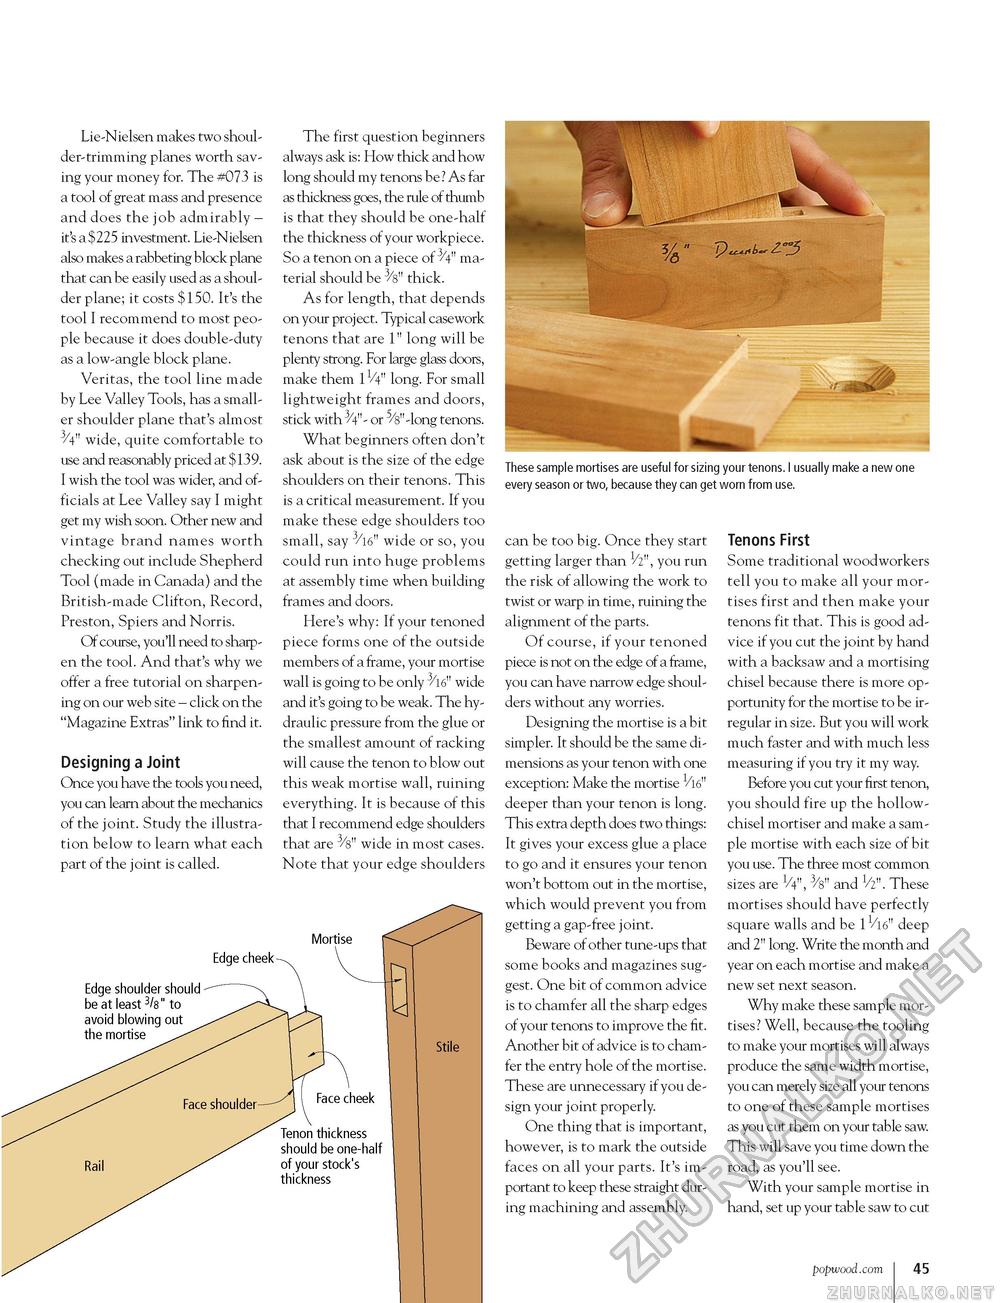
These sample mortises are useful for sizing your tenons. I usually make a new one every season or two, because they can get worn from use. Lie-Nielsen makes two shoulder-trimming planes worth saving your money for. The #073 is a tool of great mass and presence and does the job admirably -it's a $225 investment. Lie-Nielsen also makes a rabbeting block plane that can be easily used as a shoulder plane; it costs $150. It's the tool I recommend to most people because it does double-duty as a low-angle block plane. Veritas, the tool line made by Lee Valley Tools, has a smaller shoulder plane that's almost 3/4" wide, quite comfortable to use and reasonably priced at $139. I wish the tool was wider, and officials at Lee Valley say I might get my wish soon. Other new and vintage brand names worth checking out include Shepherd Tool (made in Canada) and the British-made Clifton, Record, Preston, Spiers and Norris. Of course, you'll need to sharpen the tool. And that's why we offer a free tutorial on sharpening on our web site - click on the "Magazine Extras" link to find it. Designing a Joint Once you have the tools you need, you can learn about the mechanics of the joint. Study the illustration below to learn what each part of the joint is called. The first question beginners always ask is: How thick and how long should my tenons be? As far as thickness goes, the rule of thumb is that they should be one-half the thickness of your workpiece. So a tenon on a piece of ^V" material should be 3/s" thick. As for length, that depends on your project. Typical casework tenons that are 1" long will be plenty strong. For large glass doors, make them 1V4" long. For small lightweight frames and doors, stick with 3/4"- or 5/s"-long tenons. What beginners often don't ask about is the size of the edge shoulders on their tenons. This is a critical measurement. If you make these edge shoulders too small, say 3/16" wide or so, you could run into huge problems at assembly time when building frames and doors. Here's why: If your tenoned piece forms one of the outside members of a frame, your mortise wall is going to be only 3/16" wide and it's going to be weak. The hydraulic pressure from the glue or the smallest amount of racking will cause the tenon to blow out this weak mortise wall, ruining everything. It is because of this that I recommend edge shoulders that are 3/8" wide in most cases. Note that your edge shoulders can be too big. Once they start getting larger than 1/2", you run the risk of allowing the work to twist or warp in time, ruining the alignment of the parts. Of course, if your tenoned piece is not on the edge of a frame, you can have narrow edge shoulders without any worries. Designing the mortise is a bit simpler. It should be the same dimensions as your tenon with one exception: Make the mortise deeper than your tenon is long. This extra depth does two things: It gives your excess glue a place to go and it ensures your tenon won't bottom out in the mortise, which would prevent you from getting a gap-free joint. Beware of other tune-ups that some books and magazines suggest. One bit of common advice is to chamfer all the sharp edges of your tenons to improve the fit. Another bit of advice is to chamfer the entry hole of the mortise. These are unnecessary if you design your joint properly. One thing that is important, however, is to mark the outside faces on all your parts. It's important to keep these straight during machining and assembly. Tenons First Some traditional woodworkers tell you to make all your mortises first and then make your tenons fit that. This is good advice if you cut the joint by hand with a backsaw and a mortising chisel because there is more opportunity for the mortise to be irregular in size. But you will work much faster and with much less measuring if you try it my way. Before you cut your first tenon, you should fire up the hollow-chisel mortiser and make a sample mortise with each size of bit you use. The three most common sizes are V4", 3/8" and V2" . These mortises should have perfectly square walls and be 1V16" deep and 2" long. Write the month and year on each mortise and make a new set next season. Why make these sample mortises? Well, because the tooling to make your mortises will always produce the same width mortise, you can merely size all your tenons to one of these sample mortises as you cut them on your table saw. This will save you time down the road, as you'll see. With your sample mortise in hand, set up your table saw to cut Edge cheek- Edge shoulder should be at least 3/8" to avoid blowing out the mortise Face cheek Tenon thickness should be one-half of your stock's thickness popwood.com 45 |


