Popular Woodworking 2004-06 № 141, страница 40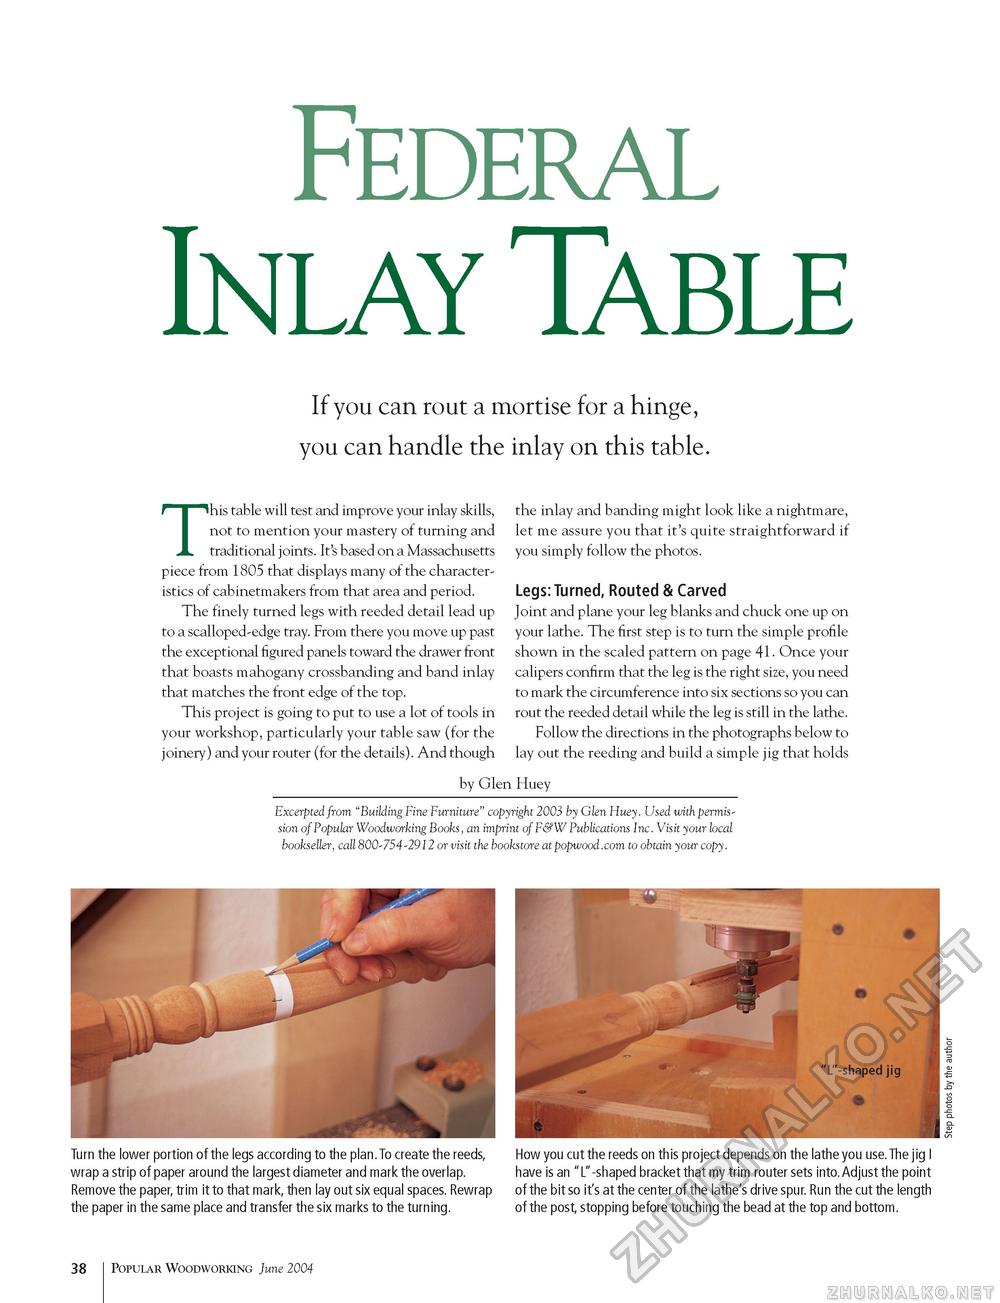
Federal Inlay TAbleIf you can rout a mortise for a hinge, you can handle the inlay on this table. This table will test and improve your inlay skills, not to mention your mastery of turning and traditional joints. It's based on a Massachusetts piece from 1805 that displays many of the characteristics of cabinetmakers from that area and period. The finely turned legs with reeded detail lead up to a scalloped-edge tray. From there you move up past the exceptional figured panels toward the drawer front that boasts mahogany crossbanding and band inlay that matches the front edge of the top. This project is going to put to use a lot of tools in your workshop, particularly your table saw (for the joinery) and your router (for the details). And though the inlay and banding might look like a nightmare, let me assure you that it's quite straightforward if you simply follow the photos. Legs: Turned, Routed & Carved Joint and plane your leg blanks and chuck one up on your lathe. The first step is to turn the simple profile shown in the scaled pattern on page 41. Once your calipers confirm that the leg is the right size, you need to mark the circumference into six sections so you can rout the reeded detail while the leg is still in the lathe. Follow the directions in the photographs below to lay out the reeding and build a simple jig that holds by Glen Huey Excerpted from "Building Fine Furniture" copyright 2003 by Glen Huey. Used with permission of Popular Woodworking Books, an imprint of F&W Publications Inc. Visit your local bookseller, call 800-754-2912 or visit the bookstore atpopwood.com to obtain your copy. Turn the lower portion of the legs according to the plan.To create the reeds, wrap a strip of paper around the largest diameter and mark the overlap. Remove the paper, trim it to that mark, then lay out six equal spaces. Rewrap the paper in the same place and transfer the six marks to the turning. How you cut the reeds on this project depends on the lathe you use. The jig I have is an "L"-shaped bracket that my trim router sets into. Adjust the point of the bit so it's at the center of the lathe's drive spur. Run the cut the length of the post, stopping before touching the bead at the top and bottom. 38 Popular Woodworking June 2004 |


